Category Archives: Balcony Gardening

Creating a Colorado Sensory Garden

By Felicia Brower, CSU Extension – Denver Master Gardener since 2020

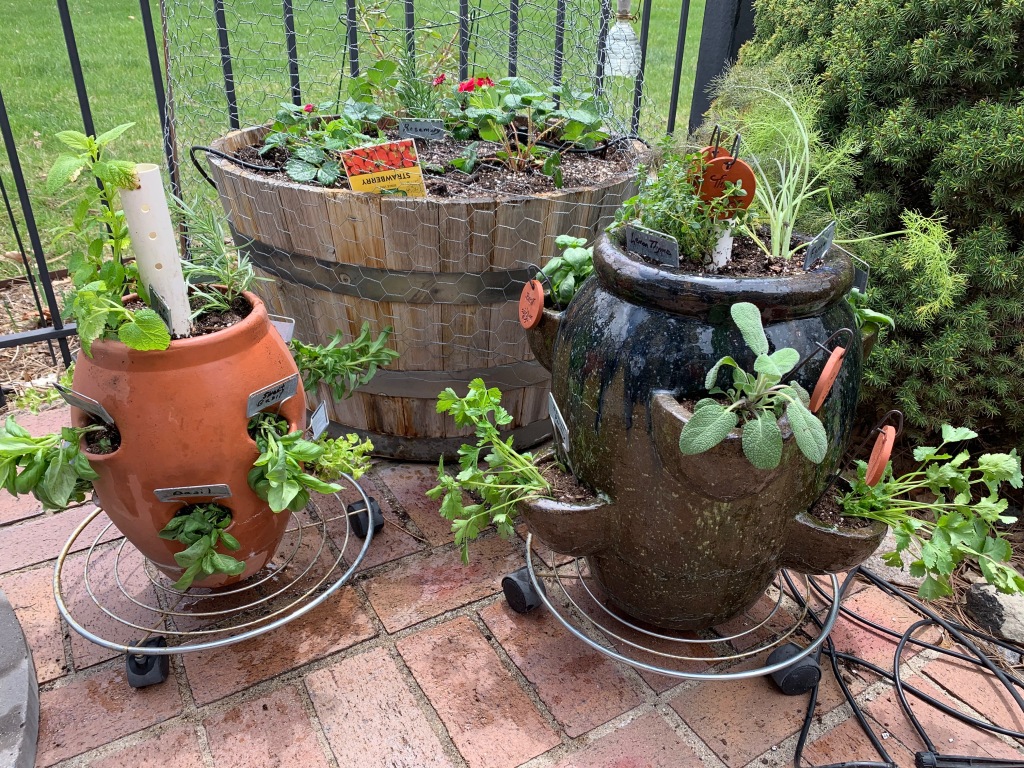
Sensory gardens – gardens that appeal to one or more of the five senses – are a great way to get both children and adults excited about the natural world. Featuring plants that appeal to sight, smell, taste, sound, and touch turns a stroll through the garden into an immersive experience where you can engage with the grasses, trees, flowers, shrubs, and hardscape elements.

Sensory gardens can be any size and can be designed to target just one sense (a garden with exceptionally bright or fragrant flowers is a good example) or as many senses as possible. Some senses are easier to find plants for than others, which is where hardscape elements come in handy. Texture from boulders, walkway stones, stumps, woodchips, and other permanent structures can take away the need to touch the plants directly, though there are plants that make finger-friendly additions to the garden.

Always make sure that your sensory garden is safe for visitors. Avoid putting harmful plants within easy reach of pathways or using toxic pesticides on plants that are easily accessible, especially if your garden is geared towards younger, curious children.

Before you plant anything, check your location to make sure that you’re choosing plants that will thrive there. Putting plants with high water needs by those with low water needs can result in plants being over- or under-watered and not surviving. Make sure you accommodate for sun and shade needs as well.

If you want to give your sensory garden an added environmental bonus, make one with native plants! These localized plants are adapted for our climate, soil, and water needs and serve as important habitats and food sources to native birds and bugs.

Here are a few plants that would make a great addition to your Colorado sensory garden:

Sight

Plants that are brightly colored or with distinctly shaped flowers, seeds, or leaves draw the eye and can be a great source of excitement in the garden. Shrubs like serviceberry (Amelanchier alnifolia) are great multi-season additions to the garden, with clusters of small white flowers, blue-black berries, and an orange to red coloring in the fall. Mountain Mahogany (Cercocarpus montanus) has distinctly shaped, feathery corkscrew seed heads. The undersides of the leaves are furry, and the flowers have a sweet smell, which allows you to cross off three senses (sight, touch, and smell) with just one plant.

Mountain mahogany

Sound 

Ornamental grasses are an easy way to appeal to sound in your sensory garden. Big bluestem (Andropogon gerardii) is a native grass that grows as a 3-foot-tall arching clump of blue-green leaves in the summer. Flowering stalks emerge in late summer and grow as tall as six feet, and the seedheads that form resemble a turkey’s foot. Listening to the sound of the grass swaying in a late-summer breeze is a great way to unwind in the garden. As an added sight bonus, the leaves turn pink, orange, rust, and purple in the fall. Despite the name, Little bluestem (Schizachyrium scoparium) is a different plant entirely that also goes through beautiful color changes (powder blue, darkening to purple, and ending with dark red stalks in winter) and provides a nice soothing sound when it sways in the summer and fall winds.

Big bluestem

Touch

As mentioned earlier, adding hardscape elements like stumps, boulders, smooth walkway stones, and woodchip paths is a simple way to add texture to your garden and check off the touch box in your sensory garden. There are some native plants that have textures as well, including the blanket flower (Gaillardia aristata) with its fuzzy leaves and stunning yellow and red daisy blooms and Blue Grama grass (Bouteloua gracilis) known informally as “eyelash grass” due to the shape of its seed clusters.

Blanket flower

Smell

Smell is one of the easier senses to find plants for, as many flowers have fragrant blooms. A popular native plant that works well is aptly named chocolate flower (Berlandiera lyrata) with its chocolate smelling daisy-like flowers. Agastache sunset hyssop (Agastache rupestris), another native, appeals to both sight and smell with its vibrant spikes of orange and purple flowers that emit a root beer fragrance.

Chocolate flower

Taste

Always exercise caution when eating anything out of the garden. Make sure that you’ve correctly identified the plant and that it’s safe to consume before eating it or encouraging others to do the same. The golden currant (Ribes aureum) is a safe-to-eat shrub with sweet yellow, red, or black berries that emerge in the late-summer and fall. These berries can be eaten fresh off the plant or be used to make jams and jellies.

Golden currant

Sensory gardens add another layer to a garden. Whether you’re passing through quickly or spending more time in one to take it all in, you’ll feel more connected to the plants during your sensory experience.

How to Plant Herbs in a Strawberry Pot

By Lois Margolin
CSU Extension-Denver Master Gardener since 2011

Many years ago, I purchased a strawberry pot filled with herbs. It was beautiful, and I was so excited thinking about all the ways I’d use the herbs. By July the herbs were mostly dead. What did I do wrong?

Years later I saw a strawberry pot that was thriving. My friend shared her secrets to success, and I’ve been following her example ever since.

A strawberry pot is a very attractive way to grow herbs. Each pot has between 3 and 9 pockets (planting holes) around and down its sides. When planted and placed on a platform with wheels, you can move it around to capture the best sun, yet have it close to the kitchen for frequent harvesting.

Tips for Growing Herbs in Strawberry Pots:

  • Ensure strawberry pots have drainage holes in the bottom to prevent root rot and to keep roots healthy.
  • Place a “watering tube” in the middle of the container extending from the bottom to a minimum 2 inches above the top.
  • Wait until after the last frost to plant or bring it indoors every night until late May.
  • Use plants instead of seeds for best results.
  • Water frequently because herbs like consistent moisture.
  • Place the container in full sun.
  • Apply an all-purpose vegetable fertilizer at least every two-to-three weeks. Add a slow-release fertilizer when planting and then supplement with a weekly drink of water-soluble fertilizer mixed at half strength.

How to Plant a Strawberry Pot:

  1. Begin with a clean container. Discard last year’s soil, brush out the container and wash it well. Disinfect with a rinse of 1 part rubbing alcohol or bleach to 2 parts water to prevent plant diseases that may have overwintered in the container.
  2. Make a watering tube by cutting 1-inch diameter PVC pipe to the needed height for the container. Drill holes around and down the length of the pipe. This disperses water along the depth of your container reaching the all the plant roots. As an alternative, garden centers now sell commercial watering tubes.
  • Use only potting soil! Garden soil is too heavy and compacts easily.
  • Place the potting soil in a bucket and add water until it’s damp but not soggy.
  • Insert the tube into the center of the container and hold it steady. Add the first layer of soil up to the first row of pockets.
  • Gently lower a small herb plant into the container from the top. Place it next to one of the pockets. Tease the leaves of the plant through the pocket, keeping the root ball inside the container. Press it into the soil. Continue adding one plant per pocket around the bottom level of pockets.
  • Water soil unless it’s already damp.
  • Add more soil up to the next level of pockets and plant more herbs. Water after each level of pockets, if needed.
  • Continue until you have planted all the pockets; add more soil to the level of the top of the container.
  • Plant 2 or 3 herbs at the top depending on the size of the container.
  • Label each herb at time of planting, as some herbs look alike.

Water once a day until mid- summer when it gets hotter, then you may need to water twice a day. Check the soil by sticking your finger into it and add water if it feels dry. Water the container both from the top and through the PVC pipe.

How to Harvest Herbs

Harvest herbs often by cutting about 1/3 of the plant each time. For best flavors deadhead the plants when blossoms appear. Frequent harvesting and deadheading stimulate plant growth. The exceptions may be flowers on lavender, chives, dill, and seeds of cilantro (called coriander) as these are all edible. The optimum time to harvest is early morning when herb flavors are freshest.

Herb Combinations for a Strawberry Pot

Plant what you like to use! You might want several pockets of your favorites. Different herbs provide colors (purple basil, variegated sage and culinary thyme) and textures (curly and Italian parsley).

In the upper pockets plant sage, culinary thyme, rosemary, marjoram and lavender as they love well-drained soil. Plant onion and/or garlic chives, chervil and coriander in the lower holes for more moisture.

How to Use Fresh Herbs in the Kitchen

There are many ways to put your fresh herbs to use in cooking or you can preserve them by drying or freezing.

Watch for my follow-up post the week of July 19, 2021, with more ideas for harvesting, using and preserving the fresh herbs from your strawberry pot.

Colorado Master Gardener/CSU Denver Extension Online Plant Sale Now Through May 16

Choose from 10 types of tomatoes and 10 pepper varieties

by Molly Gaines, CSU Extension-Denver Master Gardener since 2019

COVID-19 restrictions mean Colorado Master Gardeners/CSU Denver are unable to host our traditional in-person plant sale this year, but we are happy to offer an online sale now through Sunday, May 16.

Ten types of tomatoes and 10 varieties of peppers are available for $5 per Denvergrown plant. All profits from the sale help support programming and outreach for the Colorado State University Denver Extension office. 

During my first year working at our traditional in-person plant sale, I was blown away by the variety of tomato and pepper plants offered. There were so many sizes, shapes and varieties! It is always a little overwhelming to choose, despite knowing a thing or two about what I like and how to make them grow!

An advantage of this year’s online sale is being able to read about the varieties and place an order in just a few minutes. I cannot wait to plant my favorite tomato variety, a Sun Gold cherry (oh, their color and sweetness!); an Heirloom Cherokee Purple; and a hybrid, Better Boy — a prolific variety with fresh tomato flavor. I can already taste those BLTs we will begin eating non-stop starting in August.

Where to Shop

Our online catalog contains clear descriptions of the tomatoes and peppers on sale. Personally, I am excited to try my hand at growing the Sauve Orange, a low heat, high yield, flavorful habanero pepper that will be a colorful addition to fresh salsas and summer salads.

How to Purchase

Before the purchase deadline of Sunday, May 16, visit our online plant sale store to place your order. Shop soon as popular varieties can sell out!

Be sure to order the desired quantity of plants by adding each plant to the cart individually (3 plants=3 add-to-cart clicks) or by adjusting the quantity in the shopping cart. Click here for further instructions.

You can pay using your credit card or by check. To pay by check enter “PAYBYCHECK” in the discount code box at checkout and we will collect your check when you pick up your plants.

Unfortunately, we will not have additional plants for sale during pick-up – so make your selections carefully.

After Ordering

After placing your order, you will promptly receive an email confirmation from the CSU Extension eStore. Five days later, you will receive a second email with a link to SignUpGenius. Here, you will be able to select the date/time to pick up your plants on either Saturday, May 22, or Sunday, May 23, between 10 a.m. and 3p.m. and received detailed pick-up instructions. Reservations are required for pick-up.

No-Contact Plant Pick-up

Plant pick-up will be in Denver’s City Park; you will receive further instructions on the park’s pick-up location by email.  Masks are required for pick-up. If you are paying by check, make it payable to Colorado State University Extension and be sure to bring your ID.

Arriving at your designated time during your 15-minute window is important for no-contact pick-up as plants will be available in a timed order.

Mitigating COVID-19 Risks

Plant sale staff will maintain social distance, wear masks, provide hand sanitizer, and minimize contact. Likewise, please wear your mask when you arrive.

Thank you in advance for making the plant pick-up experience safe for everyone.

Gardening Advice from a Master Gardener

When you plant your vegetables and as you move through the gardening season, know that Colorado Master Gardeners are here for you! The best way to reach us is through the Denver Master Gardener HELP line, 720.913.5278, or by emailing denvermg@colostate.edu. Also, be sure to visit the Denver extension website for a wealth of gardening information tailored to our growing conditions.

For more information regarding the plant sale, please contact  Merrill Kingsbury, at merrill.kingsbury@colostate.edu., or the office at 720-913-5270.

Gardening Predictions for 2021

There may have been one bright spot among the gloom of 2020: The pandemic turned out to be great for horticulture. Experts estimate the industry gained 16-20 million new gardeners during the pandemic.

They’re predicting 85% of those gardeners will continue this year.

If that prediction holds true, experienced gardeners will be competing with new gardeners for seeds, plants, potting soil, mulch, tools, accessories and anything else that helps with planting and growing.

Last year seed catalogs, online retailers and garden shops couldn’t keep up with the overwhelming spring demand. More than a few had to shut down their online systems so they could catch up with orders.

Even though companies say they’re better prepared this year, gardeners should plan ahead and order their favorite varieties yesterday.

Backyard, front yard, patio and balcony food growing will continue to engage new and newer gardeners. Those who had some success last season will be anxious to expand their gardens; those who wished they would’ve started last season will get growing this year. They’ll be on the lookout for heirlooms and all kinds of organic options.

Some plants will sell out sooner than others because of special marketing and promotional programs. That’s especially true for the National Garden Bureau’s Plants of the Year for 2021.

Every year the national organization selects and promotes its Crops of the Year plants. The selections are popular, easy-to-grow, widely adaptable, genetically diverse, and versatile, according to the NGB.

The 2021 Plants of the Year include:

Annual: Sunflowers
Perennial: Monardas
Bulb crop: Hyacinths
Edible: Garden beans
Shrub: Hardy hibiscus

Plant Select has three new introductions for this year that include Drew’s Folly Hardy Snapdragon (Antirrhinum sempervirens), Hokubetsi (Helichrysum trilineatum) and Blanca Peak Rocky Mountain Beardtongue. The Plant Select website features a list of retailers that offer Plant Select plants so you can call ahead to check on availability.

Smaller garden varieties are part of All-America Selections winning plants this year. Goldilocks squash and Pot-a-peno peppers are meant for small-space gardens. The AAS’s Gold Medal winner is Profusion Red Yellow bicolor zinnia that’s sure to be in demand.

The Perennial Plant Association selected Calamintha nepta (calamint) as its Perennial Plant of the Year for 2021. A nice rock garden and border plant, tiny white flowers bloom on a bushy low mounding plant that attracts pollinators to the garden.

Houseplants will continue to be in demand to fill home offices and windowsills that have turned into miniature greenhouses. New offerings include plants that drape over pot edges and tiny plants for tiny places.

Pantone’s colors of the year will show up in plants, flower colors, pottery and other garden accessories. Look for combinations of Illuminating Yellow and Ultimate Gray at big box stores, garden centers, the plant sections at grocery stores and wherever else gardening supplies are sold.

New gardeners will continue searching for resources, help and advice. CSU Extension master gardeners will need to be extra-creative when it comes to cultivating community from a distance, encouraging new gardeners to reach out for reliable information and finding ways to reduce the fear of failure for beginning gardeners.

If you have any gardening predictions for 2021, look into your crystal ball and add your forecast here.

By Jodi Torpey
CSU Extension master gardener since 2005
Image provided by Pixabay

Take a Virtual Container Garden Tour

CSU-Denver Master Gardeners have had extra time to spend in their gardens this summer, but few opportunities to show them off – until now.

Please join our virtual tour to see seven stunning container gardens overflowing with beauty and creativity. The tour features containers of different shapes, sizes, materials, and of course, fabulous plants. These talented gardeners also share their secrets to success.

We hope you enjoy the tour!

Steve Aegerter, CMG since 1999
Steve’s hanging basket includes Calibrachoa in three colors, sweet potato vine and orange nasturtiums (peeking out on right side). He grew nearly everything from seeds, except the potato vine. His planting recipe includes about 3-4 sections of a deep six-pack of Calibrachoa, probably 3-4 nasturtium seeds and 2 sweet potato vines from cuttings.
The basket is low maintenance as flowers are self-cleaning. Steve used 4-month slow-release fertilizer at planting, plus peat moss and vermiculite in a potting soil medium. He waters the hanging basket “every other day which wouldn’t be necessary if I didn’t use sweet potato vine,” he says.

Steff Grogan, CMG since 2018
Steff says she loves to mix perennials and annuals together in her containers, “at least until the perennials outgrow the pot!” One of her favorite plantings this summer included a large container meant for a mostly-shady spot. The container includes 6 varieties of Coleus, 1 Lime Margarita sweet potato vine and 1 purple sweet potato vine.
Steff’s foliage container get 3-4 hours of morning sun and she waters it every other day, depending on heat and precipitation.

Jan Davis, CMG since 2012
Jan sent in a view of one of her large container gardens brimming with a variety of flowering plants. Her secret to such a spectacular display is to use 2-3 plants of the same type in each pot for a bigger splash. She says the show stoppers are the fragrant pink Oriental Trumpet lilies. The lilies are planted in large plastic pots so Jan can remove them from the grouping after blooming is finished. She overwinters them in the garage, after they have gone dormant. “I love this container garden because it is right outside my kitchen window and next to our outdoor eating area,” Jan says. “It gets enjoyed all the time!”

Ashley Cosme, CMG Apprentice
“I love the simple color line of this pot,” says Ashley. “Sometimes going with a straightforward white and green color brings out the beauty in the textures. I have left the perennial lysimachia and the heuchera in the pot for a few years which is very budget friendly as well.”
Ashley’s recipe for planting includes one 6-inch Kimberly fern, two 4.5-inch tropical white sunpatien, three 4.5-inch euphorbia, one #1 citronelle heuchera, two 4.5-inch Niagara Falls coleus, one 4.5-inch ipomea and one #1 lysimachia. This pot gets morning sun with afternoon shade and requires a bit of extra water as the sunpatien and the fern are thirsty plants.

Lois Margolin, CMG since 2010
Lois’s raised bed garden was built by her son-in-law and includes three large containers, each 2-feet by 4, 5, and 8 feet lengths. She says the raised beds are large enough to grow enough vegetables for two people. “The raised beds work great because I don’t have to bend or get down on my knees to garden.” In the longest of the three containers she’s planted 2 rows of carrots along the front side, carrots, scallions and carrots on the back side. Other plants include bell peppers, marigolds, Early Girl tomato, Japanese eggplant and 2 cucumber plants along the edge so they trail over the side of the container.
Lois places plants close together and uses potting soil, compost and slow release fertilizer at planting time, plus a liquid fertilizer once a month during the growing season.

Anne Beletic, CMG since 2016
Anne’s container garden is composed of 7 troughs that are planted with 11 6-inch Pincushion plants, 5 2.5-inch Dusty Miller plants, Forget-Me-Not, Borage, Cornflowers (from seeds); trailing plants are Sweet Potato vines, variegated Vinca (both 2.5 ” pots).
Anne says she likes this planting because the Pincushions have been flowering for weeks, the flowers attract bees and the Borage star shaped flowers are “exquisite.” The only downside is the borage has become too big and thirsty, she says.
Anne used a good quality potting soil with slow release fertilizer at planting, waters daily and cuts back the Pincushions to the next bud. She plans to keep the Pincushions in a flower bed “as these were the only plants I spent real money on, and they should be a viable perennial in Denver.” Anne notes, “the Pincushions were the bulk of the planting until seeds grew, and so merited buying a little larger.”

Jill Fielder, CMG since 2012
Jill says she played with new types of fancy coleus, both for color and because many of these can now be successfully grown in either sun or shade. She has two of these containers on either side of her front porch. “They get different amounts of sunlight, are bright with color that doesn’t rely on big flowers or wide leaves susceptible to hail and these are (mostly) plants that aren’t all that attractive to Japanese Beetles,” she says.
Jill’s recipe includes 1 Coleus Fireworks (purple & lime), 2 Fuchsia Gartenmeister, 2 Asparagus fern, 2 Impatiens Walleriana Peach Butterfly, 1 Coleus Maharaja (red), and 2 Dragon Wing Red begonias.
This container gets dappled morning light, is on a daily drip system and was planted up with slow release fertilizer early in the season.

A Special Thank You to the seven generous CMGs who shared their gardens and tips with us. We hope this virtual container garden tour inspires you to plant something a little different in your garden next year!

By Jodi Torpey
Master Gardener since 2005
Photos provided by each CMG

Vegetable Growing Tips for Beginning Gardeners

New to vegetable gardening? We’re here to help!

A group of experienced CSU-Denver Master Gardeners answered the call to help new vegetable gardeners plant and grow their first gardens. These tips cover most of the basics for the best chance of success growing fruits, vegetables and herbs this season.

Their advice covers how to get your garden started, what to plant, when to plant, where to plant, how to care for your garden and a primer on growing tomatoes.

John Ashworth

John H. Ashworth, Master Gardener since 2014, shares his thoughts on various veggies that do well in Colorado vegetable gardens:

Radishes are the ideal crop to start with, especially if you get your kids involved. Radishes emerge very quickly, even in cold soil, and are ready for eating in 30 days or less.

Carrots can do well here, but can struggle if you have heavy clay soil in your garden. Before you plant in clay soil, mix in a healthy dose of play sand and mix in well. This will allow the carrot roots to grow down without extensive use of a garden fork for cultivating. Plant the shorter, stubbier carrot varieties, Nantes and half Danvers, if you have heavy soil.

Basil seeds can be started indoors under lights or in a sunny window, but  DO NOT plant them outside too soon!  Wait until early to mid-June. Basil grows well in containers — I plant ten basil plants in a large pot and get enough to make pesto all summer long. Be aware that Japanese beetles love basil, so pick the beetles off the plants early each morning.

Tomatoes are heavy feeders and like rich soil. Add compost and fertilizer (either well-rotted steer manure or a balanced chemical fertilizer) to the planting hole. Fertilize every few weeks. Because our climate is dry and lacks humidity, some tomato varieties, like large beefsteak tomatoes, tend to split open prematurely. Instead, try Sungold cherry tomatoes, Early Boy or Early Girl varieties, or any of the heirloom varieties such as Brandywine,  or the Eastern European varieties such as Black Krim or Polish paste tomatoes.

John’s final piece of advice: Above all, have fun!

Mary Carnegie, Master Gardener since 2002, is also the Garden Leader for the Denver Urban Gardens (DUG) Park Hill School garden. Her top three tips for new gardeners are concise and to the point:

1. Be willing to get your hands dirty; stick your finger in the soil to see if plants need water.

2. Know the “safe” planting dates; don’t plant too early. (CSU Extension’s Vegetable Planting Guide can help with planting dates.)

3. Learn as much as you can about watering and mulching. (CSU Extension’s Watering Guide and Mulches for Home Grounds are two good resources.)

Rikki Hanson

Rikki Hanson, Master Gardener since 2014, says something that stuck with her as a beginning gardener is that “Colorado gardeners do it for the challenge. Lucky for me, I like a challenge.” To meet that challenge, she advises to start small.

1. Start with a few veggies that you enjoy eating. Have a mix of things that grow quickly and slowly, that way you can enjoy the fruits of your labor sooner while you wait for the big-ticket items. Radishes and lettuces are great fast-rewards foods.

2. Make a plan for watering: early in the morning or after 6 pm. This is especially important when you have seeds and seedlings. We have a very dry climate that lends itself nicely to mulch.

3. Find the joy in your own plot of Earth. Vegetable gardening is something to be enjoyed and to help you destress!

Jill Fielder

Jill Fielder, Master Gardener since 2012, is happy to share her trio of tips:

Tip 1:  Many vegetable plants need sunlight to grow sturdy and strong. Planting  sun-worshiping  vegetables like tomatoes, peppers, cucumbers and eggplants in less than full sun (about 6-8 hours of sun) sets one up for heartbreak. Tomato plants aren’t going to be vigorous and productive in 3 or 4 hours of sun no matter how much you will it. If you don’t have adequate sun in your space, choose plants that will thrive in partial sun (3-5 hours) such as lettuces, chard, spinach, scallions, kale, beets, Asian greens and radishes. In Colorado basil, thyme, chives, mint, oregano and parsley grow beautifully with just morning sun.

Tip 2:  Find a place for bunching onions or scallions (also called Welch onions, spring onions and green onions). These onions are super easy, speedy and fun. They can be grown from seed or slender starts from the nursery. Choose the customary white variety or scoop up the pretty deep red ones if you can find them. Plant in mid spring and you can eat the greens during the summer (snipped into eggs, stir fries and salads) and harvest the whole onion plants in the fall. Left in the garden, they’ll usually overwinter.

Tip 3:  Start seeds for ruffled, loose leaf lettuces outdoors early, even if there will likely still be frosts and maybe snow. Lettuce seedlings are remarkably tough. Depending on the lettuce variety, leaves can be ready in 40-55 days. Don’t let your precious garden space go unused in the spring!

Elizabeth Gundlach Neufeld

Elizabeth Gundlach Neufeld, long-time gardener and Master Gardener since 2017, reveals her 8 tips for tomato growing. These are the key points she wishes she would’ve known years ago when it comes to planting tomato seedlings:

1. Choose seedlings that are strong and relatively straight.

2. Harden off all seedlings for a good week after purchasing. “Hardening Off” means leaving them outside, in a sheltered location, with little exposure to the elements. Be sure to water the seedlings to keep moist before planting.

3. When ready, plant tomatoes in a trench. Cut off all the leaves and small branches EXCEPT for the top 2 inches. Plant the rest sideways in the trench. Those fuzzy little hairs on the stem will become roots! Planting the tomatoes more-or-less horizontally will produce greater numbers of roots and lead to a stronger plant.

4. Here’s the hard part. For the subsequent 3 weeks, remove ALL the flowers. Doing this allows the plant to spend its energy producing a strong root system. I sometimes compare this to humans in the following way: Although, say, young teenagers may be physically possible to bear children, they are not ready to. Similarly, the tomato plant needs to mature in the ground before producing tomatoes.

5. Pinch off all ‘suckers’ in indeterminate varieties. Suckers appear in the crotches of the tomato branches and can harm the overall plant by weakening the main stem.

6. Stake or cage the plants! Because you’ve trench-planted and picked the blossoms, the main stock will be thick and able to support many more tomatoes.

7. Water tomatoes ONLY at the bottom at soil level, trying not to wet any leaves. Keep only moderately moist. They will likely not need watering every day.

8. Enjoy the harvest!

A big thank you to John, Mary, Rikki, Jill and Elizabeth for generously sharing their hard-won secrets to vegetable-growing success.

Of course, Master Gardeners are available to answer specific questions through the Denver Master Gardener Helpline at 720-913-5278 or email denvermg @ colostate.edu. Also, please take a minute to review the list of Free CSU Extension Spring Gardening webinars and our new Grow & Give program.

By Jodi Torpey, Master Gardener since 2005
Photos provided by each gardener

Meet the Garden Squad—Gardening Help at the Denver Botanic Gardens

Meet the Garden Squad is a way to get better acquainted with some of our CSU Extension Master Gardener volunteers.

Meet the Gardening Help Volunteers

The CSU Extension Master Gardeners usually pick up the gardening helpline at the Denver Botanic Gardens or answer questions when people walk-in the door. Even though buildings at DBG are closed for now, gardeners can still get their gardening questions answered by Gardening Help from Colorado Master Gardeners at Denver Botanic Gardens, only remotely.

The interest in gardening has soared ever since people have had to hunker down at home and find ways to keep busy. First-time gardeners will likely have questions on how to get started, what to plant now, what can grow in containers, and much more.

Even gardeners with some experience have questions, too. All gardening questions can be emailed to gardeninghelp@botanicgardens.org and a CMG, working remotely, will reply by email.

Gardening Help volunteers include: Back row, left to right: Jan Fahs, Jan Davis, Ken Zwenger, Mark Zammuto, Gordon Carruth, Fran Hogan
Middle row: Lynne Conroy, Harriet Palmer Willis, Kathleen Schroeder, Leona Berger, Cindy Hanna, Mary Adams, Nancy Downs
Kneeling: Dee Becker, Charlotte Aycrigg, Jan Moran
Not pictured: Mary Carnegie, Linda Hanna, Maggie Haskett, April Montgomery, Ann Moore, Kathy Roth, Amy White

Gardening Help is a project of the CSU Extension-Denver Master Gardeners at the DBG. Volunteers provide reliable and research-based information to thousands of home gardeners each year.

Volunteers commit to at least one year in the role, with a minimum of six shifts spread across the year. The commitment starts early in the year with an orientation and training from Nancy Downs, project coordinator.

Many volunteers are GH regulars and they return to the project every year. In addition to being an active CMG, they have to satisfy DBG volunteer requirements, too. That means they’re a member of the DBG and enrolled there as a volunteer.

Some of the key characteristics of GH volunteers are good research, plant identification and diagnostic skills. Because the project is located at DBG, volunteers need to keep on top of what’s blooming at the DBG by season, so they can answer common questions that might pop up.

Photo provided by Nancy Downs

Text by Jodi Torpey
Master Gardener volunteer since 2005

Four Ways to Celebrate National Pollinator Week

Today’s the official start of summer and it coincides with another important annual event — National Pollinator Week. From June 20 through June 28, agencies, organizations, companies and ordinary gardeners bring attention to ways to help build healthy environments for bees, butterflies, birds, bats and other vital pollinators.

Here are four ways to celebrate pollinators this week. Please add your ideas to the list:

Million Pollinator Garden Challenge1. Register your garden on the National Pollinator Garden Network.

Become one in a million by registering your pollinator-friendly garden as part of the Million Pollinator Garden Challenge. The goal of the challenge is to register 1,000,000 public and private gardens and landscapes that give pollinators what they need: nesting sites and plants that provide pollen and nectar.

Pollinator Friendly Jacket Image2. Learn more about pollinators.

There are many free pollinator guides available if you need help deciding which plants give the biggest bang for pollinators. There’s also a new book written by a gardener for gardeners. Pollinator Friendly Gardening by Rhonda Fleming Hayes explains that no matter the size of your garden, there are dozens of good plants for helping pollinators. Her detailed plant lists simplify selecting flowers, herbs, vines, shrubs and trees.

3. Become a Habitat Hero.

Encourage more feathered friends to gather in your landscape through the Habitat Heroes program with Audubon Rockies. Apply to have your landscape recognized as a Habitat Hero wildscape. Some of the basics include planting bird-friendly native and regionally-adapted plants, reducing herbicide and pesticide use, and controlling invasive plants.

Pollinator Bee4. Plant zinnias.

A single packet of zinnia seeds will give you a summer full of color and plenty of lovely nectar-filled landing pads for bees and butterflies. Zinnias are some of the easiest annual flowers to grow whether in garden beds or containers on the patio, balcony or deck.

Please keep pollinators in mind and let’s work together to create a lot of buzz during National Pollinator Week!

By Jodi Torpey
A Denver master gardener


Balcony Gardening – Grow A Salad Bowl

Now is a good time to plant baby lettuce, spinach and micro-greens for early Fall harvest.  You do not need a deep container to grow salad greens and you can grow the greens from seed.  Covering the potted seeds with loose plastic wrap holds the moisture and heat and encourages sprouting.

Growing Container Salad Greens:  “You will be able to harvest your first crop in just a few short weeks, using the small tender leaves that are often not available to buy. These micro-greens are the mix of choice for gourmet salads. Leafy greens also make a flavorful addition to sandwiches or wraps.”

Salad greens

Radishes also mature quickly.  Use radish greens instead of basil in your pesto recipe.Radishes

As a container gardener you can quickly move your salad bowl inside if we get a sudden Colorado frost.  In a sunny window you can keep growing salad all winter.

If you need an incentive, a CSU Extension publication lists the nutrients in different salad greens and has notes about taste.  It has great photos — I can now identify Mizuna.  Enjoy!

Balcony Gardening – Green Walls

First it was “Green Roofs” now it is “Green Walls” or Living Walls.   You can create an outdoor Green Wall on your balcony.

a couple of trellis, anchored in a pot of dirt against one of your balcony walls. Depending on the amount of light you could grow flowering vines in the summer then plant peas in early spring.

metal shelving or a bookcase against the wall with planters on each shelf.  If your balcony is shady your “wall” can be made up of indoor plants – philodendron or other trailing plants.

– there are more sophisticated systems of hanging Green Wall “pockets” that look kind of like a magazine rack or sets of pots that can be attached to a wall in rows.   You could have edible plants like herbs and lettuce which require very little soil.  An internet search on green wall gardens will show you many options. 

As always, weight, water and building rules remain considerations for any system attached to the wall.  Ask before you invest.

Visit a local green wall.   “July Walking Tour – Sensory Garden’s Green Wall” by Angie Andrade Foster, Senior Horticulturist, Denver Botanic Gardens.

Colorado State University has a residence hall with an indoor green wall.  It is the Pavilion at Laurel Village.   An internet search will yield a variety of stories and photos.

Send me a comment and let me know where you find other indoor or outdoor Green Walls in Denver.