Category Archives: Soil

Colorado Gardening Calendar for April 2024

By: Molly Gaines, CSU Extension-Denver Master Gardener since 2019
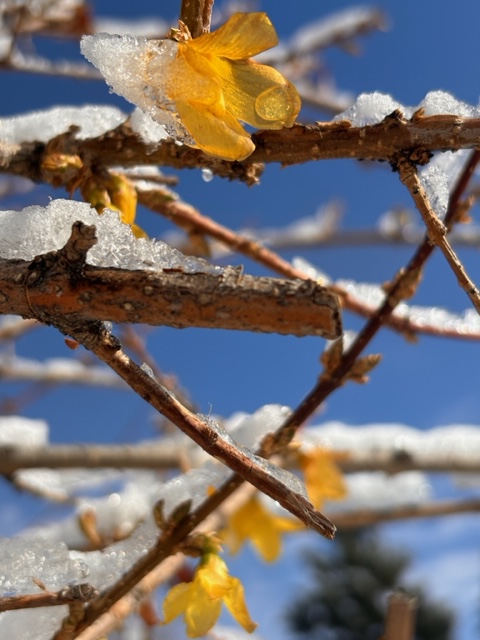
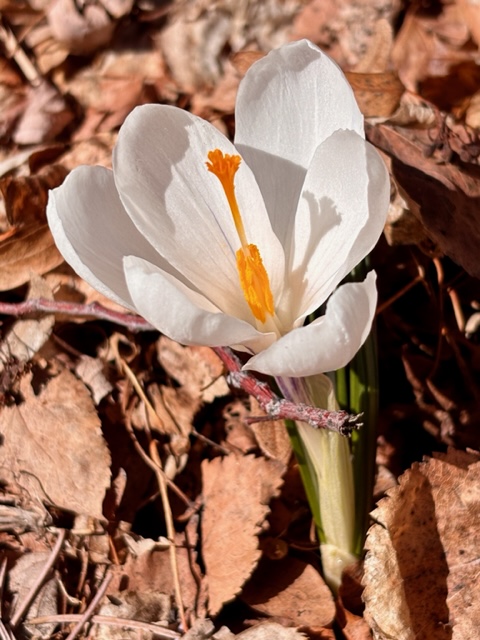
Signs of spring are everywhere in Denver. Daffodils, crocus and other spring flowers in full bloom one day; covered in ice and snow the next. Oh, to be a gardener at 5,280 feet!

While it’s too early to spend a lot of time planting, it’s a perfect time to prepare your soil, garden beds, tools, pots and lawn for the 2024 growing season. Below are a few gardening activities to consider before Mother’s Day, May 12 (around the safe zone from hard frosts) for planting most plants, flowers and vegetables.
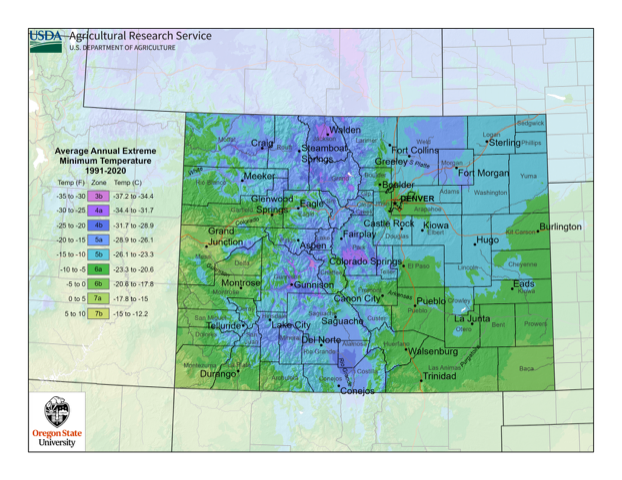
As you plan your garden, it’s worth noting that some of the Denver metro is in a new gardening zone. Last November, the USDA announced updates to its “Plant Hardiness Zone Map,” updating this go-to tool for gardeners for the first time since 2012. The new map, which can be found here, places parts of Denver in Zone 6a rather than 5b. Zone numbers reflect the average extreme minimum temperatures and help determine what plants will thrive in each zone.  Higher numbers equal incrementally warmer low temperatures. For background about how to use this map as a planting guide, visit this helpful article from the National Gardening Association’s learning library.    
Vegetable Garden

  • Clear remaining debris. Pull emerging weeds.
  • When the soil is dry, add a fresh 2-3-inch layer of compost to your beds. This supports soil health and plant vigor. Gently work compost into the top layer of your existing soil with your hands, a trowel or a cultivator. Let rest a few weeks before planting.
  • Plant frost-tolerant spring plantings, such as peas, spinach, arugula, radishes, Swiss chard, etc.
  • Start indoor seeds for warm-weather vegetables such as tomatoes, peppers, squash, melons, etc.
  • Reference this Vegetable Planting Guide to plan what you will plant when.

Trees & Shrubs

  • The snowpack is solid Colorado-wide this year, well above 100 percent. This includes Denver. That said, if this month is dry, be sure to water your trees and shrubs.
  • Early this month, prune deciduous trees, conifers and summer-blooming shrubs.
  • Later in April into mid-May, prune rose bushes. For details on exactly how, why and when to do this, visit here.  This is weather dependent so watch for low temperatures and delay if a cold snap is predicted.
  • Remove broken branches from trees and clear dead leaves and decayed fruit from the base.
  • If you’re looking to plant a new tree, consider the Park People’s annual fruit and yard tree sale that begins April 20. Trees range from $50 to $80, and sales support the Denver Digs program. More details can be found here.  

Lawn Care

  • Prep your mower, sharpening the blade as necessary and conducting other maintenance. Lawn mower blades should be sharpened at least once per season.
  • If you use a pre-emergent weed product, apply in early April. For more details about how to use, visit here.
  • Fertilize as desired, reading labels for proper application. Keep in mind that fall is the most important time for lawn fertilization. Applying only in the spring can mean excessive top growth and shallow root systems.

Perennial Beds

  • Cut back perennial plants if this wasn’t done last fall, leaving 3 inches of the plant above the soil.
  • Similar to your vegetable garden, the soil in these beds will also benefit greatly from compost, with the exception of native plants which generally prefer unamended soil.
  • Pull emerging weeds now. Stay on top of them from the start.
  • Divide overgrown perennials such as chives, sedum, grasses, phlox, daisies, hosta, etc. This will lead to healthier plants and better growth.

Other April Gardening Thoughts

  • Assess garden supplies. Purchase or plan to borrow anything needed. Sterilize and sharpen garden tools.
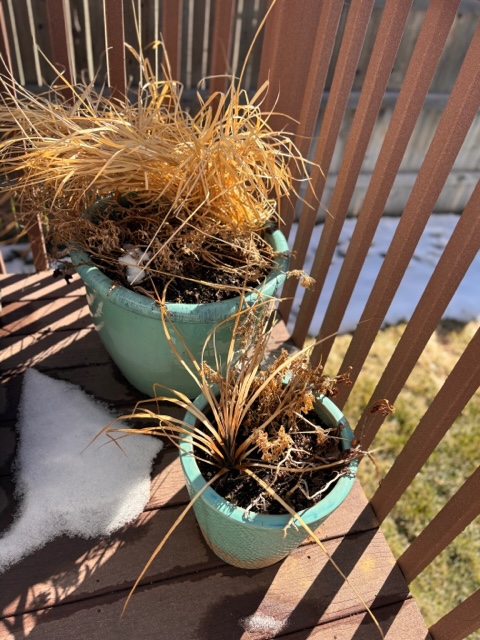
  • Empty any pots or containers still holding last year’s dead plantings. Clean and disinfect them to prevent disease in new plantings.
  • Denver Water recommends waiting to turn on your irrigation until after the last freeze, typically in early May. Hand water until then.
  • Sow wildflower and pollinator seed mixes.
  • Prepare for frost, hail and other bad weather. Have sheets of plastic, old bedsheets and five-gallon buckets in easy reach for late-season snow or spring and summer hail. Remember the hailstorm that hit Denver late June last season?
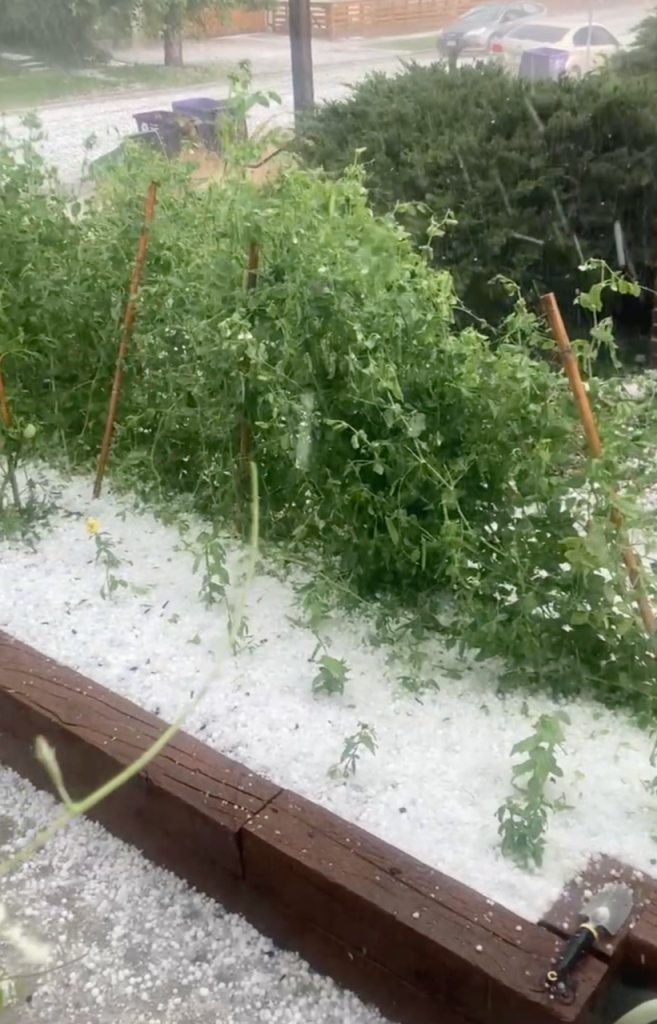
Springtime in Denver is special. I love watching new life slowly unveil itself. It’s a time full of promise, new beginnings and high anticipation of the color, flavor and textures around the corner. The more prepared you are in April, the more enjoyable your summer gardening season will be.

As always, if you have questions about plants, planting and any other gardening and yard related topics, visit the CSU Extension Yard and Garden website for tips.

Planning a Dry Shade Garden: Making Lemonade with Dusty Strawberries

Lori Williams, CSU Extension – Denver Master Gardener Since 2016

This is a dry shade garden story of happy accidents, fortunate timing due to 100+ degree temps, and purely unexpected research wrapped in a beautiful day at Denver Botanic Gardens Chatfield Farms.

After more seasons than I’d like to admit there is part of my yard that has silently been waiting for attention for many years. It’s fully dry shade, anchored with a lovely oak tree that has reliably made this space look pretty good despite lacking design and plantings, and receiving water only for the tree’s sake. Lackluster turf is more grayish than green and sparse to say the least. Hello Sad Spot, it’s finally time for your makeover.

With these hot temps I’ve retreated inside and have been pouring over xeric plant guides, watched the uber helpful presentation ‘Dry Shade Planning and Planting by Amy Lentz of Boulder County Extension, and investigated various garden designs and plant suggestions offered by the fine folks at Plant Select, Denver Water, and our very own CSU Extension.

The added bonus was finding myself immersed in a treasure trove of design and plant specimens at Denver Botanical Gardens Chatfield Farms a few weeks ago. Dry shade garden inspiration abounds!

A clear pattern of attack is laid out for not only dry shade but any new garden spot:

  • plan ahead
  • improve the soil
  • limit turf
  • efficient irrigation
  • select plants
  • mulch
  • maintain

Plan ahead…hmmm…plan ahead….me? Oh but it’s a heat wave and due to travel plans and work obligations I’m doing research for a garden spot that I won’t be able to implement or plant until early fall. That sounds like I’m planning ahead!

Step one? Check! I even have time to have my soil tested.  And I’ll have time to actually amend the soil. This is going great! Look at me, planning ahead. It’s a new and different approach but I think I like it.

Next, I literally trip over one of the oak’s roots while collecting dusty soil samples and find myself looking at something that wasn’t half scorched turf but rather a mixture of barren and fruiting strawberries with yellow and pink blossoms. They were as dusty as the grass, but they’ve voluntarily planted themselves in this neglected space. Brazen little things! Congratulations, guys – you’ve just won the ‘Right Plant, Right Place’ award. Based on your gumption I decided on the spot that strawberries are the ground cover of choice.

I’ve spent time on cool mornings removing the patchy grass with my hori hori, providing more space for the strawberry tendrils to reach out and set roots. It’s delightful to see them take hold.

Thankfully, we have a sprinkler system, but the heads are all wrong (have been forever) for this area and I’ve been hose watering this dry shade zone instead for years. Once I fully determine the plants’ placement and they are well established, soaker hoses will replace the sprinkler heads to water the new guys more effectively. I’ll stick to the garden hose with my ancient frog eyed sprinkler during the establishment phase.

One of my best-ever gifts from Mom was Denver Water’s series of xeriscape books.  They developed the whole xeric gardening concept to begin with, so Colorado-proud of them. Highly recommended reading!

Mulch selection is still a bit up in the air, but I am a diehard fan and believer. I feel like mulch is kind of the reward topper-offer at the end of newly planted garden spaces. It really makes things pop and look fully finished while stealthily helping manage weeds and providing moisture retention in the garden. Win Win Win!

As mentioned earlier, I happily found myself at Denver Botanic Gardens Chatfield Farm recently. I was expecting a lovely visit of course, involving a great stroll while surrounded by beauty. Perfect! Embarrassingly, I think I’ve only been to the arboretum for holiday lights during the winter.

This visit turned into Christmas in July as I opened my eyes and mind and phone camera – a dry shade plant selection opportunity extraordinaire! Lenten rose? Bergenia cordifolia? Siberian Bugloss? Now I only need to ‘weed’ through approximately 47 plants to select the 3-5 for my make over garden. But as I’m planning ahead, ahem, I have time.

Additional sources:

Kinds of Shade

Zero Water Gardening

Dry Shade Solutions

Testing Your Garden Soil for the 2022 Gardening Season

By: Molly Gaines
CSU Extension-Denver Master Gardener since 2019

For some reason, soil testing always overwhelms me, so I tend to put it off on my spring garden planning “to do” list. Yet, I know that proper pH levels, soluble salts, organic matter, nitrogen, phosphorous, potassium, sulfur, micronutrients, and other soil components are critical to my gardening success. In my vegetable- and flower-focused home garden, I know properly attending to my soil will lead to an abundance of nutrient-dense veggies and healthy cut flowers.

I’m determined this year to understand my soil better and conduct a proper soil test — as early as possible. Results from this test will tell me what nutrients my soil needs, or where the soil is out of balance. It will equip me with the knowledge necessary to apply soil amendments for optimizing my growing conditions, such as compost, worm castings or aged manure, before I begin putting seeds or starts in the ground.

Getting Started

Luckily for us Colorado gardeners, the soil lab at Colorado State University (CSU) makes soil testing a simple process. On their newly revamped website, you can find all details for collecting your soil sample, choosing what information you’d like to glean, pricing for each sample, and where to send the sample you’ve collected. 

The lab was extremely busy in spring 2021, and it’s anticipating significant volume again this spring. That said, it’s recommended you collect and submit your soil samples as soon as possible — as early as your soil can be worked this spring. 

Keep in mind that your soil test results will only be as reliable as the quality of the sample you submit. Your sample must reflect the average fertility of an area, field, garden, or flower bed, so it’s important to follow the sample collection directions provided here

Prices for sampling range from $10 to $140, depending upon what’s being tested. Multiple tests can be ordered for the same sample. 

Collection Process

The process for collecting a sample is outlined in detail on the CSU Soil, Water and Plant Testing Laboratory website. I’d recommend you head to their site, print the key information, and take it into your garden to guide your sample collection. You’ll then have all information needed at your fingertips as you are going through the process. Following are a few required key steps.

First, be sure you have all essential sampling tools gathered. These include:

  • Stainless steel soil-sampling probe, an auger, or a shovel/trowel
  • Clean bucket
  • Plastic bags or waterproof, lined paper bags
  • Permanent marker

Next, refer to the “Sample Collection” section on the website (or the information you’ve printed to take with you for your sampling) and follow the recommended patterns to gather your representative composite sample. This is the part that always feels a bit challenging to me, but the images provided on CSU’s sampling website really does make it simple to follow. 

Once you’ve collected the samples as directed on the site, follow directions for preparing your sample for shipping, including filling out the sample form. 

When your test is complete, you’ll receive results and an invoice. Payment is due at that time. 

Ingredients for Success

Understanding your soil and giving it more or less of what it needs to grow healthy plants, should be starting point for every gardener. Soil testing and amending will help give your seeds, perennials and starts a great beginning — just add water, sunshine and some regular weeding and pruning. These are all the ingredients necessary for an incredible garden that teems with life, health, and abundance! 

Gardening in Colorado’s Warmer, Drier Climate

By: Molly Gaines
CSU Extension-Denver Master Gardener since 2019

As we begin 2022, Denver just had its first big snow of the season. It finally comes amid an extreme drought, blamed largely on climate change, and the day after the massive Marshall fire on Dec. 30, the most destructive fire in Colorado history.

As our climate warms, drought worsens and moisture and weather patterns become more unpredictable, it is greatly impacting how gardeners in Denver and beyond approach what they grow and how they garden.

Lucky for us, as people who are passionate about plants and soil, we can help create climate resiliency through our home and community gardening efforts. It’s one reason I’m so drawn to gardening. During these wildly unpredictable times, it feels like something I can do to have a positive short- and long-term impact on my neighborhood and community.

Stacks of books could be written on this topic, but I’d like to offer a few ideas on how we as gardeners can work with our changing climate to grow successfully and in ways that help create higher-quality living environments in the face of more extreme weather.

1) Build up the soil.

Whether you’re planting directly in the ground or in containers, focus on building healthy soil. The healthier the soil, the stronger plants will grow and, if you’re growing food, the more nutrient-dense that food will be. Healthy soil, packed with microorganisms and earthworms, is also vital to sequestering carbon.

Plants grown in healthy soil are more pest and disease resistant and overall have better outcomes. For information on how to build healthy soil in your gardens, see this PlantTalk Colorado article, “Maintaining Healthy Soils”.

2) Plant trees — and be sure to water them adequately.

A New York Times headline on this topic last summer caught my eye, “What Technology Could Reduce Heat Deaths? Trees” (July 3, 2021, by Catrin Einhorn). Scientists have found that trees can lower air temperature in city neighborhoods 10 degrees, reduce electricity demand for air conditioning, save money and emissions and help avoid massive power failures during heat waves, according to the article.

For more on proper tree planting, particularly in urban environments, see a post I wrote last fall, “Fall Tree Planting Considerations and Tips.”

In Denver, particularly during extended periods with no to little moisture, year-round watering is critical. Most homeowners don’t water their trees enough, which leads to poor tree health, wind damage and premature death. The general rule of thumb is 10 gallons of water for each diameter inch of the tree’s trunk.

For additional winter watering information, see our recent post “Winter Watering.”

3) Use native, drought resistant perennials for landscaping.

Plants that are native to Colorado are already naturally adapted to our growing conditions. They will require less water and fertilizer and be more resistant to pests and disease.

As water becomes scarcer, minimizing water usage for landscaping will become more critical. Landscaping our yards and gardens with native plants can lessen our overall usage of water.

4) Grow a vegetable garden.

Planting a garden and growing some of your own food for friends and neighbors is a wonderful way to lessen your impact on the environment. It helps cut down on carbon emissions, reducing the amount of food that travels on trucks for miles to the grocery store.

When food is grown with minimal chemical inputs, it also reduces toxins in our environment and increases the number of pollinators around our homes and communities, providing them safe habit and more balance in our ecosystem.

As gardeners, particularly in Colorado, we are used to planning, tending, working with nature and being flexible in the midst of adverse weather. Our warming climate and more extreme weather events will make these skills more imperative than ever before.

Keeping these ideas top-of-mind will help us all grow successfully, while also experiencing the joy and respite our gardens bring during these challenging times.

Amending The Soil Till It Is Workable

Pixabay.com

To commemorate Earth Day, we’re turning our attention to improving garden soil with this post from Steve Aegerter, Denver Master Gardener since 1999 and a first time contributor to the blog.

You don’t have to be a kid to enjoy digging in the dirt.

Gardeners do it all the time and it’s not just for fun and games. Rather, over a few seasons, digging in the dirt can substantially improve your garden’s performance. With a bit of work and some patience, you will have soil that is ideal for plant growth with a texture that is moist and crumbly like chocolate cake. But, no matter how delicious it appears, I don’t recommend eating it!

Here are answers to commonly asked questions about improving soil.

When is it safe to work the soil?

Great question. Disturbing, stomping, or digging in a wet garden can damage soil. The baseball test is an easy way to determine if soil can be worked safely. Here’s how it is done:

  • Take a soil sample by digging a few inches straight down.
  • Remove enough soil to form a tightly packed “baseball.”
  • Hold the ball waist-high, and drop it on a hard surface, such as a sidewalk.
  • If the ball falls apart, it is safe to dig in the soil.
  • If the ball stays glued together, the soil is too moist and should not be disturbed till it dries out.

What should I add to my soil?

The very best way to know how to improve your soil is to have it tested by Colorado State University’s Soil Testing Lab. The analysis provides detailed, easy-to-follow recommendations tailored to your soil ‘s composition and the plants you want to grow. For example, native plants prefer minimally amended soil (often not at all) while veggies prefer richer soil. Directions for submitting a soil sample can be found here. Each test costs thirty five dollars.

In lieu of a soil test, a general rule of thumb is to spade one to two inches of compost and well-broken up peat moss into the soil. Compost adds organic matter and breaks down the clay texture of soil and peat moss will lighten the soil, improve its texture, and increase moisture retention. If you elect to use a rototiller, proceed with caution as over tilling soil can damage the soil’s structure. For further reading on soil preparation and composition visit PlantTalkColorado #1605 on Soil Preparation and CSU GardenNotes #212 for an in depth look at soil composition.

What is double-digging?

Double-digging is a more labor-intensive soil preparation process that results in deeply amended, workable soil. It is particularly appropriate for new, non-native garden beds.

Here’s how to double-dig a four-foot-wide garden bed:

  • Spread one to two inches of soil amendment on top of the entire bed.
  • Starting on one end, remove a four-foot-wide, shovel-blade deep section of soil, creating a trench.
  • Place this soil in a wheel barrel.
  • Us a spade or garden fork to work one to two inches of additional amendments in the bottom of the trench. This is the “double-dig.”
  • Dig another shovel-deep section of soil next to the first trench.
  • Place the soil from this section atop the first trench.
  • Repeat the digging steps for the remainder of the bed.
  • The final section of the bed will be topped off by the soil in the wheel barrel.

Can soil be improved in the fall?

Yes, definitely. In autumn, spade a couple of inches of dead leaves into the soil followed by a second layer of leaves on top. During the winter, the leaves will decompose, adding valuable organic material into the soil.

Remember, you can order the best seeds from catalogs, or purchase amazing plants from the most popular nurseries, but they won’t produce a good harvest in poor soil. Use these techniques for amending soil and in a couple of years, your friends will envy your amazing garden!

So get out there, be a kid again, and start digging in the dirt.

Meet the Garden Squad—Gardening Help at the Denver Botanic Gardens

Meet the Garden Squad is a way to get better acquainted with some of our CSU Extension Master Gardener volunteers.

Meet the Gardening Help Volunteers

The CSU Extension Master Gardeners usually pick up the gardening helpline at the Denver Botanic Gardens or answer questions when people walk-in the door. Even though buildings at DBG are closed for now, gardeners can still get their gardening questions answered by Gardening Help from Colorado Master Gardeners at Denver Botanic Gardens, only remotely.

The interest in gardening has soared ever since people have had to hunker down at home and find ways to keep busy. First-time gardeners will likely have questions on how to get started, what to plant now, what can grow in containers, and much more.

Even gardeners with some experience have questions, too. All gardening questions can be emailed to gardeninghelp@botanicgardens.org and a CMG, working remotely, will reply by email.

Gardening Help volunteers include: Back row, left to right: Jan Fahs, Jan Davis, Ken Zwenger, Mark Zammuto, Gordon Carruth, Fran Hogan
Middle row: Lynne Conroy, Harriet Palmer Willis, Kathleen Schroeder, Leona Berger, Cindy Hanna, Mary Adams, Nancy Downs
Kneeling: Dee Becker, Charlotte Aycrigg, Jan Moran
Not pictured: Mary Carnegie, Linda Hanna, Maggie Haskett, April Montgomery, Ann Moore, Kathy Roth, Amy White

Gardening Help is a project of the CSU Extension-Denver Master Gardeners at the DBG. Volunteers provide reliable and research-based information to thousands of home gardeners each year.

Volunteers commit to at least one year in the role, with a minimum of six shifts spread across the year. The commitment starts early in the year with an orientation and training from Nancy Downs, project coordinator.

Many volunteers are GH regulars and they return to the project every year. In addition to being an active CMG, they have to satisfy DBG volunteer requirements, too. That means they’re a member of the DBG and enrolled there as a volunteer.

Some of the key characteristics of GH volunteers are good research, plant identification and diagnostic skills. Because the project is located at DBG, volunteers need to keep on top of what’s blooming at the DBG by season, so they can answer common questions that might pop up.

Photo provided by Nancy Downs

Text by Jodi Torpey
Master Gardener volunteer since 2005

No More Buds? Turn to Earbuds.

By this time in the year, I’m at the point of good riddance! with the weeds and careful tending (shout out to this cold spell for sealing the deal). Pretty much everything is done and put to bed. I then spend the next two weeks really dialing into my houseplant game before I get bored and start Spring dreaming. My Fall break from the garden is short-lived so I start listening to old episodes of now-defunct podcast series and dream with new ones.  Here are a few of my favs:

Gardenerd Tip of The Week

Gardenerd.com is the ultimate resource for garden nerds. We provide organic gardening information whenever you need it, helping you turn land, public space, and containers into a more satisfying and productive garden that is capable of producing better-tasting and healthier food.

https://gardenerd.com/

My thoughts: The host lives in LA, so this one is great for winter listening as we get chillier, I love hearing about the warmth of Southern California and what’s coming into season. Interviews with other experts and educators in the horticulture field discussing plants, but also cultivating grains, discussing bees, and seeds. Each episode ends with the guest’s own tips, many of which are news to me and have been incorporated into my own practices. 

On the Ledge

I’m Jane Perrone, and I’ve been growing houseplants since I was a child, caring for cacti in my bedroom and growing a grapefruit from seed; filling a fishtank full of fittonias and bringing African violets back from the dead.

https://www.janeperrone.com/on-the-ledge

Houseplants, if new to the podcast start here for an overview, and guidance.

Jane is a freelance journalist and presenter on gardening topics. Her podcast has a ton of tips for beginners, and more advanced info for longtime houseplant lovers, as well as interviews with other plant experts. The website is also useful to explore the content of an episode if you aren’t able to listen. I could spend an entire morning traveling in and out of the archives. 

My thoughts: As the growing season comes to a close, my indoors watering schedule starts wobbling between what the plants need and my summer habits of watering too many times per week–welcome back,  fungus gnats! Here’s an entire episode on them

Plant Daddy Podcast

We aim to create a listener community around houseplants, to learn things, teach things, share conversations with experts, professionals in the horticulture industry, and amateur hobbyists like ourselves. We also want to bring the conversation beyond plants, since anybody with leaf babies has a multitude of intersectional identities. We, ourselves, are a couple gay guys living in Seattle, Washington, with a passion for gardening and houseplants. A lot of our friends are the same, though each of us has a different connection, interest, and set of skills in this hobby, demonstrating a small amount of the diversity we want to highlight among plant enthusiasts.

https://plantdaddypodcast.com/

My thoughts: Plants are visual, podcasts are auditory- episodic overviews with links to viewable content available on their website. Are you also seeing Staghorn Ferns everywhere? They have an entire episode (photos included!) on the fern and how to properly mount it for that vegan taxiderm look. Matthew and Stephen are self-identified hobbyists with a passion for plants all the way down to the Latin–it’s impressive.

Epic Gardening

The Epic Gardening podcast…where your gardening questions are answered daily! The goal of this podcast is to give you a little boost of gardening wisdom in under 10 minutes a day. I cover a wide range of topics, from pest prevention, to hydroponics, to plant care guides…as long as it has something to do with gardening, I’ll talk about it on the show!

https://www.epicgardening.com/

My thoughts: The Netflix-episode-when-you-just-don’t-feel-like-a-movie kind of podcast. Addresses the best varietals, composting, soil pH, and troubleshooting some common issues in the garden. With daily episodes archived back to December 2018, there is a quickly digested thought for some of your own curiosities. The website is also a wealth of knowledge. 

Eatweeds Podcast: For People Who Love Plants

Eatweeds: An audio journey through the wonderful wild world of plants. Episodes cover modern and ancient ways wild plants have been used in human culture as food, medicine and utilitarian uses.

http://eatweeds.libsyn.com/

My thoughts: most recent episode (and appropriately timed!)  On edible acorns. My fav topics include foraging and wild yeast fermentation; and when I really start missing the Pacific Northwest, The Wild and Wonderful World of Fungi sends me back to a misty forest wander politely decorated by les champignons. Posting of this pod is sporadic–only 25 episodes since 2014.

You Bet Your Garden

(no longer on air, but archives available)


You Bet Your Garden® was a weekly radio show and podcast produced at WHYY through September, 2018. The show’s archive is available online. It was a weekly syndicated radio show, with lots of call-ins. This weekly call-in program offers ‘fiercely organic’ advice to gardeners far and wide.

https://www.wlvt.org/television/you-bet-your-garden/

My thoughts: Host, Mike McGrath, spends much of the show taking calls and troubleshooting, reminiscent of another public radio behemoth with Click and Clack, the Tappet brothers. McGrath incorporates a lifetime of organic gardening tips with humor. McGrath features one tip to find a local “rent a goat place” (no joke) to get goats to eat the most troublesome weeds to a concerned caller considering setting much of her yard on fire.

Cultivating Place: Conversations on Natural History and the Human Impulse to Garden

Jennifer Jewell, the founder of Jewellgarden and Cultivating Place, achieves this mission through her writing, photographs, exhibits about and advocacy for gardens & natural history and through her weekly public radio program and podcast Cultivating Place: Conversations on Natural History and the Human Impulse to Garden, on gardens as integral to our natural and cultural literacy.

https://www.cultivatingplace.com/

My thoughts: sort of like On Being, but for gardening.

A fav episode:

If you aren’t so sure about this podcast thing, and just want a place to start, start here.

Do you really need a brain to sense the world around you? To remember? Or even learn? Well, it depends on who you ask. Jad and Robert, they are split on this one. Today, Robert drags Jad along on a parade for the surprising feats of brainless plants. Along with a home-inspection duo, a science writer, and some enterprising scientists at Princeton University, we dig into the work of evolutionary ecologist Monica Gagliano, who turns our brain-centered worldview on its head through a series of clever experiments that show plants doing things we never would’ve imagined. Can Robert get Jad to join the march?

https://www.wnycstudios.org/podcasts/radiolab/articles/smarty-plants

Sheet Mulching Re-visited

Last week’s blog included a link back to our October 2016 blog on experimenting with sheet mulching (also known by some as “lasagne gardening”) http://wp.me/p5JEJY-YZ so I thought we ought to re-visit and see how that worked. Sheet mulching is the layering of different kinds of compostable garden waste (sometimes with old newspapers or cardboard as well) on the surface of poor garden soil. The aim is to quickly add organic matter to the existing soil, improving drainage, water retention and fertility.

OLYMPUS DIGITAL CAMERA

I had several questions in my mind last fall when this experiment was carried out:

1. Will the cardboard decompose?
2. Is the “green” and “brown” balance right?
3. Will the raccoons and skunks churn it all up?
4. Will there be a crop of new weeds from the imported materials?
5. Will the cold Colorado winter simply stop any decomposition from taking place?
6. Will there just be a smelly slimy heap to remove next spring?
7. OR, will we have achieved that elixir of gardening – fertile, well-drained, moisture-retentive soil???

The experiment has been going on for some eight months now and these are the answers, so far:

1. YES. Some digging about at the base of the layers revealed no sign of cardboard except for a few stray bits of plastic tape that didn’t get removed when I broke down the cardboard boxes.
2. Probably YES. Though close inspection revealed that in some parts the grass clippings were laid too thick and would have done better if they’d been mixed in more with the dried leaves.
3. NO. Apart from a few little exploratory digs by some critters, the layers remained intact.
4. NO. Initially there was some germination from seeds (unidentified grass/cereal) which were in the chicken coop material I used, but these were easily pulled in the first couple of weeks. Since then not a single weed has appeared.
5. NO. Digging into the layers revealed pretty well composted good, brown material though not everywhere. Lots of worms too. Straw seems to have been the hardest to break down and is still recognizable in some places.
6. NO. See 5.
7. Well, MAYBE ….

IMG_1049

The native grey clay soil is still there beneath the sheet mulch

IMG_1047

Well on the way to being compost

There is no doubt that we now have deep layers of composted garden waste on our borders. The layers have not been totally absorbed into the soil below. They have shrunk in depth by a couple of inches which is probably mainly due to gravity and the reduction of air pockets. I accept that these borders may remain as “raised” borders for some time.

So, what happens next? I expect these sheet mulched borders to continue to decompose over the summer and, perhaps, by next spring will no longer be “raised”.

But I can’t wait until then to get new plants in.  Already, I have a planted a Japanese maple and some hellebores in one of the beds (both should benefit from the rich compost.  I dug holes in the compost layers, put in some native soil from elsewhere in the garden and planted and watered.

I was concerned that the compost itself would not hold the plant roots securely which is why I mixed in garden soil from elsewhere to give weight. It will also provide mineral nutrients that may not be present in the compost/mulch. Now, some six weeks later, the new plants are all well rooted and looking good.

IMG_1227

Japanese maple and hellebores just planted

So, is it worth doing? I’m giving the experiment a qualified “yes” at this stage.

I think it works for areas that have been neglected or are being cultivated for the first time. There is an initial effort in gathering the materials and building the sheet mulch layers, but then you just sit back and wait.

Does one big “hit” of compostable material work better than cumulative additions over the years? I don’t know. Time will tell as I compare these borders with others in the garden. Certainly, I got a lot more compost onto the borders than I could generate annually from my compost bins. (You don’t get a lot of kitchen waste from two people; and a modest-sized, young garden doesn’t produce much waste either.)

It might have been less work to simply go out and buy bags of compost from the garden center or big box store. That would have been expensive (my materials were all free). There are no regulations on what goes into bagged compost for retail sales.  At least I knew exactly what was in mine.

Aside from these thoughts, there has definitely been a great sense of satisfaction in doing the experiment.  It was interesting.  It was good exercise.  It was free.  I turned what other people thought was just rubbish messing up their yards into useful, re-vitalizing material for our garden and plants.

Anne Hughes/A Denver County Master Gardener

Never Put a $10 Plant in a 10¢ Hole and Other Gardening Tips From Denver Master Gardeners

planting-1898946_1920Passionate gardeners love to talk about gardening, so with that in mind, we recently asked Denver Master Gardeners for their best gardening advice. Responses included tried-and-true practices, creative suggestions and good reminders for all of us as the gardening season kicks into full gear.

As the title of this post implies, we believe that great plants come from appropriate soil preparation. Amending with compost is often imperative as soil in our region tends to lack organic matter. But proceed with caution, as some plants, such as natives, prefer a leaner, less fertile soil. Too rich soil will cause these plants to underperform and often just flop over. It pays to do a little homework before planting, read seed package directions and have your soil tested.

One of our gardeners shared her recipe for amending soil: Add 1/2 a handful of both Alaskan fish pellets and triple super phosphate to half a bucket (such as a kitty litter pail) full of compost. Mix this into the planting hole for strong root development and beautiful blossoms.

A tip borrowed from the Rock Garden Society is to plant bare root. By gently shaking off most or all of the soil that the plant is purchased in, the plant will adjust to the garden soil without the soil interface (or boundary) that can occur between two soil types. Bare root planting promotes healthy root development.

mulch-1100555_1920Mulch, mulch, mulch is the mantra of many of our survey respondents as it keeps weeds out and moisture in. Add it like crazy each time you dig in the veggie, perennial and annual gardens and don’t forget container plants too. Small to medium-sized bark chips are popular, practical and pleasing to the eye. Natural mulch options are very effective, including not quite finished compost from the compost bin which will add carbon, feed living organisms, prevent water runoff and prevent compaction. Local arborists are often willing to drop off wood chips which would otherwise fill up the landfill. In the fall, mow over your leaves and spread them throughout the yard, they’ll breakdown by spring and add organic matter to your soil. Consider purchasing a chipper to grind up branches and other garden waste.

garden-hose-413684_1920Suggestions for responsible use of water include watering when the plant needs it instead of on a set schedule. Soaker hoses, often made from recycled material, are effective for watering plants at the soil line. Plants (even xeric ones)  need moisture to maintain healthy roots and overall strength, but often less than we think. For example, the Water Smart Garden at the Denver Botanic Gardens is watered about seven times during the season.

Weeding can feel like a no-win battle, but attacking weeds after a soaking rain makes the task easier. Pull weeds and unwanted volunteer shrub and tree seedlings when they are small, before they take hold in the ground or develop seed. Add stepping stones to the garden to avoid stomping on plants and compacting soil when working in the garden.

bindweed-1207738_1920A clever tip to eliminate stubborn weeds, such as the nasty bindweed shown here, is to take a large piece of heavy cardboard, make a cut from the edge to the center. Keep the cardboard as level as possible, slip the vine in the center and spray the vine with the herbicide of your choice or horticultural vinegar, which is sold in garden centers. The cardboard will protect surrounding plants from overspray. Aggressive weeds may require multiple treatments during the season.

One of our members recommends a tomato planting technique passed on through generations of farmers. She adds blackened banana peel to the soil and feeds them with skim milk upon planting and again one month after that. This less conventional practice yields her sweet, abundant fruit. While CSU can’t vouch for the scientific efficacy of this, the banana could be adding potassium and the addition of calcium may reduce the chances of blossom end rot.

plant-1585251_1920Growing tomatoes in containers is recommended for those with limited space. Select varieties which produce smaller fruit such as Patio, Cherry or Sungold. Use a large container (18+ inches in diameter), a sturdy support and a tray with casters. This allows plants to be moved from the path of hail or to optimal conditions. Container plants of all kinds benefit from weekly feeding of 1/2 strength fertilizer.

To keep pests at bay, try a thorough weekly spray of water during the growing season, including the walls of the house and fence. It’s a kinder way to shoo pests away.

If your vines need a sturdier trellis consider building one out of remesh, which can be found at hardware stores. It makes a durable, cost-effective support and can easily be cut with bolt cutters. It also can be attached to supports to create a dog run or create plant cages.

botanical-garden-413489_1920In the flower garden, invest in perennials for texture and dimension and add annuals for bold color. “Enjoy the randomness of some plants that choose their own spots to thrive” suggests one gardener. What a positive way to think of the seedlings that sprout up at this time of the year. Remember, too, that perennials may not come into their glory until the second growing season.

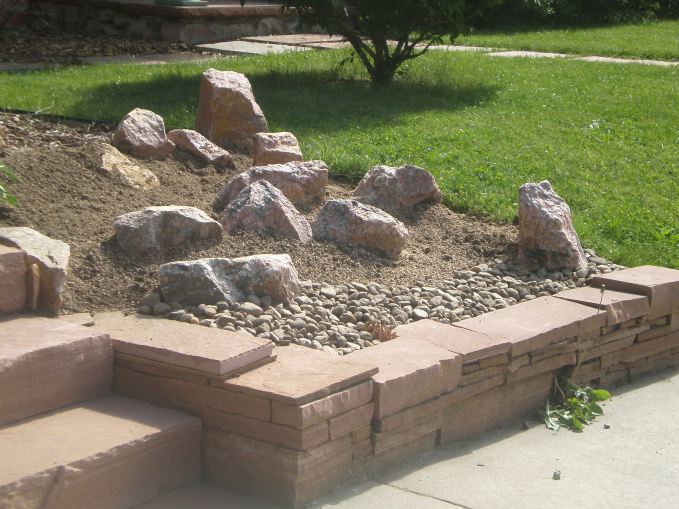
Gardening is a four season hobby. Winter watering of trees and shrubs will help keep them healthy and  veggie gardeners can get a jump on the season by using a cold frame or floating row cover to get an early start on lettuce, spinach and other cool season crops. Fall is a fantastic time to fertilize, aerate and over-seed the lawn. It is also an ideal season to divide perennials so that they settle in and are ready to take off in the spring.  Share your divisions with your neighbors, too, or trade for plants you’ve admired (envied?) in their yards. If you need more gardening space, solarizing or sheet composting is an excellent technique to ready a new garden bed and can be started throughout the year.

And lastly, a veteran gardener advises us to “Remember each little garden flower or planting arrangement is a moment in time. It will change. Don’t worry about it or take it too seriously.”


Written by Linda McDonnell with thanks to the many Denver Master Gardeners who shared their advice.

All photos courtesy of http://www.pixabay.com, a source of royalty free images.

It’s Winter and, Yet, I Dream of Cactuses

It’s January.  As I write, it’s cold.  It’s snowing.  The garden is frozen solid.  There isn’t much that can be done out in the garden.  But indoors, we can do a lot of thinking about and planning for about our gardens.  For me, this also includes thinking back to what has already been achieved. My special joy has been planning, making and planting my “desert garden”.

OLYMPUS DIGITAL CAMERA

Prickly pear peeks out of the snow

Having gained my gardening skills and horticultural knowledge in the temperate south of England, I was excited on moving to Colorado to try my hand at growing these interesting, drought tolerant plants.  Cactuses in England are generally small prickly jobs which sulk year-round in dry pots on the windowsill, gathering cobwebs.  I knew virtually nothing about them when I came to live in the USA.  My husband wasn’t much better; he told me he knew his cactuses had been over-watered when he saw mushrooms growing in their pots!

Call it what you will – rock garden, trough garden, crevice garden, desert garden. From big deserts to tiny tufa troughs, cactuses and succulents can be grown and enjoyed in many situations.  I know it’s the middle of winter right now, but I’m thinking of the sunny joy of seeing the Community Heroes Crevice Garden in Arvada and the new steppe gardens at Denver Botanic Gardens in the summer of 2016.  These showed me what could be achieved.  And as I gaze at the tips of Opuntia (prickly pear and cholla) plants poking through the snow in my front yard today, I am in awe at the extremes these amazing plants can tolerate.

OLYMPUS DIGITAL CAMERA

Opuntia x pinkavae


Our front yard faces north, not auspicious for cactus growing, but safely out of bounds to the dog and small grandchildren, and raised up above the sidewalk, so safely out of reach of passers-by.  The area I designated to be the “desert garden” is about 20 x 10 feet, bisected by the path from the sidewalk to the front door.  Despite its northerly aspect, this area does get a lot of sunshine from spring to fall.  A minimum of six to eight hours of direct sunlight daily is recommended for cactuses.  When we moved in, this part of the garden was just a boring flat patch of clay soil with rather elderly wood mulch strewn over it.  Again, not exactly the well-drained, lean (in terms of nutrients) soil usually associated with cactuses.  But I like a challenge!

To get things started, I raked off the wood mulch and underlying landscape fabric to reveal a flat, compacted, grey soil surface covered in the wriggling, white stems of bindweed like ghostly spaghetti.  I pulled as much of the bindweed as possible. Then to create some height and slopes I dug and shaped the soil into small hills sloping down towards the sidewalk.  We inherited hundreds of large granite boulders with the back yard, so my son and husband hauled a couple of dozen out to the front for me.  I chose the most attractive boulders and made sure they were of similar or complementary colors.  These were placed on the slopes, either singly as “specimen boulders” or in groups forming little “canyons” in which I could plant.

OLYMPUS DIGITAL CAMERA

Rocks, soil, river rock and neighbor’s turf

The slopes help to ensure rain (when we get it) runs off quickly so the plants don’t sit in puddles.  Pockets of water are trapped by the boulders giving little damp areas against the boulders and allowing water to slowly trickle down into the soil below.  To improve the soil drainage further, I dug in a couple of trailers’ worth of “squeegee” to a depth of approx. six to eight inches.  This is the name around here (I gather) for crushed gravel.  It is pinkish in tone and halfway between pea gravel and sand in size. Areas of small river rock (obtained for free from a neighboring garden which was being “re-done” – I love a freebie!) were laid as a transition from the “desert” to the greener area of the yard and the sidewalk.  After planting, a thick layer of pure squeegee was used as a mulch over the whole area.  This has been very effective at keeping the bindweed at bay, helped by merciless hand pulling of any little shoots that do make it to the surface.

The choosing of plants followed considerable book research, web browsing and advice from local nurserymen.  I used a mix of cactuses, succulents, grasses, small drought-tolerant perennials and bulbs.  Naturally, none of these are hot-house types.  They are all cold hardy down to at least Zone 4.  For many of them their natural environment is arid mountain-sides in Arizona and New Mexico where they bake in the summer and freeze in the winter. A couple of dwarf pines provide year-round green and structure.  (I had to remind myself that these two needed regular watering, unlike the rest of the desert garden, as they are young trees, albeit small.)

OLYMPUS DIGITAL CAMERA

Pinus mugo var. pumilio

Planting took place in June 2015, so these plants are now “enjoying” their second winter in our garden.  They spent two and a half months under snow in winter 2015/6 and came up smiling in spring 2016.  There were just two losses, both small Yuccas which had rotted at the crown.  Fortunately, I had extras safely potted up behind the house, so they were immediately replaced.

For the first summer, I watered maybe twice a week, using the mist spray on the hose head.  The second summer, 2016, I did not water at all.  The winter snow that laid on the area for two or three months or more, had provided a good reservoir of moisture which saw the garden right through the summer.

The immediate effect after planting was of a lot of very small plants stranded in a gravelly desert.  I believe in buying small and being patient for a year or two while the plants bulk up, seed around and acclimatise to their environment.

OLYMPUS DIGITAL CAMERA

Just planted, June 2015


And, now, after another summer, they are starting to do so.  I see little “pups” on the Echinocereus.  There are Sedum and Stachys seedlings. The stars are the Opuntias (tree chollas and prickly pears) and the Delospermas.  These have grown quickly and the Delospermas were carpets of jewel-like flowers for months on end.  Dianthus and Artemisias are soft foils to their prickly companions. Groups of Nasella tennuissima provide a feathery backdrop and transition to greener and moister plantings at the rear.  The gentle movement of these grasses is a nice contrast to the static cactuses. The little species tulips ‘Persian Pearl’ popped up beautiful purple-red blooms with yellow centers in spring.  I hope to see more of these this coming spring.

OLYMPUS DIGITAL CAMERA

Tulipa pulchella @Persian Pearl’

OLYMPUS DIGITAL CAMERA

Delosperma ‘Fire Spinner’


OLYMPUS DIGITAL CAMERA

Summer, 2016 (after the hail storm had knocked off all the flowers!)


Now it is getting established, it really doesn’t require a lot work.  No watering if we have enough snow in winter.  Minimal weeding.  A gentle blow-off of leaves and some careful extracting of same from the Opuntias’ prickles with the kitchen tongs once in the fall.  That’s it.

I love my desert garden and see passers-by enjoying it too and that just adds to the pleasure for me.

PS:  Cactus? Cacti? Cactuses?  Who knows … ?? Who cares … !!

Anne Hughes/a Denver County Master Gardener

https://communityheroesgarden.jimdo.com/

http://www.botanicgardens.org/

www.coloradocactus.org

Hardy Succulents: Tough Plants for Every Climate by Gwen Moore Kelaidis. Publisher: Storey Publishing.

Cacti and Succulents for Cold Climates by Leo J Chance. Publisher: Timber Press

Plant List

Cactuses

Echinocereus coccineus

Echinocereus triglochidiatus ‘White Sands’

Escobaria forcottei ‘Koenesii’

Agave utahensis var. kiahabensis

Tree cholla – Opuntia imbricata var. arborescens ‘White Tower’

Tree cholla – Opuntia arborescens var. viridifloa ‘Santa Fe’

Creeping cholla – Opuntia clavata

Prickly pear – Opuntia x pinkavae

Texas red yucca – Hesperaloe parviflora

Yucca flacida ‘Bright Edge’

Herbaceous perennials, bulbs and grass

Dusty miller/artemisia – Artemisia ‘Beth Chatto’ & Artemisia absinthium ‘Silver Frost’

Woolly thyme – Thymus pseudolanuginosus

Yarrow – Achillea sps. various

Sedum- Sedum spectabile various

Pinks- Dianthus sps. various + garden cuttings

Rock rose – Helianthemum sp.

Ice plants – Delosperma ‘Fire Spinner’ &  ?

Two row stonecrop – Sedum spurium ‘Tricolor’

Other stonecrops – ‘Vera Jameson’, ‘Lidakense’, ‘Angelina’

Mullein – Verbascum bombyciferum ‘Polar Summer’

Lambs ears – Stachys byzantinus

Feathergrass – Nassella tenuissima ‘Ponytails’

Species tulip – Tulipa pulchella ‘Persian Pearl’

Trees 

Dwarf mugo pine – Pinus mugo  var. pumilio

Dwarf mugo pine – Pinus mugo ‘Teeny’