Category Archives: Amendments

Colorado Gardening Calendar for April 2024

By: Molly Gaines, CSU Extension-Denver Master Gardener since 2019
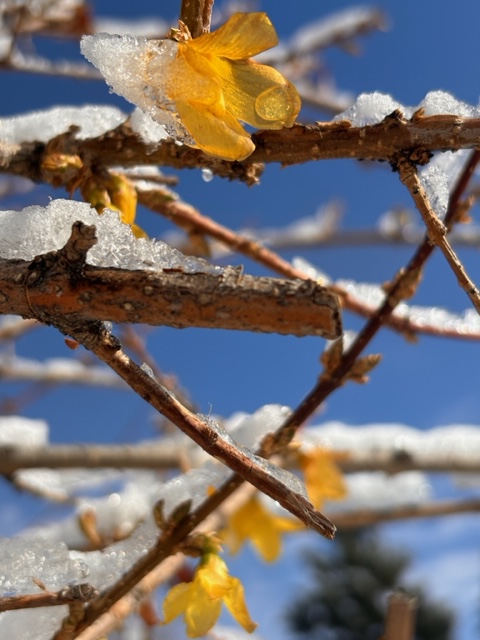
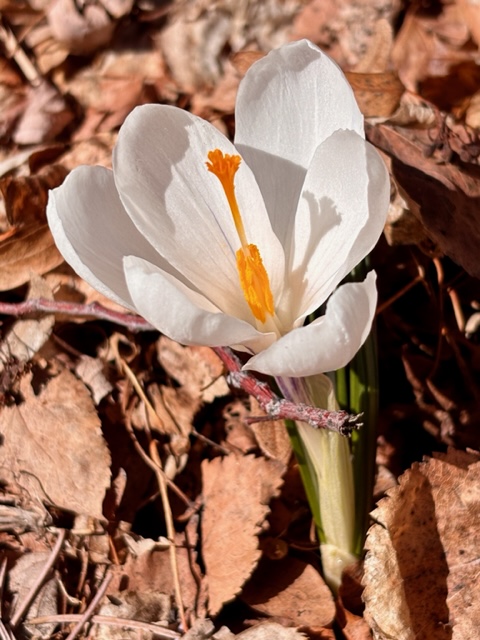
Signs of spring are everywhere in Denver. Daffodils, crocus and other spring flowers in full bloom one day; covered in ice and snow the next. Oh, to be a gardener at 5,280 feet!

While it’s too early to spend a lot of time planting, it’s a perfect time to prepare your soil, garden beds, tools, pots and lawn for the 2024 growing season. Below are a few gardening activities to consider before Mother’s Day, May 12 (around the safe zone from hard frosts) for planting most plants, flowers and vegetables.
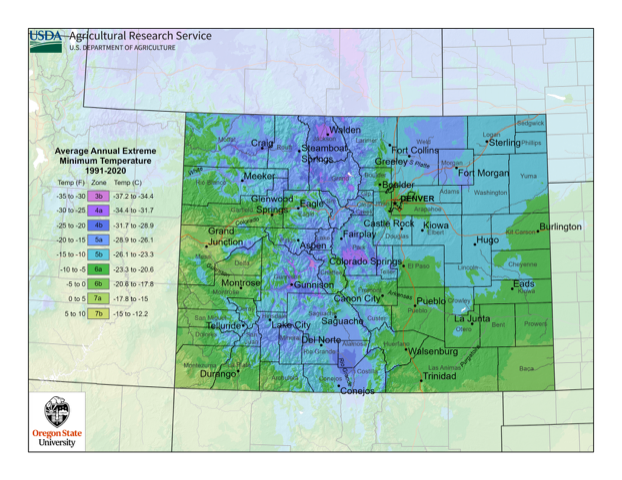
As you plan your garden, it’s worth noting that some of the Denver metro is in a new gardening zone. Last November, the USDA announced updates to its “Plant Hardiness Zone Map,” updating this go-to tool for gardeners for the first time since 2012. The new map, which can be found here, places parts of Denver in Zone 6a rather than 5b. Zone numbers reflect the average extreme minimum temperatures and help determine what plants will thrive in each zone.  Higher numbers equal incrementally warmer low temperatures. For background about how to use this map as a planting guide, visit this helpful article from the National Gardening Association’s learning library.    
Vegetable Garden

  • Clear remaining debris. Pull emerging weeds.
  • When the soil is dry, add a fresh 2-3-inch layer of compost to your beds. This supports soil health and plant vigor. Gently work compost into the top layer of your existing soil with your hands, a trowel or a cultivator. Let rest a few weeks before planting.
  • Plant frost-tolerant spring plantings, such as peas, spinach, arugula, radishes, Swiss chard, etc.
  • Start indoor seeds for warm-weather vegetables such as tomatoes, peppers, squash, melons, etc.
  • Reference this Vegetable Planting Guide to plan what you will plant when.

Trees & Shrubs

  • The snowpack is solid Colorado-wide this year, well above 100 percent. This includes Denver. That said, if this month is dry, be sure to water your trees and shrubs.
  • Early this month, prune deciduous trees, conifers and summer-blooming shrubs.
  • Later in April into mid-May, prune rose bushes. For details on exactly how, why and when to do this, visit here.  This is weather dependent so watch for low temperatures and delay if a cold snap is predicted.
  • Remove broken branches from trees and clear dead leaves and decayed fruit from the base.
  • If you’re looking to plant a new tree, consider the Park People’s annual fruit and yard tree sale that begins April 20. Trees range from $50 to $80, and sales support the Denver Digs program. More details can be found here.  

Lawn Care

  • Prep your mower, sharpening the blade as necessary and conducting other maintenance. Lawn mower blades should be sharpened at least once per season.
  • If you use a pre-emergent weed product, apply in early April. For more details about how to use, visit here.
  • Fertilize as desired, reading labels for proper application. Keep in mind that fall is the most important time for lawn fertilization. Applying only in the spring can mean excessive top growth and shallow root systems.

Perennial Beds

  • Cut back perennial plants if this wasn’t done last fall, leaving 3 inches of the plant above the soil.
  • Similar to your vegetable garden, the soil in these beds will also benefit greatly from compost, with the exception of native plants which generally prefer unamended soil.
  • Pull emerging weeds now. Stay on top of them from the start.
  • Divide overgrown perennials such as chives, sedum, grasses, phlox, daisies, hosta, etc. This will lead to healthier plants and better growth.

Other April Gardening Thoughts

  • Assess garden supplies. Purchase or plan to borrow anything needed. Sterilize and sharpen garden tools.
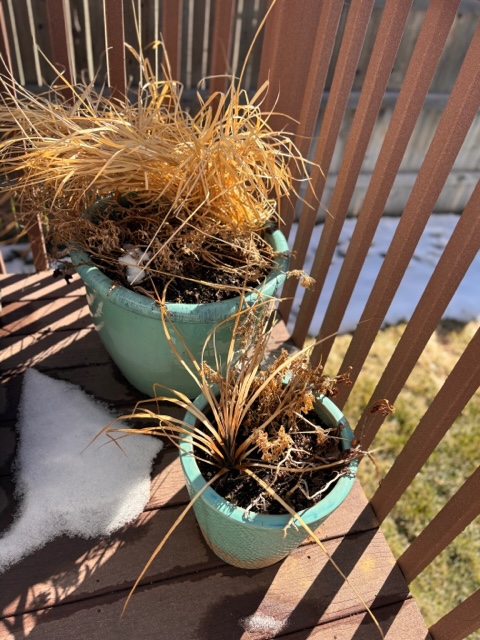
  • Empty any pots or containers still holding last year’s dead plantings. Clean and disinfect them to prevent disease in new plantings.
  • Denver Water recommends waiting to turn on your irrigation until after the last freeze, typically in early May. Hand water until then.
  • Sow wildflower and pollinator seed mixes.
  • Prepare for frost, hail and other bad weather. Have sheets of plastic, old bedsheets and five-gallon buckets in easy reach for late-season snow or spring and summer hail. Remember the hailstorm that hit Denver late June last season?
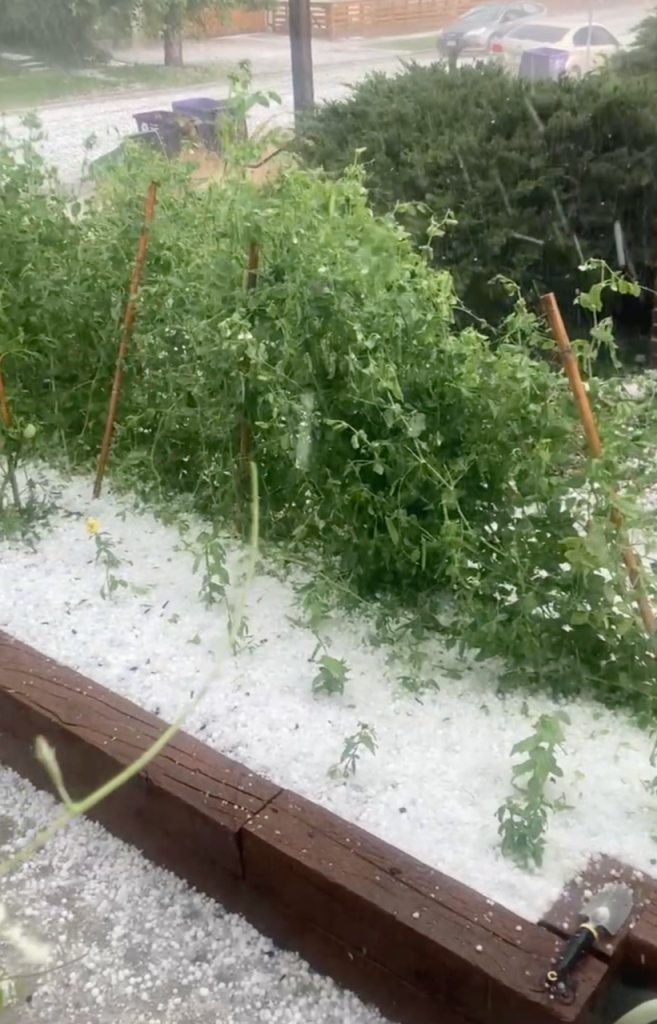
Springtime in Denver is special. I love watching new life slowly unveil itself. It’s a time full of promise, new beginnings and high anticipation of the color, flavor and textures around the corner. The more prepared you are in April, the more enjoyable your summer gardening season will be.

As always, if you have questions about plants, planting and any other gardening and yard related topics, visit the CSU Extension Yard and Garden website for tips.

How to Build a Three-Bin Composting System

By Rikki Hanson
CSU Extension-Denver Master Gardener since 2014 and a Denver Urban Gardens (DUG) Master Composter since 2013

Composting is an amazing process that produces one of the best soil amendments gardeners can use. One of my favorite composting systems uses three bins for creating brown gold in your own backyard. This composting system is efficient and gives the option of having two bins to work with at all times. It can also be built to fit any space, making it easy to maintain.

To Build a Three-bin Composting System, you’ll need:

  • Gloves
  • Untreated barriers for the three bins, such as bricks, cinder blocks, nontoxic landscape timber, chicken wire, 2×4 construction lumber, wooden pallets, etc.
  • Pitchfork or shovel
  • Tarp or plastic cover
  • Sifter

Step 1: Finding a Location for Compost Bins

In our semi-arid climate it’s important to locate the three-bin system on a level site, in a semi-shady location that’s protected from drying winds. With our hot summers and intense sunlight, compost in a south or southwest-facing location could potentially heat up too much, killing the living decomposers.

Step 2: Building the Bins

Set up the bins to fit your space, such as 3x3x3-feet or 5x5x5-feet using bricks, blocks, lumber or your choice of building material to create three separate bins.

CSU Extension explains the three-bin system in the Fact Sheet on Composting Yard Waste as an efficient wood structure that allows plant material to be aerated by turning it from one bin to the next as it decomposes.

Once the three-bin structure is in place, use a pitch fork or shovel to expose about an inch or so of earth in each bin area. Exposing the bottom of the bin attracts microorganisms living in the soil.

Step 3: Adding Materials to Bins

Add organic matter to two bins and leave one bin empty at all times to promote faster compost production and allow turning the material from one bin to another.

Spread 4-6-inches of mixed, chopped up carbon material, the tough brown, woody materials like leaves, cornstalks, straw, shredded newsprint, paper, brown paper bags, small amounts of sawdust, vacuum contents, wood chips, clumpy grass and discarded stems from annuals pulled at the end of the season.

Add 2-to-4-inches of mixed, chopped-up nitrogen material, the green layer that includes vegetable scraps, coffee grounds, grass clippings, alfalfa, eggshells, oats, beans, bread, fruit scraps and rinds, hair, garden waste, cotton rags and strings, pond algae and non-synthetic dryer lint.

NOTE: Don’t add meat, dairy products, fat, bones or lime. Eggshells are fine, but not eggs.

If you have a large quantity of grass clippings, let them dry for a day or two before adding them to the pile. Untreated grass clippings can be added to food scraps, alfalfa hay, weeds, or hair to vary texture.

Add a thin layer of soil from the garden on top of the green layer to introduce decomposing microorganisms to your system.

Composting Tips:

  • Mix and moisten the layered sandwich of brown and green material plus soil until it feels like wrung-out sponge.
  • The layering should continue until the piles are about 3-4-feet tall in two of the bins.
  • Cover with a tarp or opened black trash bag and secure with rocks or bricks to help trap heat and activate the microorganisms and decomposers.

Step 4: Maintaining the Bins

When the bin system is set up, maintaining them is a breeze. Keep a compost bucket in your kitchen for the valuable food scraps and empty them into a bin when you turn your pile every 2-3 weeks.

You have two bins to work with, so if you want to dispose of your scraps sooner, go for it! Or you can store the food scraps in the freezer until you’re ready to turn.

For every new nitrogen/green material you add, you also want to add double the amount of carbon/brown material every time you turn the piles.

Ask friends and neighbors for their leaves to help you while diverting their organic materials from the landfill.

Step 5: Collecting the Compost

After you’ve turned the materials in your bins for a few weeks, you’ll see the raw materials have turned into a rich brown compost. Congratulations! You now have the most sought-after soil amendment money can buy.

Now’s the time to use chicken wire, ¼-inch mesh, old fireplace screen or a laundry basket to sift the compost. The compost can be as fine or as chucky as you want depending on where you want to use it and how much of it you want to use or give away.

Need Answers to Your Composting Questions?

CSU Extension-Denver Master Gardeners can answer your composting questions or direct you to other local resources: email denvermg@colostate.edu or call 720-913-5278.

Sheet Mulching Re-visited

Last week’s blog included a link back to our October 2016 blog on experimenting with sheet mulching (also known by some as “lasagne gardening”) http://wp.me/p5JEJY-YZ so I thought we ought to re-visit and see how that worked. Sheet mulching is the layering of different kinds of compostable garden waste (sometimes with old newspapers or cardboard as well) on the surface of poor garden soil. The aim is to quickly add organic matter to the existing soil, improving drainage, water retention and fertility.

OLYMPUS DIGITAL CAMERA

I had several questions in my mind last fall when this experiment was carried out:

1. Will the cardboard decompose?
2. Is the “green” and “brown” balance right?
3. Will the raccoons and skunks churn it all up?
4. Will there be a crop of new weeds from the imported materials?
5. Will the cold Colorado winter simply stop any decomposition from taking place?
6. Will there just be a smelly slimy heap to remove next spring?
7. OR, will we have achieved that elixir of gardening – fertile, well-drained, moisture-retentive soil???

The experiment has been going on for some eight months now and these are the answers, so far:

1. YES. Some digging about at the base of the layers revealed no sign of cardboard except for a few stray bits of plastic tape that didn’t get removed when I broke down the cardboard boxes.
2. Probably YES. Though close inspection revealed that in some parts the grass clippings were laid too thick and would have done better if they’d been mixed in more with the dried leaves.
3. NO. Apart from a few little exploratory digs by some critters, the layers remained intact.
4. NO. Initially there was some germination from seeds (unidentified grass/cereal) which were in the chicken coop material I used, but these were easily pulled in the first couple of weeks. Since then not a single weed has appeared.
5. NO. Digging into the layers revealed pretty well composted good, brown material though not everywhere. Lots of worms too. Straw seems to have been the hardest to break down and is still recognizable in some places.
6. NO. See 5.
7. Well, MAYBE ….

IMG_1049

The native grey clay soil is still there beneath the sheet mulch

IMG_1047

Well on the way to being compost

There is no doubt that we now have deep layers of composted garden waste on our borders. The layers have not been totally absorbed into the soil below. They have shrunk in depth by a couple of inches which is probably mainly due to gravity and the reduction of air pockets. I accept that these borders may remain as “raised” borders for some time.

So, what happens next? I expect these sheet mulched borders to continue to decompose over the summer and, perhaps, by next spring will no longer be “raised”.

But I can’t wait until then to get new plants in.  Already, I have a planted a Japanese maple and some hellebores in one of the beds (both should benefit from the rich compost.  I dug holes in the compost layers, put in some native soil from elsewhere in the garden and planted and watered.

I was concerned that the compost itself would not hold the plant roots securely which is why I mixed in garden soil from elsewhere to give weight. It will also provide mineral nutrients that may not be present in the compost/mulch. Now, some six weeks later, the new plants are all well rooted and looking good.

IMG_1227

Japanese maple and hellebores just planted

So, is it worth doing? I’m giving the experiment a qualified “yes” at this stage.

I think it works for areas that have been neglected or are being cultivated for the first time. There is an initial effort in gathering the materials and building the sheet mulch layers, but then you just sit back and wait.

Does one big “hit” of compostable material work better than cumulative additions over the years? I don’t know. Time will tell as I compare these borders with others in the garden. Certainly, I got a lot more compost onto the borders than I could generate annually from my compost bins. (You don’t get a lot of kitchen waste from two people; and a modest-sized, young garden doesn’t produce much waste either.)

It might have been less work to simply go out and buy bags of compost from the garden center or big box store. That would have been expensive (my materials were all free). There are no regulations on what goes into bagged compost for retail sales.  At least I knew exactly what was in mine.

Aside from these thoughts, there has definitely been a great sense of satisfaction in doing the experiment.  It was interesting.  It was good exercise.  It was free.  I turned what other people thought was just rubbish messing up their yards into useful, re-vitalizing material for our garden and plants.

Anne Hughes/A Denver County Master Gardener

Never Put a $10 Plant in a 10¢ Hole and Other Gardening Tips From Denver Master Gardeners

planting-1898946_1920Passionate gardeners love to talk about gardening, so with that in mind, we recently asked Denver Master Gardeners for their best gardening advice. Responses included tried-and-true practices, creative suggestions and good reminders for all of us as the gardening season kicks into full gear.

As the title of this post implies, we believe that great plants come from appropriate soil preparation. Amending with compost is often imperative as soil in our region tends to lack organic matter. But proceed with caution, as some plants, such as natives, prefer a leaner, less fertile soil. Too rich soil will cause these plants to underperform and often just flop over. It pays to do a little homework before planting, read seed package directions and have your soil tested.

One of our gardeners shared her recipe for amending soil: Add 1/2 a handful of both Alaskan fish pellets and triple super phosphate to half a bucket (such as a kitty litter pail) full of compost. Mix this into the planting hole for strong root development and beautiful blossoms.

A tip borrowed from the Rock Garden Society is to plant bare root. By gently shaking off most or all of the soil that the plant is purchased in, the plant will adjust to the garden soil without the soil interface (or boundary) that can occur between two soil types. Bare root planting promotes healthy root development.

mulch-1100555_1920Mulch, mulch, mulch is the mantra of many of our survey respondents as it keeps weeds out and moisture in. Add it like crazy each time you dig in the veggie, perennial and annual gardens and don’t forget container plants too. Small to medium-sized bark chips are popular, practical and pleasing to the eye. Natural mulch options are very effective, including not quite finished compost from the compost bin which will add carbon, feed living organisms, prevent water runoff and prevent compaction. Local arborists are often willing to drop off wood chips which would otherwise fill up the landfill. In the fall, mow over your leaves and spread them throughout the yard, they’ll breakdown by spring and add organic matter to your soil. Consider purchasing a chipper to grind up branches and other garden waste.

garden-hose-413684_1920Suggestions for responsible use of water include watering when the plant needs it instead of on a set schedule. Soaker hoses, often made from recycled material, are effective for watering plants at the soil line. Plants (even xeric ones)  need moisture to maintain healthy roots and overall strength, but often less than we think. For example, the Water Smart Garden at the Denver Botanic Gardens is watered about seven times during the season.

Weeding can feel like a no-win battle, but attacking weeds after a soaking rain makes the task easier. Pull weeds and unwanted volunteer shrub and tree seedlings when they are small, before they take hold in the ground or develop seed. Add stepping stones to the garden to avoid stomping on plants and compacting soil when working in the garden.

bindweed-1207738_1920A clever tip to eliminate stubborn weeds, such as the nasty bindweed shown here, is to take a large piece of heavy cardboard, make a cut from the edge to the center. Keep the cardboard as level as possible, slip the vine in the center and spray the vine with the herbicide of your choice or horticultural vinegar, which is sold in garden centers. The cardboard will protect surrounding plants from overspray. Aggressive weeds may require multiple treatments during the season.

One of our members recommends a tomato planting technique passed on through generations of farmers. She adds blackened banana peel to the soil and feeds them with skim milk upon planting and again one month after that. This less conventional practice yields her sweet, abundant fruit. While CSU can’t vouch for the scientific efficacy of this, the banana could be adding potassium and the addition of calcium may reduce the chances of blossom end rot.

plant-1585251_1920Growing tomatoes in containers is recommended for those with limited space. Select varieties which produce smaller fruit such as Patio, Cherry or Sungold. Use a large container (18+ inches in diameter), a sturdy support and a tray with casters. This allows plants to be moved from the path of hail or to optimal conditions. Container plants of all kinds benefit from weekly feeding of 1/2 strength fertilizer.

To keep pests at bay, try a thorough weekly spray of water during the growing season, including the walls of the house and fence. It’s a kinder way to shoo pests away.

If your vines need a sturdier trellis consider building one out of remesh, which can be found at hardware stores. It makes a durable, cost-effective support and can easily be cut with bolt cutters. It also can be attached to supports to create a dog run or create plant cages.

botanical-garden-413489_1920In the flower garden, invest in perennials for texture and dimension and add annuals for bold color. “Enjoy the randomness of some plants that choose their own spots to thrive” suggests one gardener. What a positive way to think of the seedlings that sprout up at this time of the year. Remember, too, that perennials may not come into their glory until the second growing season.

Gardening is a four season hobby. Winter watering of trees and shrubs will help keep them healthy and  veggie gardeners can get a jump on the season by using a cold frame or floating row cover to get an early start on lettuce, spinach and other cool season crops. Fall is a fantastic time to fertilize, aerate and over-seed the lawn. It is also an ideal season to divide perennials so that they settle in and are ready to take off in the spring.  Share your divisions with your neighbors, too, or trade for plants you’ve admired (envied?) in their yards. If you need more gardening space, solarizing or sheet composting is an excellent technique to ready a new garden bed and can be started throughout the year.

And lastly, a veteran gardener advises us to “Remember each little garden flower or planting arrangement is a moment in time. It will change. Don’t worry about it or take it too seriously.”


Written by Linda McDonnell with thanks to the many Denver Master Gardeners who shared their advice.

All photos courtesy of http://www.pixabay.com, a source of royalty free images.

Worm Composting – It’s Easier Than You Think (and it’s fun)

Are you looking for something to occupy your time after your garden is put to bed and the snow starts falling? How about vermiculture (aka worm composting)? It’s easy. It’s fast. It’s year-round. It reduces kitchen scraps going to the landfill. And it provides rich compost for your garden and houseplants.

Worm box worms are not your average earthworms. The most common worms for vermiculture are Eisenia Fetida, commonly known as red wigglers. Red wigglers love kitchen scraps.  They will eat pretty much anything from your kitchen except meat and dairy products. Avoid meat and dairy because they can attract unwanted pests to your box. Some people say not to feed them citrus fruit and peppers. I have not had a problem giving them citrus or peppers as long as both mixed in with other scraps.

Red wigglers enjoying a meal of kitchen scraps

Red wigglers enjoying a meal of kitchen scraps

Worm composting produces rich, finished compost called worm castings. And it produces them faster than your regular compost bin. And you don’t have to turn it.  And the worm castings are richer in nutrients than regular compost. What’s not to like? The worms do all the work and you get all the rewards. It seems unfair, but the worms don’t seem to mind.

Finished worm castings

Finished worm castings

The first thing you need is a box to hold your worms. Many people make worm boxes out of Rubbermaid containers. I prefer wood boxes because I think a wood box breathes better. Worms need air. If you use Rubbermaid containers, make sure to drill plenty of holes in the container for air and drainage. I know what you are thinking – “Won’t the worms escape through the holes?” They won’t for two reasons.  They need a moist environment to live and they are photophobic (they hate light). Your dark, moist (not wet) box filled with bedding (shredded newspaper) and kitchen scraps is worm heaven for them. They are very happy right where they are.

Red wigglers dwell near the soil surface so the box does not need to be deeper than 12 to 18 inches. One foot wide by two feet long is a good size for a small household. Two feet by three feet works for a bigger household or if you have a lot of kitchen scraps.

Red wigglers like about the same temperature range as us. Not too hot and not too cold. The ideal range is 55-77 degrees Fahrenheit. A basement, laundry room, heated garage, kitchen or living room corner are all great places for a worm box. Some people are reputed to use worm boxes as coffee tables, which I suppose could help with awkward lulls in conversation – “Guess what’s under the hors d’oeuvre plate?” Worm boxes can be kept outside in warmer weather, but be careful that the box does not get too warm or too cold. A well-managed worm box is odorless and unobtrusive.

Now you need worms. One great way to get red wigglers for your box is from someone who already has a worm box. A healthy box produces a lot of worms. Most worm composters are happy to share their surplus worms with people just starting out.  You can find worms on the internet. Years ago I ordered my worms on the internet and they came in the FedEx box with air holes punched in the side with a pencil. The worms did not seem any worse for the wear and their descendants are still going strong many years later. You can also find worms for sale locally (see the link below).

A great place to learn about worm composting is Denver Urban Gardens (DUG). They have a basic worm composting outline on their website.  DUG also holds worm composting workshops in the spring and summer. The website has a link on where to get worms in the Denver area. Check the DUG website to find a class schedule for next year.  Vermiculture at DUG.

Also, check out this great YouTube video on worm composting from CSU Extension and Tagawa Gardens.  It is a good visual primer on starting a worm box.

If you really get the bug to start worm composting, the classic book Worms Eat My Garbage by Mary Appelhof is thorough guide to starting and maintaining a wormbox.

One last word of advice: don’t try to name all of them.


Written by Mark Zammuto, a Denver County Master Gardener

Sheet composting or … cooking up an experiment in the garden

I’ve always known that the soil in the garden was the key to planting success.  So, when we started our new Denver garden in 2014 we turned in most of the turf and dug, weeded and added leaf mold to the topsoil.  (We had kept all the fall leaves for this purpose.)  Then all the bare soil was covered with a 3-4 inch mulch of wood chips.  Key trees were planted in spring 2014 with more trees, shrubs , ornamental grasses and herbaceous perennials following in 2015.  We watered diligently till the winter and snow came.  We thought we’d made a good start.

In spring 2016 I was delighted to see our young trees and shrubs budding out .  Most of the herbaceous perennials had survived, but they didn’t increase in size during the summer. They hardly bloomed.  They didn’t die.  They just sat there.  Watering seemed to make no difference.

I figured that the larger plants (trees and shrubs) were able to get their roots down into the clay where there was more moisture and more nutrients.  But the perennials were struggling with their smaller root balls being mostly in the 8-10 inches of sandy loam topsoil.  Here water drained away quickly and despite the wood chip mulch, the unrelenting sun and high temperatures baked the soil to an iron hard cap over dull powdery stuff below (if you could get the spade in that far!).

I had a soil test done by the soil laboratory at CSU which told me that our topsoil was low in nitrogen and organic matter.  Ah-ha!  That is why the plants weren’t thriving.  The lack of nitrogen was slowing the development of stems and leaves.  The lack of organic matter meant the soil wasn’t holding sufficient water for the plants’ roots to take up.

OK, I thought, we have to do more to improve the soil. I’ve never liked the idea of just throwing chemical fertilizers at the garden.  It’s expensive, wasteful and potentially dangerous to the wider environment.  Double-digging and adding store-bought amendments (of uncertain quality) is back-breaking and expensive. What to do?

Soil is not tilled in the natural world.  Fertility is built up by the decomposition of leaves, twigs and other plant waste on the surface.  Soil texture and nutrient levels are also improved by the actions and decomposition of organisms living in the soil and plant roots.  I’d just been reading about permaculture gardening techniques and the soil improvement technique of “sheet composting” or “lasagna gardening” seemed to be what we needed.

This is a way of building up organic matter and nitrogen in the soil without digging.  You gather different sorts of compostable material (green garden waste, compost, grass clippings, straw, dried leaves, well-rotted manure are just some you can use) and pile them up on the soil in layers.  Hence “sheet” composting or “lasagna” gardening. Essentially, you are making compost directly on top of the soil rather than in a compost bin elsewhere and then transferring it later to the garden.

Many books suggest that you also lay newspapers or plain cardboard down first to smother any existing weeds in the ground.  This is usually where you are trying to improve a weedy, uncultivated area.  But such two dimensional materials can be a barrier to the passage of water, nutrients and the essential soil creatures (see below) that you need to make the process work.

Cardboard layer to start

Cardboard layer to start. Existing wood chips raked on to path first.

Cardboard often incorporates waxes which inhibit the movement of moisture and make it hard to break down.  Shredded newspaper in half inch layers may be a better alternative, but not perfect.  I did use cardboard, but in hindsight probably didn’t need it as the soil was not weedy at all.

Every layer has to be thoroughly soaked with water including the existing soil.  The fungi, bacteria, insects, beetles, earthworms etc. that will break down your materials need water to do their work.

My “recipe” comprised from bottom (soil level) to top:

  • cardboard (on reflection, probably not needed)
  • garden compost (precious stuff from my own bins)
  • grass clippings from a neighbor’s “pile” and half a bag of left-over peat moss
  • partially decomposed garden waste from another neighbor’s “pile”
  • wood shavings and straw from another neighbor’s old chicken shed
  • grass clippings again
  • leaves collected in our leaf cage from the previous fall
  • more partially decomposed garden waste
  • wood chips to hold it all in place and for aesthetic appeal

The layers amounted up to about 12 inches of material.  Each layer was watered in.  Grass clippings were laid in approximately 1 inch layers while the other materials were laid in 3-4 inch layers.  You need much more brown material by volume than green.

Straw and partially decomposed garden waste

Straw and partially decomposed garden waste

Just like making compost conventionally it is important to have a mix of “green” and “brown” materials or, in chemical terms, sources of nitrogen and carbon.  Too much green (e.g. grass clippings) and you have too much nitrogen.  Too much nitrogen will encourage leafy top growth in your plants at the expense of root and fruit/flower development leading to straggly unhealthy plants.  Too much brown and the materials won’t break down sufficiently.

But the green/brown or nitrogen/carbon balance isn’t just about your plants.  All the living creatures in your soil need the right balance too.  They have to live, multiply, work the soil, die and decompose in order to release the precious nutrients to your plants.  The soil creatures need to feed before your plants can.

OLYMPUS DIGITAL CAMERA

Last year’s leaves go on

It’s important that the materials you bring in don’t also bring in weed seeds resulting in a huge weeding problem for the next year.  But the theory is that any weed seeds that do come in will rot in the damp condition of the layers. And if they don’t rot first, they won’t germinate anyway due to lack of light.

The biggest part of this job is sourcing and gathering all the materials.  There were many trips to neighbors’ gardens with rakes and shovels.  Then the trips home again with a car full of other people’s “waste” in old plastic bags. It is hard work.

OLYMPUS DIGITAL CAMERA

The finished thing

So, now we have some 60 feet of garden borders resting for the winter under their layers of composting (we hope!) materials.  We also have many other areas where fewer layers were used (mainly straw with grass clippings or partially decomposed garden waste) to about 3-4 inches to perk up the soil around and between trees and shrubs.

Many questions remain:

  • Will the cardboard decompose?
  • Is the “green” and “brown” balance right?
  • Will the raccoons and skunks churn it all up?
  • Will there be a crop of new weeds from the imported materials?
  • Will the cold Colorado winter simply stop any decomposition from taking place?
  • Will there just be a smelly slimy heap to remove next spring?
  • OR, will we have achieved that elixir of gardening – fertile, well-drained, moisture-retentive soil???

Well, the answers to all these questions will be given next year when I report back in another post.

In the meantime, what do you think? Have you tried this? Did it work well? Please share your comments below.

Anne Hughes  – Denver County Apprentice Master Gardener