Category Archives: culinary plants

Rinse and Repeat:  Extend the Vegetable Season with Canny August Planting

By Terry Deem-Reilly, CSU Extension – Denver County Master Gardener since 2003

Cultivating a vegetable garden this spring was certainly a challenge – we had late snow, followed by almost constant rain and, finally, some killer hailstorms. Seeds and seedlings were drowned or drifted into neighboring patches of soil and planting was delayed due to soggy soil conditions. Then cool temperatures and heavy rains required us to protect heat-lovers like tomatoes and peppers and stunted their growth. 

As I write this, we’re experiencing some typical July heat while forecasters are predicting a temperature dip that will lower temperatures to a more comfortable level. We can look forward to an abundant second harvest in September and October if we take advantage of better planting conditions this month.

WHEN AND WHAT SHOULD I PLANT?

Before answering the questions of when and what to plant, determine this year’s anticipated first frost date. Do this by counting backward from the number of days or weeks to maturity for each plant species. This will give you the date on which seeds must be planted. 

Find the first 2023 frost date for your city on the website of the Old Farmer’s Almanac. This resource estimates Denver’s first frost to occur on or about October 6th , however this is only an approximation – keep up with local weather predictions as summer turns into fall. And remember that we can be flexible, thanks to plant protectors and moveable containers! 

Next, decide what to plant. The Denver Urban Gardens site features a guide to vegetable planting for commonly grown vegetables. It shows the recommended number of weeks (not days) to plant before the first frost. The column headed “fall planting” has the information to reference for the late gardening season. Note that we’re inside of or past the optimal seeding date for a number of these plants. Given this, consider using vegetable starts instead of seeds, and/or grow in containers that are easy to move or cover as the first frost approaches.

If seeing drop-dead dates for planting better suits your style, check out the ‘Colorado Vegetable Planting Calendar’ on the Asia Farming website.

Before heading to the nursery –- and certainly before starting to plant –- take a look at Pueblo County Extension’s publication, “Late Summer and Fall Vegetable Garden Planting” for advice on plant selection and improving the tilth of soil that’s been used to grow the summer crop. 

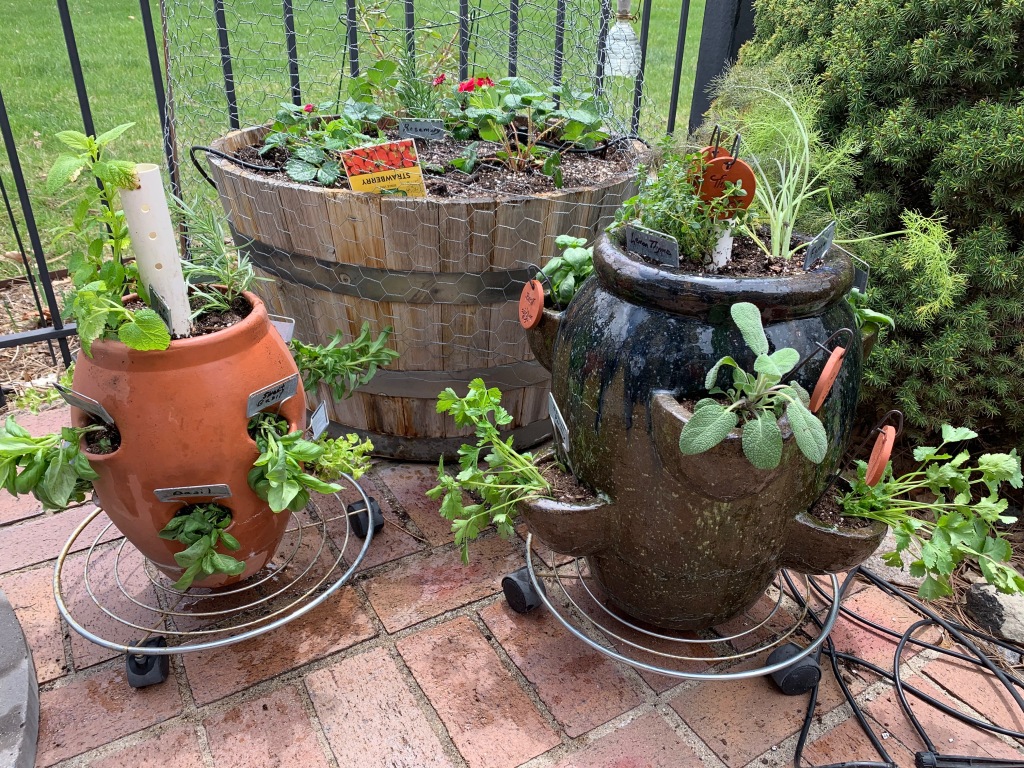
If you like perennial herbs – decorative or culinary –- look for them in pots when you’re out and about looking for vegetable starts and seeds. Herbs like winter savory, lavender, and thyme will overwinter and, in some cases, remain green for cold-weather interest. Mulch well and water regularly until the soil freezes in late November to promote good root growth for a fast start in the spring. Perennial herbs in small containers  can be brought inside during the winter and returned outdoors to perk up the garden as soon as nighttime temperatures warm to a safe level in spring. This website lists some perennials that survive Zone 4 and 5 winters and popular annual herbs for fall planting.

It’s not quite time to plant garlic, but if it’s on your fall schedule, the sheer number of available cultivars and flavors requires researching possibilities and ordering bulbs NOW. Here’s a good article about growing this crop in Colorado, featuring some well-performing varieties. Local nurseries are or will soon be stocking garlic bulbs but consult some mail-order sources for the more exotic types. And for everything essential to know about growing garlic in our climate, check out the Master Gardeners’ September 2020 blog post “‘Growing Garlic in Colorado.”’

PLANNING FOR DISASTER

Inevitably an unexpected run of bad weather will occur in September or October: a hard freeze, rains that drown seeds and seedlings, even a heavy wet snow that brings the growing season to a screeching halt by snapping plant stems in two and withering tender foliage. We can minimize this damage by using a few effective tools:

  • Row covers and frost blankets (sheets from the linen closet will work in a pinch)
  • Anti-freeze bags (these come in many different sizes and are great for bushy plants)
  • Cold frames (require advance construction but are handy year-round)
  • Morning watering when frost is expected that night (hydrated plants are more resistant to frost damage)

Good luck with your late-season veggies! As always, please contact the Denver County Extension with your gardening questions. 

Harvesting and Storing Vegetables for Peak Flavor and Freshness

By: Molly Gaines, CSU Extension – Denver Master Gardener since 2019

If you’re a vegetable gardener, you’ve likely begun to harvest some of the goodness resulting from your spring and summer efforts. My garden favorite, ‘Sun Gold’ cherry tomatoes, are just ripening. They taste like pure sunshine (those of you who’ve grown or eaten know what I’m talking about!) and I eat them like candy, straight from the vine. Because of this, it’s rare for more than a handful to make it into my kitchen.

Yet everything else in my garden — the herbs, cucumbers, green beans, summer squash and hot peppers — require some prepping, peeling, chopping, or cooking. They all need proper picking and storage until I’m ready to use them.

How and when to harvest, and how best to store your bounty, can be confusing. It’s a combination of art and science. I hope the following information helps guide you through one of the best parts of a vegetable gardener’s season: harvest time.

Knowing What’s Ready

In order to assess what’s ready for harvest, I do an early morning garden walk. It’s become one of my favorite parts of my summer days. It’s when I harvest vegetables from my garden, as it is best to pick in the morning when it’s cooler. There’s more time to gather your harvest and bring it into the kitchen before it wilts. Additionally, veggies regain moisture they’ve lost during the day, leading to overall better produce. See more about the benefits of morning harvesting here.

When you planted last spring, you may have noted when your produce should be ready. Every seed packet has a number of days until harvest, as do the tags in starter plants. However, “days to harvest” is an estimate, as it will vary depending upon your growing conditions. Soil fertility, sunshine, heat, water, etc. all impact maturity. In my own garden, our red onions should be ready to dig, but they aren’t even close because they’re partially shaded by large Zinnias above. For specific estimates on days to harvest for each vegetable, visit this helpful link from the University of Minnesota Extension. While Colorado’s climate is quite different from Minnesota, we have a similar growing season.

While it may seem counterintuitive, the more you pick, the more a plant will produce. Don’t let those zucchinis and cucumbers get too big; they won’t taste great or could be inedible. Pick produce frequently and when they are smaller, versus letting vegetables that are ripe enough continue to hang out on the vine. To keep my garden producing at an optimal level when I’m out of town, I like to hire neighbor kids to harvest or invite a friend who loves fresh vegetables to stop by and fill a bucket.

How to Harvest and Store

Harvest your produce gently and with care. Snapping off the end of your green beans or cucumbers will invite quicker decay in the fridge. It can also damage the plant, inviting disease and pests. If you’re not able to easily twist or pull a pepper or tomato or any other veggie from the vine, it’s time to use scissors or pruners. I always keep scissors close to my garden for easy use.

Speaking of proper storage, it’s disappointing to open the fridge and finding hard-fought basil browned, or last week’s fresh cucumber now mushy. We Colorado gardeners work very hard for our veggies, so it’s worth storing them properly until use. Visit here for a terrific guide to harvesting and then storing garden favorites, from when to pick to proper storage directions, including ideal temperatures.

What to Do with Excess Harvest

If you find yourself with more fresh produce than you can handle, there are a number of Denver-based organizations that will accept your extra vegetables. Here is a recent article listing some of those organizations. For more information about how to best contribute your produce locally, visit the Grow and Give website, for general donation information.

These harvest and storage tips should find you enjoying your summer bounty as long as possible, enjoying peak flavor and maximum freshness — and savoring every last bite.

Other Helpful Resources on Harvesting

https://planttalk.colostate.edu/topics/vegetables/1842-harvest-vegetables/

https://web.extension.illinois.edu/tog/harvest.cfm

https://growgive.extension.colostate.edu/wp-content/uploads/sites/63/2021/01/Colorado-Vegetable-Guide-2.1.pdf

Growing Vegetables and Herbs in Containers

By Lois Margolin, CSU Extension-Denver Master Gardener since 2011

Benefits of Growing in Containers

There are many reasons for growing vegetables and herbs in containers:

  • Place strategically in full sun areas.
  • Ease of use – no need to bend down.
  • Bring inside or easily cover in bad weather.
  • Limited outdoor space or no yard? Containers are perfect on patios, balconies, window boxes, or in small yards.
  • Planning to move this summer? Take your garden with you.
  • Add architectural, artistic, and textural interest to outdoor spaces.
  • Taller containers can keep rabbits out of crops.

Containers and Potting Soil

My favorite container is a plastic wheelbarrow. It holds enough soil to grow a delicious salad bowl of lettuces, spinach, kale, peas, scallions, and nasturtiums – even a tomato plant. It’s easily moved throughout the day to sunny or shady areas depending on what you’re growing. It’s also high enough that you don’t need to bend when planting, tending, and harvesting.

For vegetables, choose containers large enough for the plants at maturity. The wheelbarrow holds a lot, but smaller containers can hold a single tomato or pepper plant. For more information on container sizes refer to CMG Garden Notes #724.

All pots must have drainage holes to avoid root rot. Plastic containers are best for water retention. Ceramic pots need to be “high fired” to be frost-proof and not crack in winter. Wooden containers should be made from rot-proof lumber. Do not use creosote treated railroad ties for edible plants as they can be poisonous.

Strawberry pots are perfect containers for herbs. See my blog post on planting in a strawberry pot for tips on how to successfully grow in this container.

Large containers can be very heavy. If you plan to move the container around, place it on a sturdy container dolly. For taller containers, the bottom 1/3 can be filled with capped, crushed water bottles or packing “peanuts.”  (Test the peanuts by placing some in a glass of water to make sure they don’t dissolve.)  Place a layer of landscape cloth over this filler to keep out the soil. Then fill the remaining 2/3rds of the container with potting soil.

Do not use soil from the ground (native soil) as it’s too high in clay content and may have disease organisms, insects, or weed seeds.

Purchase good quality potting soil which is high in organic matter and contains perlite or vermiculite. Some brands contain water-holding polymers or gels. Or make your own potting soil by mixing 1/3 peat moss, 1/3 vermiculite or perlite, and 1/3 organic matter (compost).

For more information, see CSU’s Fact Sheets on growing salad greens and growing in containers.

Sun, Water, and Fertilization

When considering container placement remember sun requirements:

  • Fruiting vegetables – 8 hours of full sun
  • Root vegetables – 6 hours of full sun
  • Leafy vegetables and most herbs – 4 or more hours of sun

Group plants that require similar amounts of water and sunshine. In the heat of summer, you might have to water twice a day as containers require more water than in-ground plants. Check for moisture by inserting your finger into the soil about an inch. If it’s dry, it needs water.

Vegetables like consistent moisture. Ideally, water in the early morning so that plants can absorb the moisture and avoid wilting during the heat of the day.

Container vegetables also need more fertilizer than in-ground plants. I fertilize weekly with half-strength water-soluble fertilizer. You can also apply a time-release fertilizer when planting. Always follow the directions on the label.

Time to Plant!

Lettuces, spinach, kale, beans, zucchini, cucumbers, beets, parsley, cilantro, dill, radishes, and carrots do well in Colorado when planted from seeds. Longer maturation plants such as tomatoes, all peppers, most other herbs, and eggplants should be started early indoors or purchased in starter sizes. Check labels for the number of days till maturity. The metro Denver area has a short growing season – late May through early to mid-September (the average dates of the last frost in spring and the first frost in fall.) Higher elevations have an even shorter season.

Choose dwarf plants as they do better in containers than full-sized varieties. Cherry tomatoes do exceptionally well in containers. Try plants like Megabite tomatoes, Big Dwarf tomatoes, Potomatoes with clusters of yellow cherry tomatoes that grow on an 18-inch plant, Cute Stuff red peppers, Raven zucchini, and Hensel eggplants are all good options.

For vegetable containers that are decorative and colorful as well as productive, consider planting small flowers with the veggies. Marigolds add nice color as do nasturtiums that hang over the sides.

Edible flowers add drama and flavor to salads, main courses, and desserts. Not sure which flowers are edible? This CSU Fact Sheet has an extensive list.

Container gardening is fun, easy, and very rewarding. Remember to harvest as soon as the vegetables are ripe. Many plants will continue to produce during the summer and into early fall. ENJOY!

Horsing Around In the Garden & Kitchen

By Lori Williams, CSU Extension – Denver Master Gardener since 2016

I adore horseradish. I love the beauty and structure of the plant. It’s gorgeous with its wide, proud leaves standing up in the spring through summer and into fall. Horseradish leaves offer a unique texture and shape in the garden, and I want that drama in my landscape. When cut, the leaves look amazing in a vase mixed in with any flowers imaginable.

I also adore the horseradish root – a bold flavinator that is simple to harvest for culinary enjoyment. It’s easily transformed into a creamy condiment after a quick dig and cleaning, some grating and the addition of salt and vinegar. This “pickled” horseradish sauce is delish with grilled meats and a spoonful mixes wonderfully into marinades, soups, mashed potatoes and more. Mix 50/50 with your favorite ketchup and you have hearty cocktail sauce.

Though a delicious recipe enhancer, don’t underestimate the aromatic intensity unleashed as the root is cut and grated. Horseradish has a pungent compound called “allyl isothiocyanate” that is released when it makes contact with oxygen. This compound’s chemical reaction with air creates the “hot” smell and taste of horseradish.

 My best advice: Do not lean in and breathe deep while processing horseradish. The Horseradish Information Council’s #1 suggestion while harvesting? A room with good ventilation. The concentrated aromatics released can affect eyes, skin, nasal passages and possibly balance as it can knock you back a few steps!

Next let’s talk about harvesting this tasty root. As mentioned, the steps are simple and the processing into preserved or pickled horseradish doesn’t take much time. The most common harvesting advice is to wait until after its foliage has died back, after a few frosts.

Is this because a few freezes cause some savory chemical reaction affecting the root, or some other science-y explanation? Probably! However, my research shows this advice around harvest timing is more about convenience. After a frost or two, most gardens and garden chores are wrapped up, and horseradish is something that can survive through colder temperatures.

A few tips for harvesting horseradish:

  1. Select and cut around roots with a long-bladed shovel aiming down versus “in” as the roots are long. Gently loosen soil around root and remove from the ground. You want as much of the long root as possible and to avoid breaking them in the ground (which promotes spreading).
  2. Rinse root in water, scrub enthusiastically. Cut into safely manageable pieces, remove rough skin with a vegetable peeler. Note: Isothiocyanate begins to release with abandon at this point, so proceed with caution.
  3. Rinse bright white root flesh a final time, chop into small pieces your food processor or blender is able to grate. This is a very dense, fibrous root and can challenge blades of processors and blenders so be kind to your appliance, and to yourself, when lifting the lid to check grating progress. Don’t lean in close or breathe deep!
  4. Add a bit of salt to help the root breakdown and sweat. Water or ice cubes add moisture without significantly changing the taste and help “cream” the root. Process to desired consistency.
  5. Timing is important when adding vinegar since vinegar stops the enzymatic process and takes the root taste from mild to hot. Add immediately and the “temperature” of your sauce will be less than if you wait longer for a bigger bite in flavor.
  6. After processing scoop the pickled horseradish into a sterilized jar and refrigerate, freeze in ice cube trays, or go through the canning process and stash in your pantry.

I know many of you might be thinking, “Not in my yard. Horseradish spreads!” It does spread, but it can also be curtailed with routine diligence that doesn’t take much effort. I have 14- and 10-year-old plants, each about 3 feet in circumference. Maintaining this size has been very manageable and we enjoy and harvest horseradish all year long!

To keep your horseradish in check:

  • plant in a shady spot for slower growth, away from your favorite perennials
  • consider planting near compost piles; horseradish loves the ‘back 40’
  • slice out and compost unwanted starts/roots
  • plant in a very deep, two- to three-foot container
  • option for non-fans of the horsey hotness: plant and never harvest to contain growth

Handling roots carefully with intent when harvesting helps deter over-growth. Planted with purpose, horseradish can also eat up some space as a lush looking hedge along a border or on a berm. Maybe a splash of bold on a hell strip? Horseradish can thrive in almost any condition. It loves and is especially successful in full sun. It’s a strong plant in both stature and flavor, versatile in the kitchen, and a true beauty in the garden.

Bon appetite!

Additional reading:   https://pss.uvm.edu/ppp/articles/horserad.html  

The Fun Begins: Harvesting and Preserving Garden Fresh Vegetables

By Lois Margolin, CSU Extension- Denver Master Gardener since 2011

The harvest season has started! I’ve already harvested herbs four times and they’re still going strong. Some hot peppers have ripened and so have green beans. The cucumbers, tomatoes, zucchini, eggplants and bell peppers will be ripe soon.

So, what to do with all these fresh vegetables? Over the years I’ve found some tricks for prolonging the life of the harvest from preparing fresh to freezing, canning and drying.

Use Every Fresh Fruit and Vegetable

The CSU Extension Guide to Handling Fresh Produce has everything you need for safely handling and cleaning your vegetable harvest. Please refer to the fact sheet for general information on cleaning garden-grown fruits and vegetables.

Here’s how I harvest and preserve some of my vegetable garden favorites:

Carrots

I begin to thin carrots after they’re about 2 inches tall. I wait until mid-to-late July to finish the process. By then the carrots I pull are “babies” and great for eating. I wash them thoroughly with a vegetable scrub brush, and at this stage they don’t even need peeling.

In the fall I harvest carrots as I need them. They actually become sweeter after the first frost. I continue to harvest throughout the winter or until the ground is frozen. During mild winters I’ve harvested as late as March.

Peas, Radishes, Green Beans and Basil

Peas, radishes and green beans are so prolific I can’t use them fast enough. I wash them well, wrap them in a damp paper towel and put them in zip lock bags that I partially close before putting them in the fridge. They keep for a week or longer. Fresh herbs are best used right away, but you can place leftovers in a glass of water and put them on the counter for use within 2 to 6 days.

Tips for Using the Harvest

For fantastic hot summer meals make gazpacho, zucchini or cucumber soups to serve cold. Cantaloupe or peach cold soups https://www.tasteofhome.com/recipes/chilled-peach-soup/ are like drinking smoothies.

For Use in Winter

For best preservation of color, flavor and enzymes, blanch vegetables before freezing. (The basics of blanching include briefly plunging vegetables into boiling water and then into cold to stop the cooking process.) However, if vegetables will be used in stir-fry dishes, soups and stews. just wash, dry and place them in freezer bags. This method works for peas, green beans, tomatoes, peppers and sliced carrots.

The CSU Extension Guide to Freezing Vegetables gives you everything you need for choosing freezer containers, selecting, prepping, packing, labeling and storing fresh produce. There’s also a freezing guide for over 30 different fruits and vegetables.

Preserving Zucchini, Carrots and More

Do you have more zucchini and carrots than the family can eat fresh? Peel and grate them. Measure out portions for later use in breads, cakes and soups. Place in labeled freezer bags with item name and measured amount. Freeze. After thawing, drain off some of the liquid so the recipe isn’t too wet.

I do the same with butternut squash, cubed rather than grated, for soup around the holidays.

Rhubarb can also be cut and frozen for later use in crisps and pies or cooked into sauce.

Canning Fruits and Vegetables

Canning is easier than it sounds, but be sure to follow the CSU Extension best practices for canning safety.

Grocery stores carry packaged pickling spice blends that make excellent dill pickles and salsas for zucchini, green beans, small carrots and beets. Just add vinegar and follow the instructions on the packages.

More Preserving Ideas

  1. Cook a batch of ratatouille using zucchini, yellow squash, tomatoes, eggplant and peppers. Bake in one meal portioned containers, cool completely and freeze.
  • Make your favorite spaghetti sauce and freeze in one-meal portions.
  • Jams and jellies are easy to make, just follow the recipes that come with packages of pectin. Some of my favorites are mint jelly, tomato jam, strawberry and blueberry jam. Jams are made with crushed fruit and don’t need the extra step of straining the fruit mixture like for jellies.
  • If you have fruit trees you can also make plum and peach jams and apple butter. I slice the fruit and mix in the ingredients needed for pie fillings and freeze these in one-pie portions. When I want a fresh pie I make the crust, thaw the fruit mixture, place it in the pie shell and bake.
  • Don’t forget to dry your fresh herbs to use all winter. Find tips for preserving your garden herbs here.

Of course, there are many more ways to use the fresh and preserved fruits and vegetables from your garden. What are some of your favorite ways to preserve the garden harvest?

How to Use and Preserve Fresh Herbs from Your Garden

By Lois Margolin, CSU Extension–Denver Master Gardener since 2011

My May blog post gave instructions for planting an herb garden in a strawberry pot. Now it’s time to begin harvesting and cooking with those garden-fresh, delicious herbs.

The middle of May had unusually hot weather and daily watering was a must for plant survival. I set my irrigation system to water every morning for 4 minutes. Then I went out of town for two weeks, I thought the garden would be fine, but the weather turned cool and rainy.

The result was water-logged plants in the lower pockets of the strawberry pot. Plus our yard became home to a large number of baby rabbits. What the water didn’t kill, the rabbits ate!

I replaced the herbs that died and harvested the herbs that started flowering to keep them growing. After cutting off 1/3 of each herb plant, I labeled them because herbs can look similar after they’ve dried.

After washing the herbs, thoroughly dry them with paper towels. Pluck the leaves off the stems and place them in pie tins. It can take several days to two weeks to thoroughly dry the herbs. They should become very brittle.

This is the lazy way to dry herbs. Other methods include using an electric dehydrator, leaving the herbs in the oven with the light on overnight, microwaving, and hanging the herbs to dry in the air.

The CSU Extension Fact Sheet on Preserving and Using Fresh Herbs is a comprehensive resource for making the most of your herbal harvest. The fact sheet gives ideas for drying, freezing and storing, plus lists for matching specific herbs to their best culinary uses.

For best flavor, package whole herb leaves and wait to crush them right before using. Dried leaves can be stored in plastic bags and airtight containers.

Be sure to label and date the bags, then place the packages in a dry, dark place like a cupboard or drawer. Use dried herbs within a year for maximum flavor.

Easy Herb Recipes from the Garden

Make Herbes de Provence

One of my favorite ways to use dried herbs is to make Herbes de Provence to use on steamed vegetables and stir fry dishes, in soups and on meats.

A typical Herbes de Provence recipe blends together a combination of dried herbs such as thyme, rosemary, savory, marjoram, oregano, parsley and lavender flowers.

When attractively packaged, this herb mix also makes great hostess and holiday gifts. I find small glass jars with airtight lids at hobby shops and make my own labels.

Use Oregano and Sage

I dry a lot of oregano and sage to use all winter. Place a small amount of dried oregano in the palm of one hand and rub hands together to crush it into a powder that’s perfect for seasoning lasagna, spaghetti sauce and other recipes. Use sage for seasoning roast beef, lamb, chicken and turkey.

Drink up Mint, Lavender and Rosemary

Mint, lavender and rosemary make great flavorings for tea. Use fresh leaves throughout the summer and dried in winter. I like strong black tea so I pour boiling water over the tea leaves and herbs letting them steep for 5 to 10 minutes.

For herbal tea omit the black tea leaves. Brew herbal teas in boiling water and then chill for iced tea. Rosemary also adds a nice flavor.

Don’t use herbs in sun tea because it’s the perfect medium for bacteria growth. “Sun tea gets warm enough to brew tea, but it does not get hot enough to kill a ropy bacteria called Alcaligenes viscolactis that may be present in the water or in the tea or herb leaves,” according to Iowa State University and Extension in “Celebrating Iced Tea Safely.”

To avoid problems with bacteria, steep fresh herbs in boiling water, cool and then add to sun tea made using black tea leaves. If you prefer 100 percent herbal tea, let the steeped herb liquid cool and add to hot or cold water for iced tea.

Enjoy Fresh Basil

A caprese salad is a delicious way to use garden-fresh tomatoes and basil. Simply slice a ripe tomato, top it with a slice of fresh mozzarella cheese, add chopped fresh basil and drizzle Balsamic vinegar over the top.

Another way to use fresh basil is by making basil sugar, a bright green treat. Combine l cup of sugar in a food processor with ½ cup of fresh basil leaves and ¼ tsp lemon zest. Pulse for 30 seconds or until the basil is fully ground. Use basil sugar to sweeten fruit, teas, lemonade, and to decorate cookies before baking.

The recipes using dried or fresh herbs are endless and too numerous to list here. Search online and browse through cookbooks for ideas to enjoy all the “fruits of your labor.”

Lesson learned: Herb gardens need constant attention for best performance. Monitor the weather, test the soil for moisture, harvest frequently and give your herbal strawberry pots love and attention. The rewards are worth the effort!

How to Plant Herbs in a Strawberry Pot

By Lois Margolin
CSU Extension-Denver Master Gardener since 2011

Many years ago, I purchased a strawberry pot filled with herbs. It was beautiful, and I was so excited thinking about all the ways I’d use the herbs. By July the herbs were mostly dead. What did I do wrong?

Years later I saw a strawberry pot that was thriving. My friend shared her secrets to success, and I’ve been following her example ever since.

A strawberry pot is a very attractive way to grow herbs. Each pot has between 3 and 9 pockets (planting holes) around and down its sides. When planted and placed on a platform with wheels, you can move it around to capture the best sun, yet have it close to the kitchen for frequent harvesting.

Tips for Growing Herbs in Strawberry Pots:

  • Ensure strawberry pots have drainage holes in the bottom to prevent root rot and to keep roots healthy.
  • Place a “watering tube” in the middle of the container extending from the bottom to a minimum 2 inches above the top.
  • Wait until after the last frost to plant or bring it indoors every night until late May.
  • Use plants instead of seeds for best results.
  • Water frequently because herbs like consistent moisture.
  • Place the container in full sun.
  • Apply an all-purpose vegetable fertilizer at least every two-to-three weeks. Add a slow-release fertilizer when planting and then supplement with a weekly drink of water-soluble fertilizer mixed at half strength.

How to Plant a Strawberry Pot:

  1. Begin with a clean container. Discard last year’s soil, brush out the container and wash it well. Disinfect with a rinse of 1 part rubbing alcohol or bleach to 2 parts water to prevent plant diseases that may have overwintered in the container.
  2. Make a watering tube by cutting 1-inch diameter PVC pipe to the needed height for the container. Drill holes around and down the length of the pipe. This disperses water along the depth of your container reaching the all the plant roots. As an alternative, garden centers now sell commercial watering tubes.
  • Use only potting soil! Garden soil is too heavy and compacts easily.
  • Place the potting soil in a bucket and add water until it’s damp but not soggy.
  • Insert the tube into the center of the container and hold it steady. Add the first layer of soil up to the first row of pockets.
  • Gently lower a small herb plant into the container from the top. Place it next to one of the pockets. Tease the leaves of the plant through the pocket, keeping the root ball inside the container. Press it into the soil. Continue adding one plant per pocket around the bottom level of pockets.
  • Water soil unless it’s already damp.
  • Add more soil up to the next level of pockets and plant more herbs. Water after each level of pockets, if needed.
  • Continue until you have planted all the pockets; add more soil to the level of the top of the container.
  • Plant 2 or 3 herbs at the top depending on the size of the container.
  • Label each herb at time of planting, as some herbs look alike.

Water once a day until mid- summer when it gets hotter, then you may need to water twice a day. Check the soil by sticking your finger into it and add water if it feels dry. Water the container both from the top and through the PVC pipe.

How to Harvest Herbs

Harvest herbs often by cutting about 1/3 of the plant each time. For best flavors deadhead the plants when blossoms appear. Frequent harvesting and deadheading stimulate plant growth. The exceptions may be flowers on lavender, chives, dill, and seeds of cilantro (called coriander) as these are all edible. The optimum time to harvest is early morning when herb flavors are freshest.

Herb Combinations for a Strawberry Pot

Plant what you like to use! You might want several pockets of your favorites. Different herbs provide colors (purple basil, variegated sage and culinary thyme) and textures (curly and Italian parsley).

In the upper pockets plant sage, culinary thyme, rosemary, marjoram and lavender as they love well-drained soil. Plant onion and/or garlic chives, chervil and coriander in the lower holes for more moisture.

How to Use Fresh Herbs in the Kitchen

There are many ways to put your fresh herbs to use in cooking or you can preserve them by drying or freezing.

Watch for my follow-up post the week of July 19, 2021, with more ideas for harvesting, using and preserving the fresh herbs from your strawberry pot.

Indoor Gardening with Microgreens

By Uli Klein
CSU Extension-Denver Master Gardener since 2019

Microgreens have been on the menus of high-end restaurants for years, and now you can grow them at home. Their colorful appearance and delicate flavors make them an attractive garnish to spruce up salads, soups, and sandwiches. Health-conscious consumers appreciate their high level of nutrients and add them to smoothies and protein shakes.

If you’ve never grown microgreens, now’s the time. For beginners, I recommend starting with some basic equipment and growing a few easy varieties. Then, after your first success, explore the many different tastes, colors, and textures that microgreens can provide.

Sprouts, Microgreens, Baby greens – What’s the difference?

Sprouts are grown in closed, humid conditions. They only need water, no soil or even sunlight, to grow. In general, sprouts take about 1 week to grow, and both the stems and seeds are edible. They add vitamins and a crunchy texture to recipes.

Microgreens are grown in soil, soil substitute, or on a hydroponic mat. Microgreens are easy to grow with light, air, and some ventilation. The risk of contamination with bacteria is negligible as long as they are handled properly and only healthy plants are consumed. Microgreens are typically harvested at the cotyledon or first leaf phase, but some varieties can be grown to the true leaf phase. Most take between 1 to 3 weeks to grow. Only the leaves and stems are eaten.

Baby Greens are smaller leafy plants compared to their mature counterparts and are grown in soil or a soil substitute, or they’re grown hydroponically. They are harvested before they are full grown, on average after 40-60 days and at 4-6 inches tall.

How to Grow Microgreens Indoors

All you need to grow microgreens are containers; soil, soil substitute or a soilless mix; and microgreen seeds.

Fill clean and sanitized plastic containers, like small blueberry containers or larger strawberry containers, with ½ to 1-inch of moist soil or other substrate such a coconut coir.

Select seeds that are specifically labeled for microgreen or sprouting use. The easiest and fastest-growing seed varieties include radish, arugula, kale, cress, broccoli, mustard, and Asian greens. Cilantro, basil, pea, and sunflower greens can be more difficult to grow. Avoid tomato, pepper, and eggplant seeds because these seedlings contain alkaloids, which are toxic for humans at high levels.

Sow seeds evenly and fairly thickly on top of the soil. If you’re planting microgreens in large quantities, a seed density calculator can help.

Gently tamp seeds down into the soil surface. Large seeds benefit from a light covering of soil; smaller seeds germinate faster by leaving them uncovered.

Place the seeded container on a tray, such as a 10 x 20-inch tray or plant saucer. Moisten the seeds with a gentle spraying at first, then water the container from the bottom tray to keep the soil moist, but not soggy. This method keeps the leaves and stems dry to avoid plant problems.

Some microgreen growers recommend the optional step of covering the seeded tray with another tray or dome for 1-to-3 days to help speed germination and to keep moisture in.

Microgreen seeds can grow on a windowsill with the available light from a window and at room temperatures between 60- and 75-degrees Fahrenheit.

Once the plants are around 1-inch tall, intermittent gentle horizontal airflow with a fan helps to keep plants healthy and strong.

Some of the microgreens are almost ready to harvest; more will be ready in another 7-to-10 days.

How to Harvest Microgreens

When plants are 2-inches tall, use scissors to cut the stems about ¼-inch above the soil level. Small and deep containers may make it difficult to cut the plants, so carefully lift the entire plant and soil complex out of the container to harvest. It can be messy if it breaks apart because the roots aren’t sufficiently interwoven with the soil.

The plants won’t regrow after harvesting, so the growing medium with the roots is best recycled by composting it. Clean and sanitize the containers and replant with a new batch of seeds to ensure a steady supply of microgreens.

Growing Currants in Colorado

By Felicia Brower, Colorado Master Gardener since 2020

Photo credit: Jodi Torpey

What are Currants

Currants (Ribes spp.) are edible and ornamental deciduous shrubs that can reach three to six feet in height. In addition to being an attractive addition to the yard, the pea-sized fruits contain several minerals and are high in vitamins A, B, and C. Currants are hardy and thornless, and the fruits grow in a grape-like cluster on a drooping stem called a “strig.”

There are several varieties of currants, including red, black, white, and golden. Red currants are tart and are often used in fruit and jelly production. Black currants can also be used for jams and jellies, but they’re also used to make liqueur. White and golden currants have sweeter flavors and can be enjoyed directly off of the plant.

How and When to Start Currants

Currants do well in fertile, loamy soil that has good drainage with full sun, so it’s best to plant them on north-facing slopes and use mulch to moderate soil temperature fluctuations. The optimum pH is 6.2 to 6.5, but they’ll tolerate 5.5 to 7.0. At a higher pH, the fruit quantity may be limited, but the plants can still be used for ornamental landscaping. To find out your soil’s pH level, conduct a soil test through Colorado State University.

You can propagate currants from cuttings of year-old stems, or you can purchase the plants from your local nursery (often grown in containers as two- or three-year-old plants) or through a catalog (sold as one- or two-year old bare-root plants). Purchase quality, disease-free plants to ensure that you have high yields and fewer plant problems down the road.

Photo credit: Jodi Torpey

Due to their hardy nature, you can plant currants 3.5 to 4.5 feet apart in early spring as soon as the soil is workable. Prior to planting, prune out all damaged roots and branches. Keep the plants cool and moist until they go into the ground, and soak bare root plants in water for three to four hours right before planting. Cut all of the branches back to five inches and set plants one to two inches below the soil line in holes wider than their roots. Water well.

Plant Maintenance

To ensure that you have the highest possible yield, control weeds to reduce competition and use mulch to reduce weeds, watering, and injury to roots caused by cold-weather temperature fluctuations. Currants can have pest problems, including aphids, cane borers, and red spider mites. Address any pest problems immediately to prevent yield reductions and ongoing damage to the plant.

When to Pick Currants

Currants will rarely fruit in the first year, and typically don’t produce well until two to five years after planting. The plants from nurseries have often been growing for two to three years already, so you can expect fruit immediately from those. Currants are extremely long lived and can continue producing for two to three decades if properly maintained.

Harvest your currants mid to late summer. When using the fruit for jellies and jams, harvest before the fruit is fully ripe so that natural fruit pectin levels will be higher. You can eat the fruit of some currant varieties right off the vine or immediately use it for juice but some, especially the black currant, have a strong taste that might not be favorable.  For storage, refrigerate the freshly picked fruit in a covered container or closed bag for several weeks or dry them and use them as a substitute for raisins. They will keep on the vine for several weeks, so you can also just leave them on until you’re ready to use them.

Photo credit: Jodi Torpey

End-Season Care & Overwintering

After you harvest your plants completely, reduce the amount of water to harden the plants prior to winter. Give the plant a final deep watering in November to reduce drying during the winter.

You must prune currants if you want to continue to get a high yield. In late winter or early spring, prior to bud swelling, remove all wood more than three years old and thin out any younger wood until you’re left with three upright stems each of three-, two- and one-year-old wood.

Plan Ahead for Pumpkin Habanero Peppers

Pumpkin habanero peppers are perfect for Halloween. (Image by John Pendleton)

If you like to play practical jokes on your friends, how far in advanced have you planned to put one in place? I’ve waited two full gardening seasons, so far.

The devious prank occurred to me in 2019 when I read about a new “cooler hotter” chile pepper called Pumpkin habanero. These adorable pumpkin-shaped peppers look just like candy, and I thought they’d be a perfect trick for Halloween. I pictured how sweet they’d look sitting next to all the other seasonal treats on a party buffet table. (Cue fiendish laughter.)

Pumpkin habanero peppers are a cross between African and South American habanero peppers that were intentionally planted in the same field as part of a special project at Rutgers University. The two peppers mingled naturally and created a bright orange pumpkin-shaped habanero chile pepper.

These peppers were bred to pack less punch than Scotch Bonnets, more like a hotter jalapeno with a tangerine-like taste. Plant breeders wanted to produce peppers especially suited to the New Jersey climate and to give the state’s immigrant population a taste of home.

As a long-time vegetable gardener and chile grower, I didn’t let pepper facts stand in my way. Surely New Jersey habanero plants could also grow in drier and less humid Colorado.

But first I had to order seeds from the Exotic Pepper Project at Rutgers. The Exotic Pepper program began about 10 years ago as a special agricultural project to create new pepper varieties that were missing in the marketplace. The program was the brainchild of Albert Ayeni, professor of plant biology, together with professors Tom Orton and Jim Simon. They conduct their research at the New Jersey Agriculture Research Station in New Brunswick, N.J.

Pumpkin habanero chile peppers turn from green to orange with time. (Image by Jodi Torpey)

I spent $11 for forty Pumpkin habanero seeds that arrived in time for starting a few indoors in March. The seeds took about 8 weeks to sprout and grow into small, dark green plants with wrinkly leaves. They were ready for transplanting in May. Unfortunately, those first habanero plants struggled and never recovered from an early spring cold spell.

Rats! My Halloween prank would have to wait for the 2020 gardening season.

When spring rolled around, I started another batch of seeds and this time waited to transplant until temperatures really heated up in June. Two small, but healthy Pumpkin habanero plants began growing in containers placed in the hottest spot on the patio.

With a lot of extra TLC, the pepper plants each grew to over 24 inches tall. Every day I looked for small white flowers and then watched for the tiny green peppers to form. They were slow to grow and even slower for the first few to ripen to bright orange in September.

With warm October days helping them along, I had a good crop of perfect pumpkin-shaped peppers for my long-planned prank. But I’m foiled again! With no Halloween parties planned this year, I’ll have to wait for gardening season 2021 for my friends to be treated to my Great Pumpkin trick.

By Jodi Torpey
Master Gardener since 2005