Category Archives: Container gardening

2024 Denver Master Gardener Plant Sale – Saturday, May 18 & Sunday, May 19 2024 – An All-Weather Event You Can Count On!

By: Lori Williams – CSU Extension-Denver Master Gardener since 2016

The 2024 CSU Extension Denver Master Gardener Plant Sale features more than 150 of varieties of perpetual vegetable winners, including a huge selection of hybrid and heirloom tomatoes, delicious culinary herbs, and more than 25 chile pepper strains (sweet, hot, sweet-hot, hot and hot-hot)! For a full list of what will be offered, visit here. We offer gorgeous, healthy plants for your garden: many you’re likely familiar with and some fun new ones to get your garden possibilities growing! All veggies and herbs are $7 each. Annual flowers will also be available. Come early for best selection. Bring your own flat or totes if you can!

With planting time just around the corner, many gardeners are looking forward to getting into the soil and chocking it full of robust bedding plants. Volunteers will be on hand to advise on varieties, planting practices and gardening in general – Ask US!! When you take your baby plants home from the sale, here are some important tips to first harden them off, as they will be fresh out of the greenhouse.

An exciting addition to the sale this year is a native plant selection. Five different species will be offered for $9 each, including: Large-Flowered Penstemon, Switchgrass, Mexican Hat, Butterfly Weed, and Evening Primrose. These are expected to go fast! With each plant purchased, native seeds will be given away (while supplies last). Salegoers can view a native garden planted last season, and the Front Range chapter of WildOnes.org will have a table.

Also during the sale, you’ll enjoy gardening demonstrations and an “Ask a Master Gardener” booth for your gardening questions. CSU Extension will have research-based resources for home gardeners, as well as education and nutrition information. New this year, Denver Master Gardeners will sell seeds for cool-season crops (like peas and spinach that can be direct sown).  A selection of native plants and perennials will also be offered!

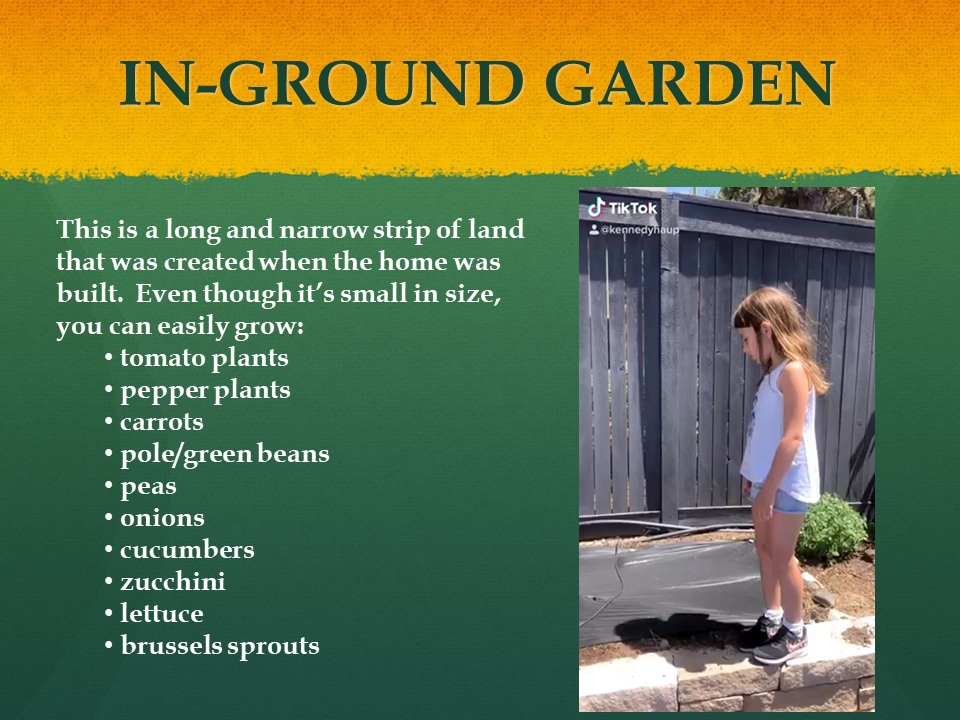
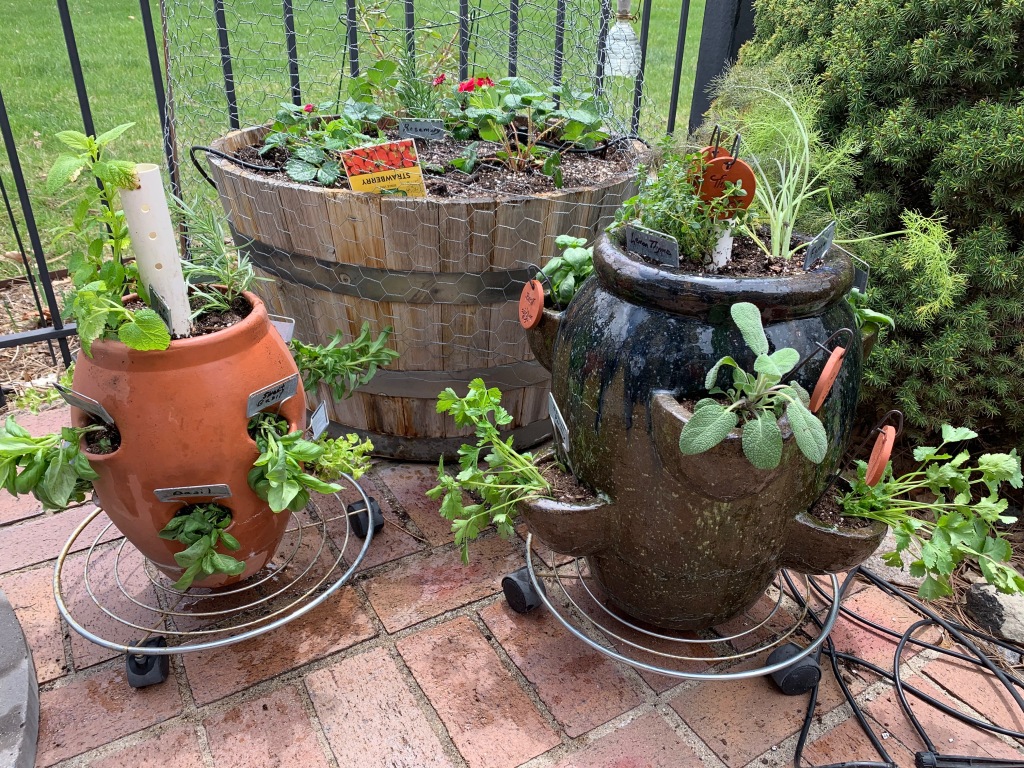
Do you garden in containers or raised beds? Interested in interplanting veggies, flowers and herbs? Maybe you’ve been curious about block style garden layouts? Community gardens offer great gardening options, too. Our partners at DUG have all kinds of useful information here. Fresh vegetables and herbs will make you glad for the space and time you spend this season on growing fresh, flavor-rich, nutritious food for you and your loved ones.

Find all your faves & diverse new selections.

Denver Master Gardener volunteers are heroic in their commitment to get the healthiest, prettiest seedlings to YOU for your 2024 growing season – no matter the weather! A Colorado spring day can bring rain, sleet, snow, and sun – in no particular order. Regardless of temps, winds, or precip, our volunteers are excited to get these lovely bedding plants into your hands. We will be there, ready to help you! 

We look forward to seeing you May 18 & 19!

Maybe you’re also interested in becoming a Colorado Master Gardener? Come grow your experience and learn about the many gardening options, being a Master Gardener, and the amazing resources available to you through CSU Extension! 

How to Select and Pamper Your Houseplants this Winter

By Lori Williams, CSU Extension – Denver Master Gardener since 2016

Houseplants are so lovely and offer a nice spot of green during the Colorado winter. Almost everyone, and certainly gardeners, can find them an enjoyable extension of outdoor gardening. Be it herbs in a kitchen window, plants brought in from summer’s patio to overwinter, or the many varieties that prefer an all-year indoor existence, research shows several health benefits of houseplants, including:

  • Improve employee focus and reduced sick days in the workplace.
  • Reduce fatigue and boost indoor air quality.
  • Lift spirits – pops of color from seasonal plants such as amaryllis or orchids can help beat the winter blues.

As with all plants, houseplants subscribe to the maxim: Right plant, right place. Many who are convinced they have a brown thumb can work through the following simple steps, find their right plant within their (right) place and achieve success. It’s not magic, complicated, or mysterious. Promise.

TIPS FOR HOUSEPLANT SUCCESS

Proper lighting is most important. Evaluate your space and select plants that will work. Find tips for evaluating light quality here.

Most houseplants like household temps that most people like, basically around 70℉.

Some plants need more humidity than typically found indoors, so grouping those together on pebble lined trays and adding water to below the top of pebbles increases the relative humidity.

Watering is unique to each plant: Overwatering kills as many plants as under watering.  Plant tags and a quick google search can explain your plant’s preference. Grouping plants with similar watering needs together helps water accordingly. An inexpensive houseplant water meter is a handy tool, too.

Monitor consistently for pest and/or disease (and while shopping for them, too).  Look under leaves for yellowing or leaf loss. Discovering new growth can happen here, too!

Fertilize seasonally, usually during active growing months from April through September.

SELECTING HOUSEPLANTS

If you are new to houseplants, find help selecting the best ones for your lighting and skill level. This webinar is absolutely wonderful for explaining the science behind happy houseplants and selecting the right plant for your place.  

Once you’ve got a handle on the light in your space, it’s on to the fun part: Make a wish list of suitable plants and go strolling through your favorite local garden center. Enjoy the immersion in the elevated oxygen of the greenhouse, ask their staff questions, and peruse the gorgeousness you will find. 

Aesthetically, it’s fun to mix up plant structures – tall and reedy, soft and velvety, draping growth habitat, foliage colors. Are you wanting something that blooms? Violets, bromeliads, or cyclamens might be the ticket. Or is self-sufficiency key? Sansevieria, pothos, schefflera or succulents are rewarding lower maintenance options.

Another tip is to inspect plants before you buy by checking under the leaves and at the soil line. Sometimes creepy crawlies sneak their way in to even the most professional greenhouses!  

WINTER TLC

Regardless of the time of year, all houseplants need a little TLC. During winter months, with non-melting snow, dreary skies and almost freezing temps projected for days – houseplant pampering can perk up plants and us – their peeps! Here’s how I do it:

  • Gather the basics: Gloves, clippers, potting mix, a small fork or chopstick, fertilizer, watering can, and a bowl of water to keep any clippings hydrated for propagation.
  • Collect plants in the shower or tub and gently spray or splash off the mid-winter dust.  It’s a nice humidity boost for them, too.
  • Soak soil thoroughly and let the container drain. Clip, pluck or pinch off dead, diseased, or discolored matter. If the foliage is looking a bit limp or weak you can fertilize lightly with half strength of your favorite brand.
  • Inspect plants for disease and pests. If any are present, you’ll find remedies here.
  • This is a good time to select plant parts for propagating and prune to reshape foliage. Check out good tips here.
  • Gently disturb the top 1” of container’s soil and apply a top dressing of potting mix. Depending on your plant’s preferred growing conditions, this can also be a good time to repot root bound varieties.
  • Return the plant to its home. Every few weeks, rotate the plant so it receives even light on all sides.
  • Dispose of diseased matter rather than composting it to avoid spreading the disease further. Compost temps need to reach at least 150℉ to kill pathogens which is a struggle for home compost bins to reach during winter months.

Houseplants offer a verdant element to our homes and workplaces. They are as varied and interesting as the people who share them!

Growing Vegetables and Herbs in Containers

By Lois Margolin, CSU Extension-Denver Master Gardener since 2011

Benefits of Growing in Containers

There are many reasons for growing vegetables and herbs in containers:

  • Place strategically in full sun areas.
  • Ease of use – no need to bend down.
  • Bring inside or easily cover in bad weather.
  • Limited outdoor space or no yard? Containers are perfect on patios, balconies, window boxes, or in small yards.
  • Planning to move this summer? Take your garden with you.
  • Add architectural, artistic, and textural interest to outdoor spaces.
  • Taller containers can keep rabbits out of crops.

Containers and Potting Soil

My favorite container is a plastic wheelbarrow. It holds enough soil to grow a delicious salad bowl of lettuces, spinach, kale, peas, scallions, and nasturtiums – even a tomato plant. It’s easily moved throughout the day to sunny or shady areas depending on what you’re growing. It’s also high enough that you don’t need to bend when planting, tending, and harvesting.

For vegetables, choose containers large enough for the plants at maturity. The wheelbarrow holds a lot, but smaller containers can hold a single tomato or pepper plant. For more information on container sizes refer to CMG Garden Notes #724.

All pots must have drainage holes to avoid root rot. Plastic containers are best for water retention. Ceramic pots need to be “high fired” to be frost-proof and not crack in winter. Wooden containers should be made from rot-proof lumber. Do not use creosote treated railroad ties for edible plants as they can be poisonous.

Strawberry pots are perfect containers for herbs. See my blog post on planting in a strawberry pot for tips on how to successfully grow in this container.

Large containers can be very heavy. If you plan to move the container around, place it on a sturdy container dolly. For taller containers, the bottom 1/3 can be filled with capped, crushed water bottles or packing “peanuts.”  (Test the peanuts by placing some in a glass of water to make sure they don’t dissolve.)  Place a layer of landscape cloth over this filler to keep out the soil. Then fill the remaining 2/3rds of the container with potting soil.

Do not use soil from the ground (native soil) as it’s too high in clay content and may have disease organisms, insects, or weed seeds.

Purchase good quality potting soil which is high in organic matter and contains perlite or vermiculite. Some brands contain water-holding polymers or gels. Or make your own potting soil by mixing 1/3 peat moss, 1/3 vermiculite or perlite, and 1/3 organic matter (compost).

For more information, see CSU’s Fact Sheets on growing salad greens and growing in containers.

Sun, Water, and Fertilization

When considering container placement remember sun requirements:

  • Fruiting vegetables – 8 hours of full sun
  • Root vegetables – 6 hours of full sun
  • Leafy vegetables and most herbs – 4 or more hours of sun

Group plants that require similar amounts of water and sunshine. In the heat of summer, you might have to water twice a day as containers require more water than in-ground plants. Check for moisture by inserting your finger into the soil about an inch. If it’s dry, it needs water.

Vegetables like consistent moisture. Ideally, water in the early morning so that plants can absorb the moisture and avoid wilting during the heat of the day.

Container vegetables also need more fertilizer than in-ground plants. I fertilize weekly with half-strength water-soluble fertilizer. You can also apply a time-release fertilizer when planting. Always follow the directions on the label.

Time to Plant!

Lettuces, spinach, kale, beans, zucchini, cucumbers, beets, parsley, cilantro, dill, radishes, and carrots do well in Colorado when planted from seeds. Longer maturation plants such as tomatoes, all peppers, most other herbs, and eggplants should be started early indoors or purchased in starter sizes. Check labels for the number of days till maturity. The metro Denver area has a short growing season – late May through early to mid-September (the average dates of the last frost in spring and the first frost in fall.) Higher elevations have an even shorter season.

Choose dwarf plants as they do better in containers than full-sized varieties. Cherry tomatoes do exceptionally well in containers. Try plants like Megabite tomatoes, Big Dwarf tomatoes, Potomatoes with clusters of yellow cherry tomatoes that grow on an 18-inch plant, Cute Stuff red peppers, Raven zucchini, and Hensel eggplants are all good options.

For vegetable containers that are decorative and colorful as well as productive, consider planting small flowers with the veggies. Marigolds add nice color as do nasturtiums that hang over the sides.

Edible flowers add drama and flavor to salads, main courses, and desserts. Not sure which flowers are edible? This CSU Fact Sheet has an extensive list.

Container gardening is fun, easy, and very rewarding. Remember to harvest as soon as the vegetables are ripe. Many plants will continue to produce during the summer and into early fall. ENJOY!

Vegetable Gardening for Kids

By Lois Margolin, CSU Extension – Denver Master Gardener since 2011 

Gardening is a great activity to do with kids, whether they’re in preschool or young adults. In addition to teaching children a new skill set, it introduces them to new foods (they like eating what they grow!) and incorporates great lessons such as protecting the environment, healthy and nutritious eating habits, water conservation, and more. It also teaches children the benefits of helping others in need by donating extra produce to food banks.

Gardening is also a great, hands-on way to teach children the life-cycle of plants. All plants begin as seeds. About five to eight days after planting, the seed will sprout. You will see a green “stem” poke above the soil. Two seed leaves will begin to form, and then larger true leaves will appear above the seed leaves. The plant will flower and the flower will become the vegetable (beans, peas, tomatoes, peppers). Some vegetables (like carrots, onions, and beets) are actually roots. By fall, the plants that have been growing all summer will begin to get brown and die.

If you want to grow a garden this summer, these are some veggies that grow well in our Colorado climate:

  • Edible pea pods
  • Peas
  • Kale
  • Spinach
  • Leaf lettuces
  • Green Beans
  • Zucchini and other squash
  • Cucumbers
  • Peppers
  • Tomatoes
  • Onions/scallions
  • Beets
  • Carrots

What You’ll Need to Garden

A few tools make gardening easier:

  • Shovel – This is essential for in-ground gardens to turn the soil.
  • Trowel – Best tool for digging small holes and trenches.
  • Gardening gloves – Keeps your hands clean. Buy them in children’s sizes for kids.

Decide Which Type of Garden You Need

In-ground or Small Raised Garden Bed

While these gardens are small, they can hold a lot of veggies. Pole beans, cucumbers and squash can be grown in them. Cucumbers grow tall and can be tied to stakes or cages, and lettuce and other short plants can be planted around the base of the taller plants.

Even if you only have a small space to work with, you can easily grow:

  • tomato plants
  • pepper plants
  • carrots
  • pole/green beans
  • peas
  • onions
  • cucumbers
  • zucchini
  • lettuce
  • brussels sprouts

Container Gardens

Containers are a great way to introduce kids to gardening. It’s easier to prepare the soil in pots, they have fewer weeds, and rabbits can’t reach the taller ones.

Get Started

If you’re new to gardening, START SMALL! For the best outcome, plan your plantings on paper first. Get creative with your design – you can plant a LOT of veggies! For in-ground gardens, start by preparing your space. Dig up an area of ground about 4 feet x 4 feet.

A sample garden design could have three mounds of cucumbers, three rows of bush green beans, two rows of beets, and one row of onions.

Root veggies like beets and carrots need to be thinned out once they sprout to allow room for the roots to develop.

Prepare the Soil

If you’re building an in-ground garden, remove all of the grass and weeds from your new area. Mix in good top soil and compost (available at garden centers), and work it into the ground soil.

If you’re using containers, put holes in bottom of the container for drainage, and cover holes with a piece of very thin cloth or coffee filters. Fill clean containers with potting soil (available at Garden Centers). Make sure your garden is located in full sun if you’re planning on growing veggies, as 6 to 8 hours of daily sunshine is needed.

Decide When To Plant

When buying plants and seeds look for maturity dates of 48 to 85 days. Planting during the correct time of year will help make sure your vegetable garden is successful.

Use the following list as a guideline:

  • April: Plant cold weather crops like peas, lettuces, spinach, and kale.  
  • Early May:  Plant carrots, beets, and onions.
  • Mid to late May:  Plant tomatoes, peppers, squash (zucchini), cucumbers, and beans. Hot weather crops can be planted when the soil reaches 60 degrees.
  • June: Continue planting cucumbers and beans so you can harvest veggies continually from July through September.

To get veggies over a longer period of time instead of having one big harvest all at once, plant a row or two and wait a week before you plant more.

How to Plant

Look at your seed packets for instructions on how deep and how far apart to place seeds. Follow those guidelines, but also be aware that you can plant seeds closer together in containers than you do in the ground.

If you’re using starter plants (young plants that have been grown already and just need to be put in the garden), carefully remove them from their pots, put them in the soil at the same height as they were in their original pots. (Tip: Tomatoes can be planted deeper to develop more roots.) Water the ground or container immediately after planting.

Maintain Your Garden

Make sure your garden gets enough water throughout the season. Check daily by putting your finger in the soil; if it feels dry, you need to water! The garden will need more water in the middle of the summer when it gets very hot and/or windy. Containers need daily watering, sometimes twice a day in really hot weather.

Water early morning so plants dry out before going to “bed” at night.  This helps prevent diseases and fungi from spreading. Pull any and all weeds that you see!

Fertilize your in-ground garden by mid-summer and your containers once a month from June through August.

Harvest Your Vegetables

You can check the seed packet to determine the number of days from planting to harvesting, but the plants will usually let you know when they’re ready to harvest. Most tomatoes are ready when they are bright red unless they’re meant to be yellow or other colors. Root veggies will begin to “pop” out of the soil when they are ready to pick. Beans and peas should be harvested when they’re firm and medium size. They get tough when they get too large. Lettuce can be cut at any size, but if you leave half the plant more leaves will grow. By mid-summer lettuce starts to flower and gets bitter, so try to complete your harvest by then. Watch your squash and cucumbers closely! They grow fast and need to be picked before they get large. Similar to lettuce, they’re not so tasty when they get huge.

With plenty of sunshine, water, and a little fertilizer, you will be ready to harvest by mid summer. Have fun and prepare to eat delicious veggies!

If you have specific questions, please call the C.S.U. Denver Extension office at (720) 913-5178.

Creating a Colorado Sensory Garden

By Felicia Brower, CSU Extension – Denver Master Gardener since 2020

Sensory gardens – gardens that appeal to one or more of the five senses – are a great way to get both children and adults excited about the natural world. Featuring plants that appeal to sight, smell, taste, sound, and touch turns a stroll through the garden into an immersive experience where you can engage with the grasses, trees, flowers, shrubs, and hardscape elements.

Sensory gardens can be any size and can be designed to target just one sense (a garden with exceptionally bright or fragrant flowers is a good example) or as many senses as possible. Some senses are easier to find plants for than others, which is where hardscape elements come in handy. Texture from boulders, walkway stones, stumps, woodchips, and other permanent structures can take away the need to touch the plants directly, though there are plants that make finger-friendly additions to the garden.

Always make sure that your sensory garden is safe for visitors. Avoid putting harmful plants within easy reach of pathways or using toxic pesticides on plants that are easily accessible, especially if your garden is geared towards younger, curious children.

Before you plant anything, check your location to make sure that you’re choosing plants that will thrive there. Putting plants with high water needs by those with low water needs can result in plants being over- or under-watered and not surviving. Make sure you accommodate for sun and shade needs as well.

If you want to give your sensory garden an added environmental bonus, make one with native plants! These localized plants are adapted for our climate, soil, and water needs and serve as important habitats and food sources to native birds and bugs.

Here are a few plants that would make a great addition to your Colorado sensory garden:

Sight

Plants that are brightly colored or with distinctly shaped flowers, seeds, or leaves draw the eye and can be a great source of excitement in the garden. Shrubs like serviceberry (Amelanchier alnifolia) are great multi-season additions to the garden, with clusters of small white flowers, blue-black berries, and an orange to red coloring in the fall. Mountain Mahogany (Cercocarpus montanus) has distinctly shaped, feathery corkscrew seed heads. The undersides of the leaves are furry, and the flowers have a sweet smell, which allows you to cross off three senses (sight, touch, and smell) with just one plant.

Mountain mahogany

Sound 

Ornamental grasses are an easy way to appeal to sound in your sensory garden. Big bluestem (Andropogon gerardii) is a native grass that grows as a 3-foot-tall arching clump of blue-green leaves in the summer. Flowering stalks emerge in late summer and grow as tall as six feet, and the seedheads that form resemble a turkey’s foot. Listening to the sound of the grass swaying in a late-summer breeze is a great way to unwind in the garden. As an added sight bonus, the leaves turn pink, orange, rust, and purple in the fall. Despite the name, Little bluestem (Schizachyrium scoparium) is a different plant entirely that also goes through beautiful color changes (powder blue, darkening to purple, and ending with dark red stalks in winter) and provides a nice soothing sound when it sways in the summer and fall winds.

Big bluestem

Touch

As mentioned earlier, adding hardscape elements like stumps, boulders, smooth walkway stones, and woodchip paths is a simple way to add texture to your garden and check off the touch box in your sensory garden. There are some native plants that have textures as well, including the blanket flower (Gaillardia aristata) with its fuzzy leaves and stunning yellow and red daisy blooms and Blue Grama grass (Bouteloua gracilis) known informally as “eyelash grass” due to the shape of its seed clusters.

Blanket flower

Smell

Smell is one of the easier senses to find plants for, as many flowers have fragrant blooms. A popular native plant that works well is aptly named chocolate flower (Berlandiera lyrata) with its chocolate smelling daisy-like flowers. Agastache sunset hyssop (Agastache rupestris), another native, appeals to both sight and smell with its vibrant spikes of orange and purple flowers that emit a root beer fragrance.

Chocolate flower

Taste

Always exercise caution when eating anything out of the garden. Make sure that you’ve correctly identified the plant and that it’s safe to consume before eating it or encouraging others to do the same. The golden currant (Ribes aureum) is a safe-to-eat shrub with sweet yellow, red, or black berries that emerge in the late-summer and fall. These berries can be eaten fresh off the plant or be used to make jams and jellies.

Golden currant

Sensory gardens add another layer to a garden. Whether you’re passing through quickly or spending more time in one to take it all in, you’ll feel more connected to the plants during your sensory experience.

Denver Master Gardeners Look Back at the Growing Season – Part 2

Compiled by Linda McDonnell, Denver Master Gardener since 2013

Welcome back to part two of our garden season recaps. We hope you enjoy this look at the wins, challenges, and surprises from Denver Master Gardeners. If you missed part one, you’ll find it here.

HUMMINGBIRD BANQUET  Barb Pitner, Denver Master Gardener since 2012

This season’s goal was to create a garden to attract and feed hummingbirds. I started by removing a twelve-foot-wide circle of lawn with a two-foot-wide circle or “bullseye” in the center. The soil of this center area was prepped with compost into which four scarlet sage vines (Salvia coccinea) were planted around a four-foot-high decorative tower.

The remainder of the full-sun, brightly colored pollinator garden was filled with containers, which encircled the scarlet sage and descended in height from the center.

The tall scarlet sage vines were surrounded by containers of vibrantly colored ‘Giant’ zinnias alternating with containers of crocosmia varieties including ‘George Davidson’ (yellow), ‘Lucifer’ (deep red-orange), ‘Emily McKenzie’ (red-orange-maroon with a yellow eye). Cypress vines (Ipomoea quamoclit) were added to the crocosmia displays.

The outer ring of the garden was made up of smaller containers, brimming with lower growing annuals such as marigolds, blue Victoria salvia, red calibrachia, and red-yellow lantana.

Daily watering, regular feeding, and deadheading insured constant blooms from July to September. In addition to hummingbirds, the garden was regularly visited by native, honey, and bumble bees. All have been kept in good supply of nectar and pollen.  

WINTER-SOWN BAPTISIA  Susan Tamulonis, Denver Master Gardener since 2018

Last December I was given thirty-eight Baptisia seeds (Baptisia spp; variety unknown, aka wild or false indigo) from a neighbor. This gift launched a multi-season challenge to nurture, document, and transform the seeds into healthy plants. Baptisia is in the Fabaceae (bean) family and requires cold temperatures to germinate – perfect timing for this project.

The dense, hard-coated seeds were treated to two boiling water baths and then soaked for two more days. The seeds were then planted in “mini-greenhouses,” constructed from milk jugs (one 1-gallon and two ½-gallons). The uncapped containers were cut in half horizontally and drainage holes were poked in the bottom. Seeds were sown in the base of the containers, lightly covered with soil, and watered. The top portion of the containers were replaced, creating dome-like planters. The containers were placed in a shady outdoor spot immediately after planting and were regularly checked for moisture and good drainage.

In April, to allow for more light, the top half of the containers were removed; germination began in May. By mid-June, seedlings were four to five inches tall with three sets of leaves. It was now time to plant them in full sun. In August, the seeds yielded seventeen healthy plants for a 58% germination rate.

And here’s where the story takes a turn…I returned from a fall vacation to find the young plants were mowed down by a hungry visitor, likely a rabbit. So while the winter-sowing process was successful, the plants didn’t survive!

A FUN & BENEFICIAL SURPRISE  Jodi Torpey, Denver Master Gardener since 2005

My biggest gardening success this season gave new meaning to the old saying about keeping one’s ear close to the ground. That’s because I grew an ear in a container of radishes.

Although I didn’t set out to grow a body part in my garden, I was delighted to see this flesh-colored, earlike growth pop up among the radishes during this year’s cool, wet spring. My “ear” was most likely a type of cup fungus belonging to the genus Peziza. These fungi are real bodies – the fruiting bodies – of cup fungi that usually live underground but can grow above ground in mulch or compost when conditions are right.

While they don’t all look like ears, they’re all good for gardens because they break down organic matter to make nutrients available to plants. An ear growing in that container turned out to be a real fun guy.

A TREE WORTH WAITING FOR!  Lori Williams, Denver Master Gardener since 2016

After a four-year delay in planting any tree, finally this summer a long-awaited, lovely peach tree found a home in our yard. It came with baby peaches all over, but we popped most off so the energy would go to the roots. The only decent gladiolus I planted this year were around the new peach tree – and we enjoyed nine very tasty peaches in mid-August. Highlight of our summer!

NATIVE POLLINATOR GARDEN: YEAR TWO  Ann Winslow, Denver Master Gardener since 2019

Last year, I shared my adventure creating a pollinator garden using native plants on this blog. You’ll find the posts here and here. This year, I’ve watched and recorded what has flourished and what has struggled – maybe because of weather, where the plant was sited, and in some cases, for reasons I can’t tell.

One big success was chocolate flower (Berlandiera lyrata). At one end of the garden, three plants became massive, merging into one enormous display, which will be divided in the Spring. They have been abuzz with native pollinators since June. Just what I hoped for!

In contrast, wine cups (Callirhoe involucrata) has struggled. It’s possible that the heavy spring rains caused it to grow leggy, splay out on the ground, and have few blooms. I’m cutting back the long, dead stems now as I see it’s getting new growth in the center.

Always something to learn. Every year is a new adventure in gardening.

Many thanks to the Denver Master Gardeners who allowed us to peak into their gardens, learn from their experiences, and be inspired by their results.

How to Use and Preserve Fresh Herbs from Your Garden

By Lois Margolin, CSU Extension–Denver Master Gardener since 2011

My May blog post gave instructions for planting an herb garden in a strawberry pot. Now it’s time to begin harvesting and cooking with those garden-fresh, delicious herbs.

The middle of May had unusually hot weather and daily watering was a must for plant survival. I set my irrigation system to water every morning for 4 minutes. Then I went out of town for two weeks, I thought the garden would be fine, but the weather turned cool and rainy.

The result was water-logged plants in the lower pockets of the strawberry pot. Plus our yard became home to a large number of baby rabbits. What the water didn’t kill, the rabbits ate!

I replaced the herbs that died and harvested the herbs that started flowering to keep them growing. After cutting off 1/3 of each herb plant, I labeled them because herbs can look similar after they’ve dried.

After washing the herbs, thoroughly dry them with paper towels. Pluck the leaves off the stems and place them in pie tins. It can take several days to two weeks to thoroughly dry the herbs. They should become very brittle.

This is the lazy way to dry herbs. Other methods include using an electric dehydrator, leaving the herbs in the oven with the light on overnight, microwaving, and hanging the herbs to dry in the air.

The CSU Extension Fact Sheet on Preserving and Using Fresh Herbs is a comprehensive resource for making the most of your herbal harvest. The fact sheet gives ideas for drying, freezing and storing, plus lists for matching specific herbs to their best culinary uses.

For best flavor, package whole herb leaves and wait to crush them right before using. Dried leaves can be stored in plastic bags and airtight containers.

Be sure to label and date the bags, then place the packages in a dry, dark place like a cupboard or drawer. Use dried herbs within a year for maximum flavor.

Easy Herb Recipes from the Garden

Make Herbes de Provence

One of my favorite ways to use dried herbs is to make Herbes de Provence to use on steamed vegetables and stir fry dishes, in soups and on meats.

A typical Herbes de Provence recipe blends together a combination of dried herbs such as thyme, rosemary, savory, marjoram, oregano, parsley and lavender flowers.

When attractively packaged, this herb mix also makes great hostess and holiday gifts. I find small glass jars with airtight lids at hobby shops and make my own labels.

Use Oregano and Sage

I dry a lot of oregano and sage to use all winter. Place a small amount of dried oregano in the palm of one hand and rub hands together to crush it into a powder that’s perfect for seasoning lasagna, spaghetti sauce and other recipes. Use sage for seasoning roast beef, lamb, chicken and turkey.

Drink up Mint, Lavender and Rosemary

Mint, lavender and rosemary make great flavorings for tea. Use fresh leaves throughout the summer and dried in winter. I like strong black tea so I pour boiling water over the tea leaves and herbs letting them steep for 5 to 10 minutes.

For herbal tea omit the black tea leaves. Brew herbal teas in boiling water and then chill for iced tea. Rosemary also adds a nice flavor.

Don’t use herbs in sun tea because it’s the perfect medium for bacteria growth. “Sun tea gets warm enough to brew tea, but it does not get hot enough to kill a ropy bacteria called Alcaligenes viscolactis that may be present in the water or in the tea or herb leaves,” according to Iowa State University and Extension in “Celebrating Iced Tea Safely.”

To avoid problems with bacteria, steep fresh herbs in boiling water, cool and then add to sun tea made using black tea leaves. If you prefer 100 percent herbal tea, let the steeped herb liquid cool and add to hot or cold water for iced tea.

Enjoy Fresh Basil

A caprese salad is a delicious way to use garden-fresh tomatoes and basil. Simply slice a ripe tomato, top it with a slice of fresh mozzarella cheese, add chopped fresh basil and drizzle Balsamic vinegar over the top.

Another way to use fresh basil is by making basil sugar, a bright green treat. Combine l cup of sugar in a food processor with ½ cup of fresh basil leaves and ¼ tsp lemon zest. Pulse for 30 seconds or until the basil is fully ground. Use basil sugar to sweeten fruit, teas, lemonade, and to decorate cookies before baking.

The recipes using dried or fresh herbs are endless and too numerous to list here. Search online and browse through cookbooks for ideas to enjoy all the “fruits of your labor.”

Lesson learned: Herb gardens need constant attention for best performance. Monitor the weather, test the soil for moisture, harvest frequently and give your herbal strawberry pots love and attention. The rewards are worth the effort!

How to Plant Herbs in a Strawberry Pot

By Lois Margolin
CSU Extension-Denver Master Gardener since 2011

Many years ago, I purchased a strawberry pot filled with herbs. It was beautiful, and I was so excited thinking about all the ways I’d use the herbs. By July the herbs were mostly dead. What did I do wrong?

Years later I saw a strawberry pot that was thriving. My friend shared her secrets to success, and I’ve been following her example ever since.

A strawberry pot is a very attractive way to grow herbs. Each pot has between 3 and 9 pockets (planting holes) around and down its sides. When planted and placed on a platform with wheels, you can move it around to capture the best sun, yet have it close to the kitchen for frequent harvesting.

Tips for Growing Herbs in Strawberry Pots:

  • Ensure strawberry pots have drainage holes in the bottom to prevent root rot and to keep roots healthy.
  • Place a “watering tube” in the middle of the container extending from the bottom to a minimum 2 inches above the top.
  • Wait until after the last frost to plant or bring it indoors every night until late May.
  • Use plants instead of seeds for best results.
  • Water frequently because herbs like consistent moisture.
  • Place the container in full sun.
  • Apply an all-purpose vegetable fertilizer at least every two-to-three weeks. Add a slow-release fertilizer when planting and then supplement with a weekly drink of water-soluble fertilizer mixed at half strength.

How to Plant a Strawberry Pot:

  1. Begin with a clean container. Discard last year’s soil, brush out the container and wash it well. Disinfect with a rinse of 1 part rubbing alcohol or bleach to 2 parts water to prevent plant diseases that may have overwintered in the container.
  2. Make a watering tube by cutting 1-inch diameter PVC pipe to the needed height for the container. Drill holes around and down the length of the pipe. This disperses water along the depth of your container reaching the all the plant roots. As an alternative, garden centers now sell commercial watering tubes.
  • Use only potting soil! Garden soil is too heavy and compacts easily.
  • Place the potting soil in a bucket and add water until it’s damp but not soggy.
  • Insert the tube into the center of the container and hold it steady. Add the first layer of soil up to the first row of pockets.
  • Gently lower a small herb plant into the container from the top. Place it next to one of the pockets. Tease the leaves of the plant through the pocket, keeping the root ball inside the container. Press it into the soil. Continue adding one plant per pocket around the bottom level of pockets.
  • Water soil unless it’s already damp.
  • Add more soil up to the next level of pockets and plant more herbs. Water after each level of pockets, if needed.
  • Continue until you have planted all the pockets; add more soil to the level of the top of the container.
  • Plant 2 or 3 herbs at the top depending on the size of the container.
  • Label each herb at time of planting, as some herbs look alike.

Water once a day until mid- summer when it gets hotter, then you may need to water twice a day. Check the soil by sticking your finger into it and add water if it feels dry. Water the container both from the top and through the PVC pipe.

How to Harvest Herbs

Harvest herbs often by cutting about 1/3 of the plant each time. For best flavors deadhead the plants when blossoms appear. Frequent harvesting and deadheading stimulate plant growth. The exceptions may be flowers on lavender, chives, dill, and seeds of cilantro (called coriander) as these are all edible. The optimum time to harvest is early morning when herb flavors are freshest.

Herb Combinations for a Strawberry Pot

Plant what you like to use! You might want several pockets of your favorites. Different herbs provide colors (purple basil, variegated sage and culinary thyme) and textures (curly and Italian parsley).

In the upper pockets plant sage, culinary thyme, rosemary, marjoram and lavender as they love well-drained soil. Plant onion and/or garlic chives, chervil and coriander in the lower holes for more moisture.

How to Use Fresh Herbs in the Kitchen

There are many ways to put your fresh herbs to use in cooking or you can preserve them by drying or freezing.

Watch for my follow-up post the week of July 19, 2021, with more ideas for harvesting, using and preserving the fresh herbs from your strawberry pot.

Colorado Master Gardener/CSU Denver Extension Online Plant Sale Now Through May 16

Choose from 10 types of tomatoes and 10 pepper varieties

by Molly Gaines, CSU Extension-Denver Master Gardener since 2019

COVID-19 restrictions mean Colorado Master Gardeners/CSU Denver are unable to host our traditional in-person plant sale this year, but we are happy to offer an online sale now through Sunday, May 16.

Ten types of tomatoes and 10 varieties of peppers are available for $5 per Denvergrown plant. All profits from the sale help support programming and outreach for the Colorado State University Denver Extension office. 

During my first year working at our traditional in-person plant sale, I was blown away by the variety of tomato and pepper plants offered. There were so many sizes, shapes and varieties! It is always a little overwhelming to choose, despite knowing a thing or two about what I like and how to make them grow!

An advantage of this year’s online sale is being able to read about the varieties and place an order in just a few minutes. I cannot wait to plant my favorite tomato variety, a Sun Gold cherry (oh, their color and sweetness!); an Heirloom Cherokee Purple; and a hybrid, Better Boy — a prolific variety with fresh tomato flavor. I can already taste those BLTs we will begin eating non-stop starting in August.

Where to Shop

Our online catalog contains clear descriptions of the tomatoes and peppers on sale. Personally, I am excited to try my hand at growing the Sauve Orange, a low heat, high yield, flavorful habanero pepper that will be a colorful addition to fresh salsas and summer salads.

How to Purchase

Before the purchase deadline of Sunday, May 16, visit our online plant sale store to place your order. Shop soon as popular varieties can sell out!

Be sure to order the desired quantity of plants by adding each plant to the cart individually (3 plants=3 add-to-cart clicks) or by adjusting the quantity in the shopping cart. Click here for further instructions.

You can pay using your credit card or by check. To pay by check enter “PAYBYCHECK” in the discount code box at checkout and we will collect your check when you pick up your plants.

Unfortunately, we will not have additional plants for sale during pick-up – so make your selections carefully.

After Ordering

After placing your order, you will promptly receive an email confirmation from the CSU Extension eStore. Five days later, you will receive a second email with a link to SignUpGenius. Here, you will be able to select the date/time to pick up your plants on either Saturday, May 22, or Sunday, May 23, between 10 a.m. and 3p.m. and received detailed pick-up instructions. Reservations are required for pick-up.

No-Contact Plant Pick-up

Plant pick-up will be in Denver’s City Park; you will receive further instructions on the park’s pick-up location by email.  Masks are required for pick-up. If you are paying by check, make it payable to Colorado State University Extension and be sure to bring your ID.

Arriving at your designated time during your 15-minute window is important for no-contact pick-up as plants will be available in a timed order.

Mitigating COVID-19 Risks

Plant sale staff will maintain social distance, wear masks, provide hand sanitizer, and minimize contact. Likewise, please wear your mask when you arrive.

Thank you in advance for making the plant pick-up experience safe for everyone.

Gardening Advice from a Master Gardener

When you plant your vegetables and as you move through the gardening season, know that Colorado Master Gardeners are here for you! The best way to reach us is through the Denver Master Gardener HELP line, 720.913.5278, or by emailing denvermg@colostate.edu. Also, be sure to visit the Denver extension website for a wealth of gardening information tailored to our growing conditions.

For more information regarding the plant sale, please contact  Merrill Kingsbury, at merrill.kingsbury@colostate.edu., or the office at 720-913-5270.

Indoor Gardening with Microgreens

By Uli Klein
CSU Extension-Denver Master Gardener since 2019

Microgreens have been on the menus of high-end restaurants for years, and now you can grow them at home. Their colorful appearance and delicate flavors make them an attractive garnish to spruce up salads, soups, and sandwiches. Health-conscious consumers appreciate their high level of nutrients and add them to smoothies and protein shakes.

If you’ve never grown microgreens, now’s the time. For beginners, I recommend starting with some basic equipment and growing a few easy varieties. Then, after your first success, explore the many different tastes, colors, and textures that microgreens can provide.

Sprouts, Microgreens, Baby greens – What’s the difference?

Sprouts are grown in closed, humid conditions. They only need water, no soil or even sunlight, to grow. In general, sprouts take about 1 week to grow, and both the stems and seeds are edible. They add vitamins and a crunchy texture to recipes.

Microgreens are grown in soil, soil substitute, or on a hydroponic mat. Microgreens are easy to grow with light, air, and some ventilation. The risk of contamination with bacteria is negligible as long as they are handled properly and only healthy plants are consumed. Microgreens are typically harvested at the cotyledon or first leaf phase, but some varieties can be grown to the true leaf phase. Most take between 1 to 3 weeks to grow. Only the leaves and stems are eaten.

Baby Greens are smaller leafy plants compared to their mature counterparts and are grown in soil or a soil substitute, or they’re grown hydroponically. They are harvested before they are full grown, on average after 40-60 days and at 4-6 inches tall.

How to Grow Microgreens Indoors

All you need to grow microgreens are containers; soil, soil substitute or a soilless mix; and microgreen seeds.

Fill clean and sanitized plastic containers, like small blueberry containers or larger strawberry containers, with ½ to 1-inch of moist soil or other substrate such a coconut coir.

Select seeds that are specifically labeled for microgreen or sprouting use. The easiest and fastest-growing seed varieties include radish, arugula, kale, cress, broccoli, mustard, and Asian greens. Cilantro, basil, pea, and sunflower greens can be more difficult to grow. Avoid tomato, pepper, and eggplant seeds because these seedlings contain alkaloids, which are toxic for humans at high levels.

Sow seeds evenly and fairly thickly on top of the soil. If you’re planting microgreens in large quantities, a seed density calculator can help.

Gently tamp seeds down into the soil surface. Large seeds benefit from a light covering of soil; smaller seeds germinate faster by leaving them uncovered.

Place the seeded container on a tray, such as a 10 x 20-inch tray or plant saucer. Moisten the seeds with a gentle spraying at first, then water the container from the bottom tray to keep the soil moist, but not soggy. This method keeps the leaves and stems dry to avoid plant problems.

Some microgreen growers recommend the optional step of covering the seeded tray with another tray or dome for 1-to-3 days to help speed germination and to keep moisture in.

Microgreen seeds can grow on a windowsill with the available light from a window and at room temperatures between 60- and 75-degrees Fahrenheit.

Once the plants are around 1-inch tall, intermittent gentle horizontal airflow with a fan helps to keep plants healthy and strong.

Some of the microgreens are almost ready to harvest; more will be ready in another 7-to-10 days.

How to Harvest Microgreens

When plants are 2-inches tall, use scissors to cut the stems about ¼-inch above the soil level. Small and deep containers may make it difficult to cut the plants, so carefully lift the entire plant and soil complex out of the container to harvest. It can be messy if it breaks apart because the roots aren’t sufficiently interwoven with the soil.

The plants won’t regrow after harvesting, so the growing medium with the roots is best recycled by composting it. Clean and sanitize the containers and replant with a new batch of seeds to ensure a steady supply of microgreens.