Category Archives: Fertilizers

Colorado Gardening Calendar for April 2024

By: Molly Gaines, CSU Extension-Denver Master Gardener since 2019

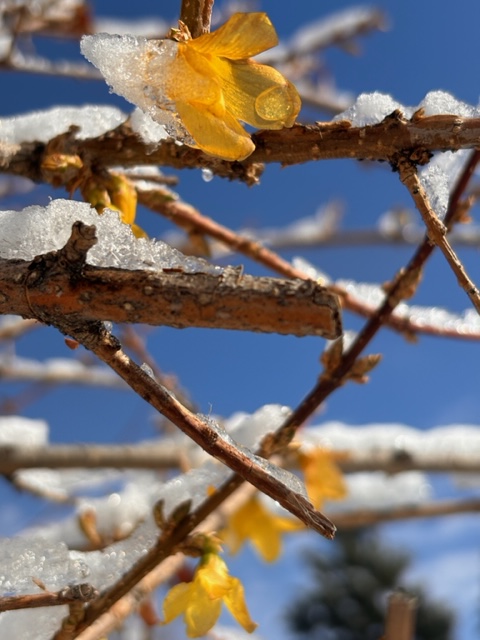
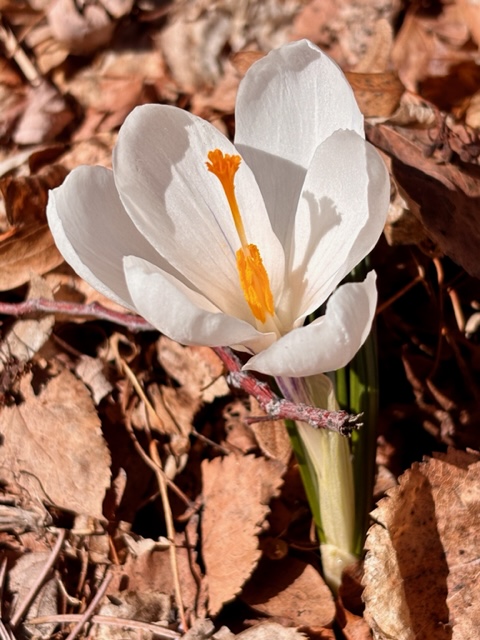
Signs of spring are everywhere in Denver. Daffodils, crocus and other spring flowers in full bloom one day; covered in ice and snow the next. Oh, to be a gardener at 5,280 feet!

While it’s too early to spend a lot of time planting, it’s a perfect time to prepare your soil, garden beds, tools, pots and lawn for the 2024 growing season. Below are a few gardening activities to consider before Mother’s Day, May 12 (around the safe zone from hard frosts) for planting most plants, flowers and vegetables.

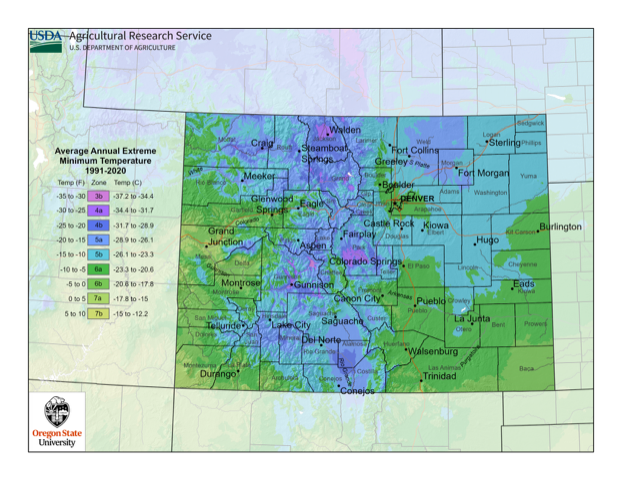
As you plan your garden, it’s worth noting that some of the Denver metro is in a new gardening zone. Last November, the USDA announced updates to its “Plant Hardiness Zone Map,” updating this go-to tool for gardeners for the first time since 2012. The new map, which can be found here, places parts of Denver in Zone 6a rather than 5b. Zone numbers reflect the average extreme minimum temperatures and help determine what plants will thrive in each zone.  Higher numbers equal incrementally warmer low temperatures. For background about how to use this map as a planting guide, visit this helpful article from the National Gardening Association’s learning library.    

Vegetable Garden

  • Clear remaining debris. Pull emerging weeds.
  • When the soil is dry, add a fresh 2-3-inch layer of compost to your beds. This supports soil health and plant vigor. Gently work compost into the top layer of your existing soil with your hands, a trowel or a cultivator. Let rest a few weeks before planting.
  • Plant frost-tolerant spring plantings, such as peas, spinach, arugula, radishes, Swiss chard, etc.
  • Start indoor seeds for warm-weather vegetables such as tomatoes, peppers, squash, melons, etc.
  • Reference this Vegetable Planting Guide to plan what you will plant when.

Trees & Shrubs

  • The snowpack is solid Colorado-wide this year, well above 100 percent. This includes Denver. That said, if this month is dry, be sure to water your trees and shrubs.
  • Early this month, prune deciduous trees, conifers and summer-blooming shrubs.
  • Later in April into mid-May, prune rose bushes. For details on exactly how, why and when to do this, visit here.  This is weather dependent so watch for low temperatures and delay if a cold snap is predicted.
  • Remove broken branches from trees and clear dead leaves and decayed fruit from the base.
  • If you’re looking to plant a new tree, consider the Park People’s annual fruit and yard tree sale that begins April 20. Trees range from $50 to $80, and sales support the Denver Digs program. More details can be found here.  

Lawn Care

  • Prep your mower, sharpening the blade as necessary and conducting other maintenance. Lawn mower blades should be sharpened at least once per season.
  • If you use a pre-emergent weed product, apply in early April. For more details about how to use, visit here.
  • Fertilize as desired, reading labels for proper application. Keep in mind that fall is the most important time for lawn fertilization. Applying only in the spring can mean excessive top growth and shallow root systems.

Perennial Beds

  • Cut back perennial plants if this wasn’t done last fall, leaving 3 inches of the plant above the soil.
  • Similar to your vegetable garden, the soil in these beds will also benefit greatly from compost, with the exception of native plants which generally prefer unamended soil.
  • Pull emerging weeds now. Stay on top of them from the start.
  • Divide overgrown perennials such as chives, sedum, grasses, phlox, daisies, hosta, etc. This will lead to healthier plants and better growth.

Other April Gardening Thoughts

  • Assess garden supplies. Purchase or plan to borrow anything needed. Sterilize and sharpen garden tools.
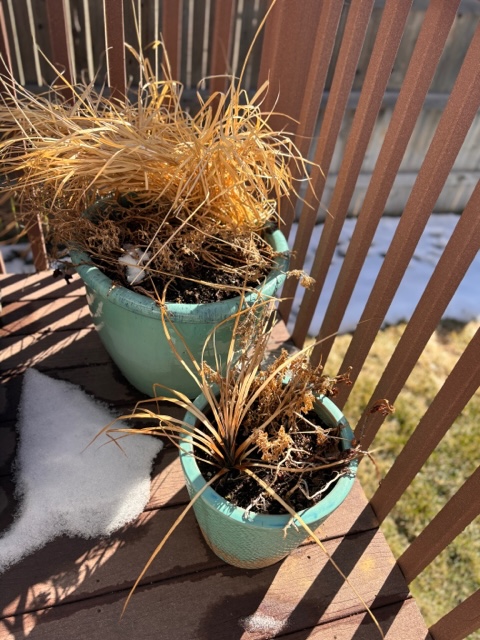
  • Empty any pots or containers still holding last year’s dead plantings. Clean and disinfect them to prevent disease in new plantings.
  • Denver Water recommends waiting to turn on your irrigation until after the last freeze, typically in early May. Hand water until then.
  • Sow wildflower and pollinator seed mixes.
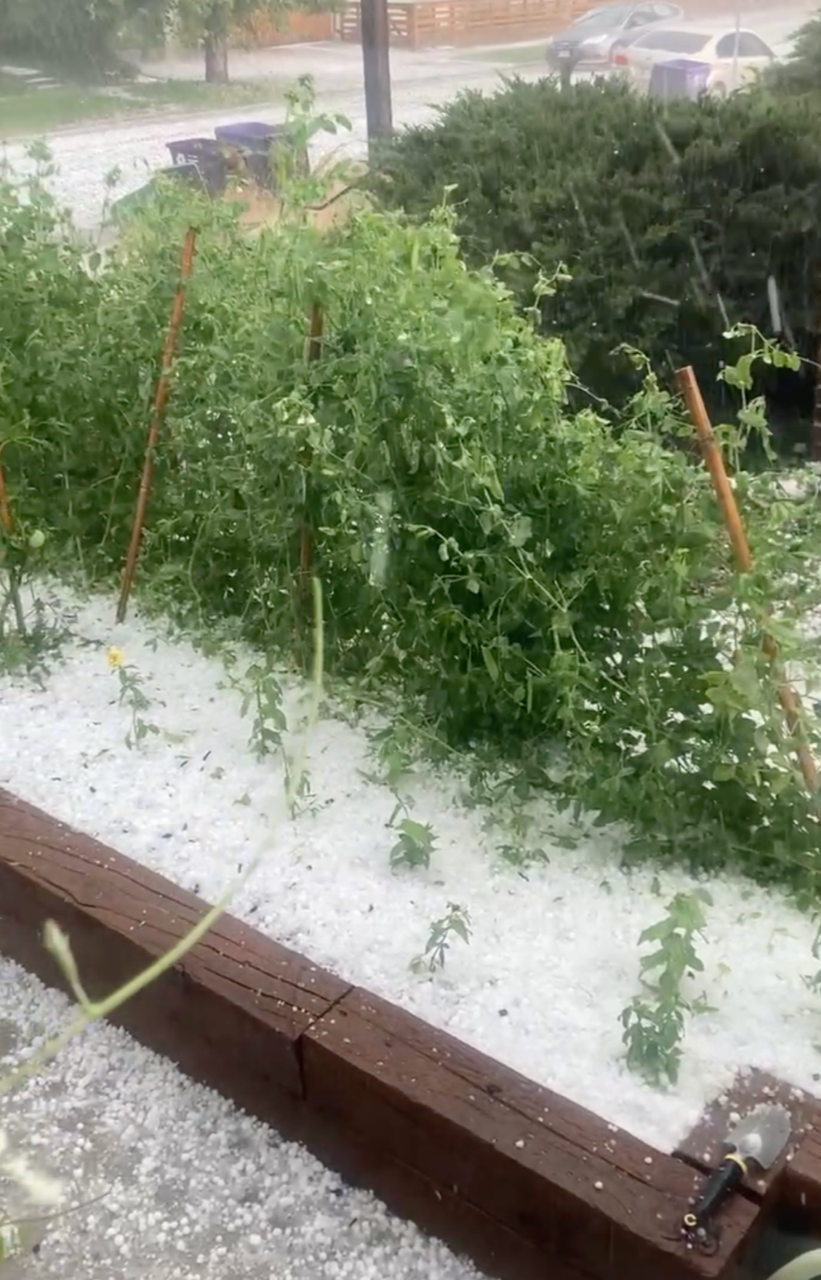
  • Prepare for frost, hail and other bad weather. Have sheets of plastic, old bedsheets and five-gallon buckets in easy reach for late-season snow or spring and summer hail. Remember the hailstorm that hit Denver late June last season?

Springtime in Denver is special. I love watching new life slowly unveil itself. It’s a time full of promise, new beginnings and high anticipation of the color, flavor and textures around the corner. The more prepared you are in April, the more enjoyable your summer gardening season will be.

As always, if you have questions about plants, planting and any other gardening and yard related topics, visit the CSU Extension Yard and Garden website for tips.

Turf Grass Management for Autumn

By: Steve Aegerter, CSU Denver Extension-Colorado Master Gardener since 1999

Why is there such a mystery about maintaining a healthy Kentucky Bluegrass lawn? Depending on who you talk to and what you read in books and on the internet, you can get lots of conflicting advice. No wonder homeowners sometimes get confused and downright addled!

Proper turf management is actually easier to achieve than one might think. If a picture-perfect lawn is your goal next season, you can definitely achieve it by following these few simple research-based recommendations this fall.

Fertilization. Fall is the absolute best time to fertilize with nitrogen fertilizer. This is simply called a winterization process and should be performed in October-November. Benefits of this process are better fall and winter color, earlier spring green-up, increased shoot density, improved fall, winter and spring root growth, and enhanced storage of energy reserves. This also eliminates the need to fertilize in the spring.

Mowing. The proper mowing height is 2 to 3 inches. Ignore common advice to mow the grass shorter in the fall. Also leave the grass clippings on the lawn – they will not contribute to thatch accumulation. In fact, they are comprised primarily of nitrogen and as they break down, they add nitrogen to the soil.  So, in essence, you are fertilizing every time you mow.

Core Aeration. Core cultivation should be performed in the fall, and for that matter also in the spring. This assists in the management of thatch, reduces compaction, increases gas exchange, enhances water filtration, improves root growth, and provides an ideal environment for seed germination.

Overseeding. If the lawn is thin or has bare spots, overseed immediately after core aeration. Don’t skimp – purchase the best blend of sun/shade grass seed you can find. Taking the bargain route can lead to years of woe.

Power raking. This practice generally does more harm than good as it can damage roots or remove turf. Skip it, it is not necessary.

Watering. It is far better to water less often, but deeper. Grass benefits more from a weekly 45-minute soak than a daily 10-minute drink. Best of all, by watering correctly, you’ll likely use less water and save money. Winter watering is advisable during prolonged dry spells of 3-4 weeks. For more information on winter care, visit Fall and Winter Watering – 7.211 – Extension (colostate.edu).

Following these simple recommendations will provide a huge assist in obtaining a lush green lawn next summer. For more lawncare information, visit CSU’s Lawn Care Fact Sheet 7.202.

Meet the Garden Squad—Gardening Help at the Denver Botanic Gardens

Meet the Garden Squad is a way to get better acquainted with some of our CSU Extension Master Gardener volunteers.

Meet the Gardening Help Volunteers

The CSU Extension Master Gardeners usually pick up the gardening helpline at the Denver Botanic Gardens or answer questions when people walk-in the door. Even though buildings at DBG are closed for now, gardeners can still get their gardening questions answered by Gardening Help from Colorado Master Gardeners at Denver Botanic Gardens, only remotely.

The interest in gardening has soared ever since people have had to hunker down at home and find ways to keep busy. First-time gardeners will likely have questions on how to get started, what to plant now, what can grow in containers, and much more.

Even gardeners with some experience have questions, too. All gardening questions can be emailed to gardeninghelp@botanicgardens.org and a CMG, working remotely, will reply by email.

Gardening Help volunteers include: Back row, left to right: Jan Fahs, Jan Davis, Ken Zwenger, Mark Zammuto, Gordon Carruth, Fran Hogan
Middle row: Lynne Conroy, Harriet Palmer Willis, Kathleen Schroeder, Leona Berger, Cindy Hanna, Mary Adams, Nancy Downs
Kneeling: Dee Becker, Charlotte Aycrigg, Jan Moran
Not pictured: Mary Carnegie, Linda Hanna, Maggie Haskett, April Montgomery, Ann Moore, Kathy Roth, Amy White

Gardening Help is a project of the CSU Extension-Denver Master Gardeners at the DBG. Volunteers provide reliable and research-based information to thousands of home gardeners each year.

Volunteers commit to at least one year in the role, with a minimum of six shifts spread across the year. The commitment starts early in the year with an orientation and training from Nancy Downs, project coordinator.

Many volunteers are GH regulars and they return to the project every year. In addition to being an active CMG, they have to satisfy DBG volunteer requirements, too. That means they’re a member of the DBG and enrolled there as a volunteer.

Some of the key characteristics of GH volunteers are good research, plant identification and diagnostic skills. Because the project is located at DBG, volunteers need to keep on top of what’s blooming at the DBG by season, so they can answer common questions that might pop up.

Photo provided by Nancy Downs

Text by Jodi Torpey
Master Gardener volunteer since 2005

No More Buds? Turn to Earbuds.

By this time in the year, I’m at the point of good riddance! with the weeds and careful tending (shout out to this cold spell for sealing the deal). Pretty much everything is done and put to bed. I then spend the next two weeks really dialing into my houseplant game before I get bored and start Spring dreaming. My Fall break from the garden is short-lived so I start listening to old episodes of now-defunct podcast series and dream with new ones.  Here are a few of my favs:

Gardenerd Tip of The Week

Gardenerd.com is the ultimate resource for garden nerds. We provide organic gardening information whenever you need it, helping you turn land, public space, and containers into a more satisfying and productive garden that is capable of producing better-tasting and healthier food.

https://gardenerd.com/

My thoughts: The host lives in LA, so this one is great for winter listening as we get chillier, I love hearing about the warmth of Southern California and what’s coming into season. Interviews with other experts and educators in the horticulture field discussing plants, but also cultivating grains, discussing bees, and seeds. Each episode ends with the guest’s own tips, many of which are news to me and have been incorporated into my own practices. 

On the Ledge

I’m Jane Perrone, and I’ve been growing houseplants since I was a child, caring for cacti in my bedroom and growing a grapefruit from seed; filling a fishtank full of fittonias and bringing African violets back from the dead.

https://www.janeperrone.com/on-the-ledge

Houseplants, if new to the podcast start here for an overview, and guidance.

Jane is a freelance journalist and presenter on gardening topics. Her podcast has a ton of tips for beginners, and more advanced info for longtime houseplant lovers, as well as interviews with other plant experts. The website is also useful to explore the content of an episode if you aren’t able to listen. I could spend an entire morning traveling in and out of the archives. 

My thoughts: As the growing season comes to a close, my indoors watering schedule starts wobbling between what the plants need and my summer habits of watering too many times per week–welcome back,  fungus gnats! Here’s an entire episode on them

Plant Daddy Podcast

We aim to create a listener community around houseplants, to learn things, teach things, share conversations with experts, professionals in the horticulture industry, and amateur hobbyists like ourselves. We also want to bring the conversation beyond plants, since anybody with leaf babies has a multitude of intersectional identities. We, ourselves, are a couple gay guys living in Seattle, Washington, with a passion for gardening and houseplants. A lot of our friends are the same, though each of us has a different connection, interest, and set of skills in this hobby, demonstrating a small amount of the diversity we want to highlight among plant enthusiasts.

https://plantdaddypodcast.com/

My thoughts: Plants are visual, podcasts are auditory- episodic overviews with links to viewable content available on their website. Are you also seeing Staghorn Ferns everywhere? They have an entire episode (photos included!) on the fern and how to properly mount it for that vegan taxiderm look. Matthew and Stephen are self-identified hobbyists with a passion for plants all the way down to the Latin–it’s impressive.

Epic Gardening

The Epic Gardening podcast…where your gardening questions are answered daily! The goal of this podcast is to give you a little boost of gardening wisdom in under 10 minutes a day. I cover a wide range of topics, from pest prevention, to hydroponics, to plant care guides…as long as it has something to do with gardening, I’ll talk about it on the show!

https://www.epicgardening.com/

My thoughts: The Netflix-episode-when-you-just-don’t-feel-like-a-movie kind of podcast. Addresses the best varietals, composting, soil pH, and troubleshooting some common issues in the garden. With daily episodes archived back to December 2018, there is a quickly digested thought for some of your own curiosities. The website is also a wealth of knowledge. 

Eatweeds Podcast: For People Who Love Plants

Eatweeds: An audio journey through the wonderful wild world of plants. Episodes cover modern and ancient ways wild plants have been used in human culture as food, medicine and utilitarian uses.

http://eatweeds.libsyn.com/

My thoughts: most recent episode (and appropriately timed!)  On edible acorns. My fav topics include foraging and wild yeast fermentation; and when I really start missing the Pacific Northwest, The Wild and Wonderful World of Fungi sends me back to a misty forest wander politely decorated by les champignons. Posting of this pod is sporadic–only 25 episodes since 2014.

You Bet Your Garden

(no longer on air, but archives available)


You Bet Your Garden® was a weekly radio show and podcast produced at WHYY through September, 2018. The show’s archive is available online. It was a weekly syndicated radio show, with lots of call-ins. This weekly call-in program offers ‘fiercely organic’ advice to gardeners far and wide.

https://www.wlvt.org/television/you-bet-your-garden/

My thoughts: Host, Mike McGrath, spends much of the show taking calls and troubleshooting, reminiscent of another public radio behemoth with Click and Clack, the Tappet brothers. McGrath incorporates a lifetime of organic gardening tips with humor. McGrath features one tip to find a local “rent a goat place” (no joke) to get goats to eat the most troublesome weeds to a concerned caller considering setting much of her yard on fire.

Cultivating Place: Conversations on Natural History and the Human Impulse to Garden

Jennifer Jewell, the founder of Jewellgarden and Cultivating Place, achieves this mission through her writing, photographs, exhibits about and advocacy for gardens & natural history and through her weekly public radio program and podcast Cultivating Place: Conversations on Natural History and the Human Impulse to Garden, on gardens as integral to our natural and cultural literacy.

https://www.cultivatingplace.com/

My thoughts: sort of like On Being, but for gardening.

A fav episode:

If you aren’t so sure about this podcast thing, and just want a place to start, start here.

Do you really need a brain to sense the world around you? To remember? Or even learn? Well, it depends on who you ask. Jad and Robert, they are split on this one. Today, Robert drags Jad along on a parade for the surprising feats of brainless plants. Along with a home-inspection duo, a science writer, and some enterprising scientists at Princeton University, we dig into the work of evolutionary ecologist Monica Gagliano, who turns our brain-centered worldview on its head through a series of clever experiments that show plants doing things we never would’ve imagined. Can Robert get Jad to join the march?

https://www.wnycstudios.org/podcasts/radiolab/articles/smarty-plants

Sheet Mulching Re-visited

Last week’s blog included a link back to our October 2016 blog on experimenting with sheet mulching (also known by some as “lasagne gardening”) http://wp.me/p5JEJY-YZ so I thought we ought to re-visit and see how that worked. Sheet mulching is the layering of different kinds of compostable garden waste (sometimes with old newspapers or cardboard as well) on the surface of poor garden soil. The aim is to quickly add organic matter to the existing soil, improving drainage, water retention and fertility.

OLYMPUS DIGITAL CAMERA

I had several questions in my mind last fall when this experiment was carried out:

1. Will the cardboard decompose?
2. Is the “green” and “brown” balance right?
3. Will the raccoons and skunks churn it all up?
4. Will there be a crop of new weeds from the imported materials?
5. Will the cold Colorado winter simply stop any decomposition from taking place?
6. Will there just be a smelly slimy heap to remove next spring?
7. OR, will we have achieved that elixir of gardening – fertile, well-drained, moisture-retentive soil???

The experiment has been going on for some eight months now and these are the answers, so far:

1. YES. Some digging about at the base of the layers revealed no sign of cardboard except for a few stray bits of plastic tape that didn’t get removed when I broke down the cardboard boxes.
2. Probably YES. Though close inspection revealed that in some parts the grass clippings were laid too thick and would have done better if they’d been mixed in more with the dried leaves.
3. NO. Apart from a few little exploratory digs by some critters, the layers remained intact.
4. NO. Initially there was some germination from seeds (unidentified grass/cereal) which were in the chicken coop material I used, but these were easily pulled in the first couple of weeks. Since then not a single weed has appeared.
5. NO. Digging into the layers revealed pretty well composted good, brown material though not everywhere. Lots of worms too. Straw seems to have been the hardest to break down and is still recognizable in some places.
6. NO. See 5.
7. Well, MAYBE ….

IMG_1049

The native grey clay soil is still there beneath the sheet mulch

IMG_1047

Well on the way to being compost

There is no doubt that we now have deep layers of composted garden waste on our borders. The layers have not been totally absorbed into the soil below. They have shrunk in depth by a couple of inches which is probably mainly due to gravity and the reduction of air pockets. I accept that these borders may remain as “raised” borders for some time.

So, what happens next? I expect these sheet mulched borders to continue to decompose over the summer and, perhaps, by next spring will no longer be “raised”.

But I can’t wait until then to get new plants in.  Already, I have a planted a Japanese maple and some hellebores in one of the beds (both should benefit from the rich compost.  I dug holes in the compost layers, put in some native soil from elsewhere in the garden and planted and watered.

I was concerned that the compost itself would not hold the plant roots securely which is why I mixed in garden soil from elsewhere to give weight. It will also provide mineral nutrients that may not be present in the compost/mulch. Now, some six weeks later, the new plants are all well rooted and looking good.

IMG_1227

Japanese maple and hellebores just planted

So, is it worth doing? I’m giving the experiment a qualified “yes” at this stage.

I think it works for areas that have been neglected or are being cultivated for the first time. There is an initial effort in gathering the materials and building the sheet mulch layers, but then you just sit back and wait.

Does one big “hit” of compostable material work better than cumulative additions over the years? I don’t know. Time will tell as I compare these borders with others in the garden. Certainly, I got a lot more compost onto the borders than I could generate annually from my compost bins. (You don’t get a lot of kitchen waste from two people; and a modest-sized, young garden doesn’t produce much waste either.)

It might have been less work to simply go out and buy bags of compost from the garden center or big box store. That would have been expensive (my materials were all free). There are no regulations on what goes into bagged compost for retail sales.  At least I knew exactly what was in mine.

Aside from these thoughts, there has definitely been a great sense of satisfaction in doing the experiment.  It was interesting.  It was good exercise.  It was free.  I turned what other people thought was just rubbish messing up their yards into useful, re-vitalizing material for our garden and plants.

Anne Hughes/A Denver County Master Gardener

Sheet composting or … cooking up an experiment in the garden

I’ve always known that the soil in the garden was the key to planting success.  So, when we started our new Denver garden in 2014 we turned in most of the turf and dug, weeded and added leaf mold to the topsoil.  (We had kept all the fall leaves for this purpose.)  Then all the bare soil was covered with a 3-4 inch mulch of wood chips.  Key trees were planted in spring 2014 with more trees, shrubs , ornamental grasses and herbaceous perennials following in 2015.  We watered diligently till the winter and snow came.  We thought we’d made a good start.

In spring 2016 I was delighted to see our young trees and shrubs budding out .  Most of the herbaceous perennials had survived, but they didn’t increase in size during the summer. They hardly bloomed.  They didn’t die.  They just sat there.  Watering seemed to make no difference.

I figured that the larger plants (trees and shrubs) were able to get their roots down into the clay where there was more moisture and more nutrients.  But the perennials were struggling with their smaller root balls being mostly in the 8-10 inches of sandy loam topsoil.  Here water drained away quickly and despite the wood chip mulch, the unrelenting sun and high temperatures baked the soil to an iron hard cap over dull powdery stuff below (if you could get the spade in that far!).

I had a soil test done by the soil laboratory at CSU which told me that our topsoil was low in nitrogen and organic matter.  Ah-ha!  That is why the plants weren’t thriving.  The lack of nitrogen was slowing the development of stems and leaves.  The lack of organic matter meant the soil wasn’t holding sufficient water for the plants’ roots to take up.

OK, I thought, we have to do more to improve the soil. I’ve never liked the idea of just throwing chemical fertilizers at the garden.  It’s expensive, wasteful and potentially dangerous to the wider environment.  Double-digging and adding store-bought amendments (of uncertain quality) is back-breaking and expensive. What to do?

Soil is not tilled in the natural world.  Fertility is built up by the decomposition of leaves, twigs and other plant waste on the surface.  Soil texture and nutrient levels are also improved by the actions and decomposition of organisms living in the soil and plant roots.  I’d just been reading about permaculture gardening techniques and the soil improvement technique of “sheet composting” or “lasagna gardening” seemed to be what we needed.

This is a way of building up organic matter and nitrogen in the soil without digging.  You gather different sorts of compostable material (green garden waste, compost, grass clippings, straw, dried leaves, well-rotted manure are just some you can use) and pile them up on the soil in layers.  Hence “sheet” composting or “lasagna” gardening. Essentially, you are making compost directly on top of the soil rather than in a compost bin elsewhere and then transferring it later to the garden.

Many books suggest that you also lay newspapers or plain cardboard down first to smother any existing weeds in the ground.  This is usually where you are trying to improve a weedy, uncultivated area.  But such two dimensional materials can be a barrier to the passage of water, nutrients and the essential soil creatures (see below) that you need to make the process work.

Cardboard layer to start

Cardboard layer to start. Existing wood chips raked on to path first.

Cardboard often incorporates waxes which inhibit the movement of moisture and make it hard to break down.  Shredded newspaper in half inch layers may be a better alternative, but not perfect.  I did use cardboard, but in hindsight probably didn’t need it as the soil was not weedy at all.

Every layer has to be thoroughly soaked with water including the existing soil.  The fungi, bacteria, insects, beetles, earthworms etc. that will break down your materials need water to do their work.

My “recipe” comprised from bottom (soil level) to top:

  • cardboard (on reflection, probably not needed)
  • garden compost (precious stuff from my own bins)
  • grass clippings from a neighbor’s “pile” and half a bag of left-over peat moss
  • partially decomposed garden waste from another neighbor’s “pile”
  • wood shavings and straw from another neighbor’s old chicken shed
  • grass clippings again
  • leaves collected in our leaf cage from the previous fall
  • more partially decomposed garden waste
  • wood chips to hold it all in place and for aesthetic appeal

The layers amounted up to about 12 inches of material.  Each layer was watered in.  Grass clippings were laid in approximately 1 inch layers while the other materials were laid in 3-4 inch layers.  You need much more brown material by volume than green.

Straw and partially decomposed garden waste

Straw and partially decomposed garden waste

Just like making compost conventionally it is important to have a mix of “green” and “brown” materials or, in chemical terms, sources of nitrogen and carbon.  Too much green (e.g. grass clippings) and you have too much nitrogen.  Too much nitrogen will encourage leafy top growth in your plants at the expense of root and fruit/flower development leading to straggly unhealthy plants.  Too much brown and the materials won’t break down sufficiently.

But the green/brown or nitrogen/carbon balance isn’t just about your plants.  All the living creatures in your soil need the right balance too.  They have to live, multiply, work the soil, die and decompose in order to release the precious nutrients to your plants.  The soil creatures need to feed before your plants can.

OLYMPUS DIGITAL CAMERA

Last year’s leaves go on

It’s important that the materials you bring in don’t also bring in weed seeds resulting in a huge weeding problem for the next year.  But the theory is that any weed seeds that do come in will rot in the damp condition of the layers. And if they don’t rot first, they won’t germinate anyway due to lack of light.

The biggest part of this job is sourcing and gathering all the materials.  There were many trips to neighbors’ gardens with rakes and shovels.  Then the trips home again with a car full of other people’s “waste” in old plastic bags. It is hard work.

OLYMPUS DIGITAL CAMERA

The finished thing

So, now we have some 60 feet of garden borders resting for the winter under their layers of composting (we hope!) materials.  We also have many other areas where fewer layers were used (mainly straw with grass clippings or partially decomposed garden waste) to about 3-4 inches to perk up the soil around and between trees and shrubs.

Many questions remain:

  • Will the cardboard decompose?
  • Is the “green” and “brown” balance right?
  • Will the raccoons and skunks churn it all up?
  • Will there be a crop of new weeds from the imported materials?
  • Will the cold Colorado winter simply stop any decomposition from taking place?
  • Will there just be a smelly slimy heap to remove next spring?
  • OR, will we have achieved that elixir of gardening – fertile, well-drained, moisture-retentive soil???

Well, the answers to all these questions will be given next year when I report back in another post.

In the meantime, what do you think? Have you tried this? Did it work well? Please share your comments below.

Anne Hughes  – Denver County Apprentice Master Gardener