
Thank you to everyone who attended our plant sale last weekend. It was another record-setting, sell-out year! We are grateful for your support.
By John Ashworth, CSU Extension – Denver Master Gardener since 2014

(Photo: Jerry Friedman, via Wikimedia Commons)
For those of you who are trying to add low-maintenance seasonal beauty to your yard while helping our threatened local pollinators, Rocky Mountain native perennials are an obvious choice. Once established, these plants are hardy and resistant to most pests (many are also not attractive to deer or rabbits!), As a side benefit, they need very little water to thrive. Native perennials are a natural fit with drip irrigation since you can periodically deliver a small amount of water directly to the plant without watering weed seeds that are always present in the soil.
Making a Plan
You need to decide where to put your new perennial bed(s). It can be an existing flower bed, a section of grass that you no longer want to keep, or an area along existing walkways or paths. In my case, I had a hill in my backyard that needed attention to remove bindweed inherited from a previous owner. After digging up the bindweed, I drew up a plan for an array of native flowers and shrubs that were hardy, attractive to hummingbirds and bees, and readily available locally. Colorado State University (CSU) Extension has many good online reference fact sheets that provide attractive options, including Native Herbaceous Perennials for Colorado Landscapes, and Low-Water Native Plants for Colorado Gardens: Front Range & Foothills.
For those looking for a more comprehensive reference, horticulturalists from CSU, the Denver Botanic Gardens (DBG), and local Colorado green industry professionals published Pretty Tough Plants, a book highlighting 135 low-water, native, and non-native plant choices that also are suitable for this type of irrigation system. You’ll find these plants labeled Plant Select® at garden centers.
There are several things to consider as you draw up your plan:
- how much sun each part of the bed receives,
- how tall each plant grows in a season,
- how wide it spreads when it is mature,
- the colors of any flowers, and
- when the flowers emerge during the growing season.
In general, shorter plants do best and are more visible at the front of the bed, with larger flowers or shrubs at the back. Grouping plants by flower color or by when they bloom is a personal choice.
Installing the Drip System
Once you have the plant bed designed, you can develop a watering system design. Drip systems are easy to install and operate at low pressure. They require a pressure reduction valve to lower the normal water pressure found in irrigation systems or faucets to 20-25 pounds per square inch or less. They will need a controller or timer to set the duration of the watering and what days the system will operate.
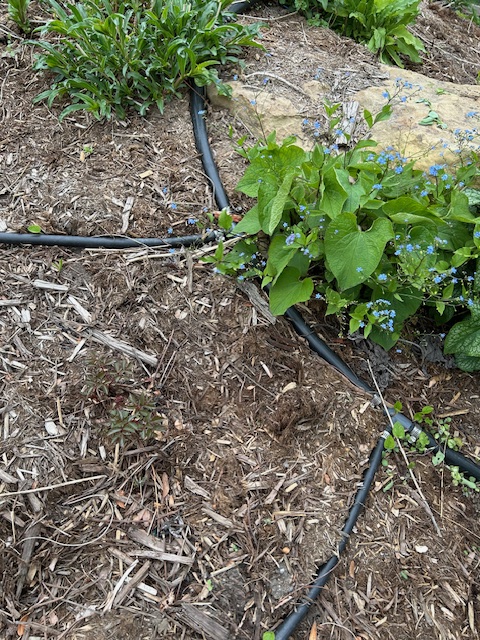
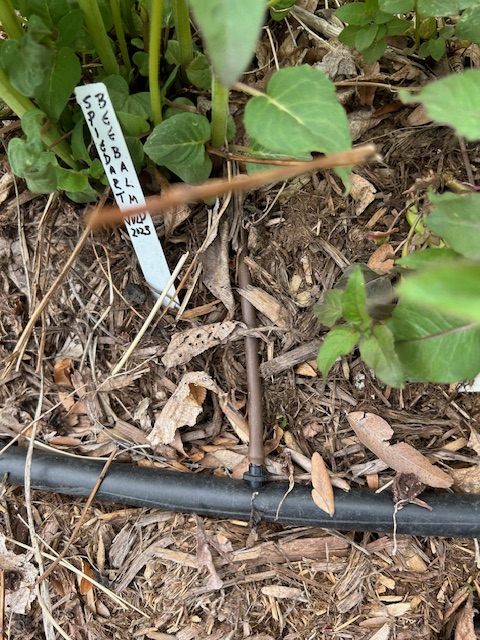
For small areas, 1/2” thin skin drip pipe available at every hardware store can be laid down in the center of a long narrow bed or around the outside of a rectangular bed. For large areas, such as my backyard hill, 1” flexible pipe can be run around one side or two sides and 1/2” pipe sections can be tee-d off every few feet at a 90-degree angle as laterals to form a grid across the surface, see figure 1. The end of each lateral is capped as shown in Figure 2.
Operating the Drip System
In the first year, while the plants are getting established, you will want to set the controller to water twice a week for 20-30 minutes. In subsequent years, you can reduce the watering to once a week for 15-30 minutes.
With some planning, adding drip irrigation provides an ideal environment for native and low-water plants, conserves water, and supports pollinators.

