Tag Archives: houseplants

Heirloom Houseplants: What to Propagate for Generations

By Molly Gaines, CSU Extension – Denver Master Gardener since 2019

On a recent visit to the Cozens Ranch Museum in Fraser, a red and green-leafed begonia in a windowsill, flooded with afternoon sunlight, caught my eye. I walked over for a closer look, and a sign next to the plant shared its special history. It was propagated from an angel wing begonia plant that had been in the Cozens’ family since the late 1800s! 

In the late 1990s, when my husband and I were moving into our first home, my husband’s grandma gave us a cutting from her pothos plant. We’ve had that plant now for 25 years, and we’ve propagated countless other plants from its cuttings for our home and as gifts for friends and family. While arguably more pedestrian than an angel wing begonia, it’s special to us since it came from someone we dearly love.

Generational Plant Ideas

Are you interested in nurturing a special heirloom plant, one that tells a story and can be passed down through your family for generations? If so, below are a few good options. For a detailed list of plants that are easy to propagate, along with propagation methods for various house plants, read this wonderful article from Iowa State Extension. Of course, videos are a terrific way to learn various propagation methods, and you’ll find an abundance of them through a quick YouTube search.

Pothos

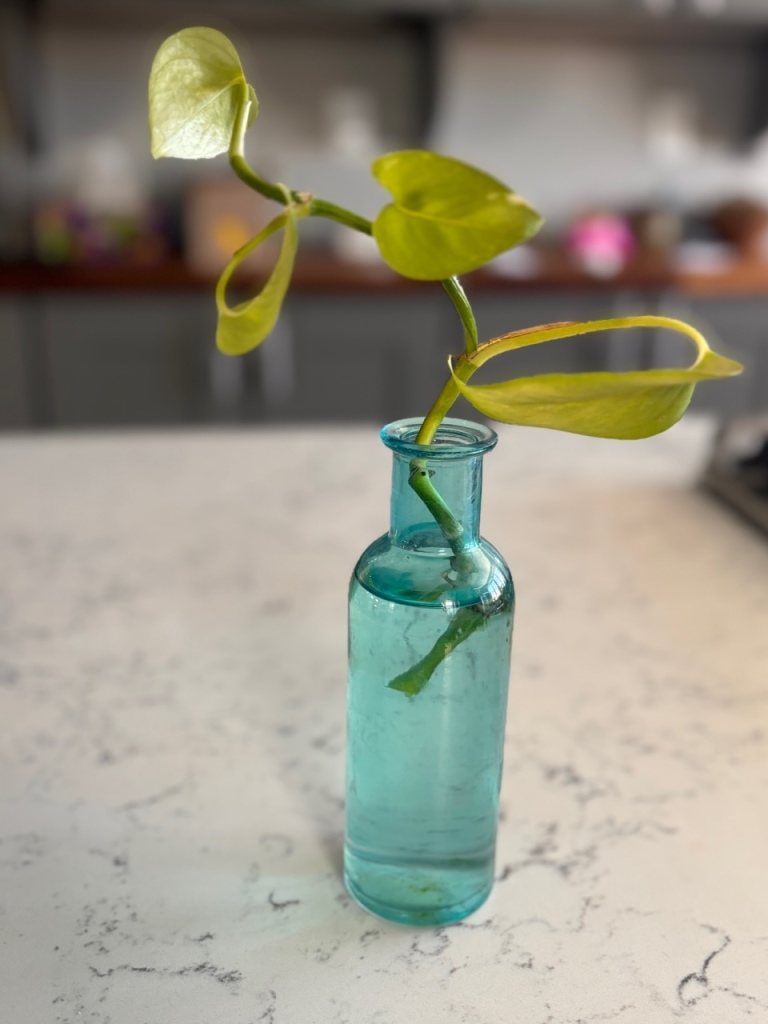
Because it is so simple to grow and easy to propagate, pothos is an excellent heirloom plant choice, according to the University of Wisconsin-Madison Extension. It can survive in a variety of environments, making it a good option for young adults who are likely to move from place to place. It does like filtered light, rather than direct, and well-aerated soil. Through the years, I’ve propagated too many to count. And my own kids have beautiful plants from these cuttings that they can someday place in their homes. Our pothos will always make us think about my husband’s special grandmother, Neva.
Spider Plant or Airplane Plant

Like pothos, spider plant is great for beginners and thrives in indirect sunlight with water as needed, according to the individual plant’s dryness. According to CSU Extension, spider plants have the added benefit of cleansing a home of toxic gases. They quickly outgrow their pots, requiring frequent dividing and repotting. These plants live an average of 20 years. 

Christmas Cactus

While you may not be ready to think about Christmas cactus in February, keep this plant in mind next December. It can be a festive heirloom that makes the holiday season feel even more special. Christmas cactus can live to be more than 100 years old! 

According to the University of Minnesota Extension, these plants do require considerable attention for optimal blooms and growth. They are “short-day plants,” which means they produce flower buds as daylight decreases in the winter months. Christmas cactus like cool nighttime temperatures. 

Jade Plants

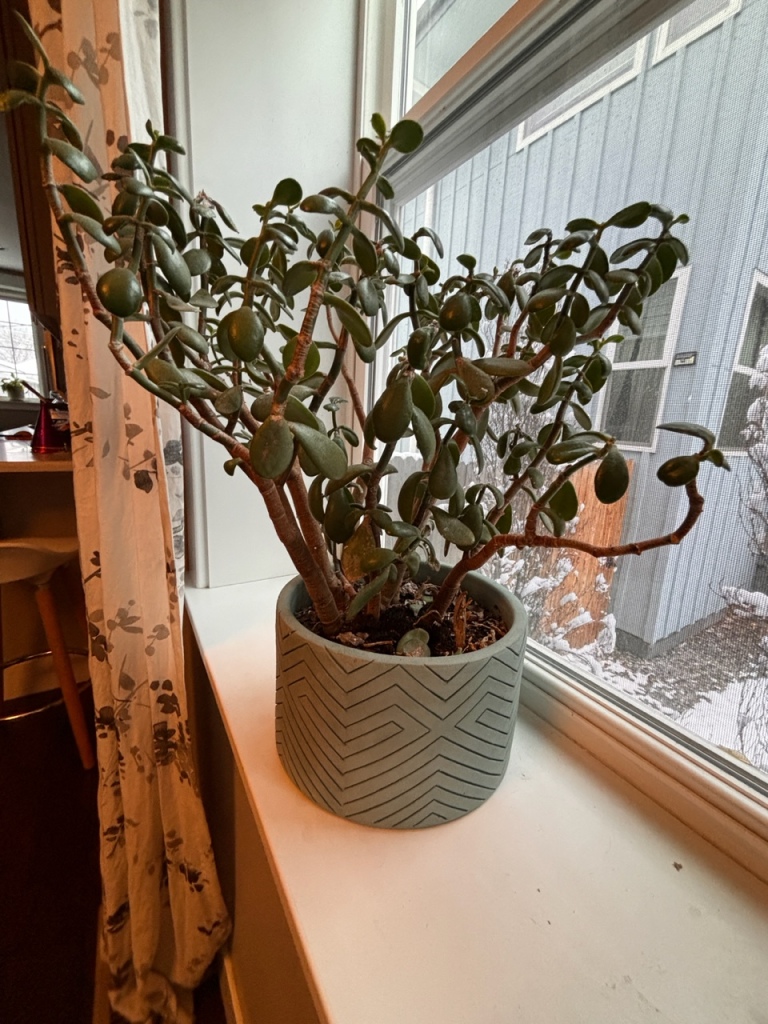
Similar to Christmas cactus, jade plants can live for a long time, 50-100 years. These plants are simple to propagate, making them ideal for gifting or passing down to others. Easy to grow, jade prefers full to partial sun, a south-facing window, and at least four hours of direct sunlight daily. That said, I’ve had a fairly healthy jade plant for a decade that is rootbound, only receives indirect sunlight, and sits in a north-facing window. Jade should be planted in a succulent potting mix and watered only when soil is dry, according to Penn State Extension

I’ve offered a few ideas here for plants to pass along, but there are many more. As someone who loves plants, I like the thought of some of my special plants finding a home with my grandkids yet-to-be. Just as we pass down special jewelry, dishes and other items, houseplants can serve as special reminders of memories and people we hold close to our hearts. They are a way for us to remember the generations of family who came before us. Do you already have a special plant in your home that you could propagate for future generations?

As always, we’re grateful to you for reading our blog. CSU is available with gardening advice at the CSU Extension Yard and Garden website.

How to Select and Pamper Your Houseplants this Winter

By Lori Williams, CSU Extension – Denver Master Gardener since 2016

Houseplants are so lovely and offer a nice spot of green during the Colorado winter. Almost everyone, and certainly gardeners, can find them an enjoyable extension of outdoor gardening. Be it herbs in a kitchen window, plants brought in from summer’s patio to overwinter, or the many varieties that prefer an all-year indoor existence, research shows several health benefits of houseplants, including:

  • Improve employee focus and reduced sick days in the workplace.
  • Reduce fatigue and boost indoor air quality.
  • Lift spirits – pops of color from seasonal plants such as amaryllis or orchids can help beat the winter blues.

As with all plants, houseplants subscribe to the maxim: Right plant, right place. Many who are convinced they have a brown thumb can work through the following simple steps, find their right plant within their (right) place and achieve success. It’s not magic, complicated, or mysterious. Promise.

TIPS FOR HOUSEPLANT SUCCESS

Proper lighting is most important. Evaluate your space and select plants that will work. Find tips for evaluating light quality here.

Most houseplants like household temps that most people like, basically around 70℉.

Some plants need more humidity than typically found indoors, so grouping those together on pebble lined trays and adding water to below the top of pebbles increases the relative humidity.

Watering is unique to each plant: Overwatering kills as many plants as under watering.  Plant tags and a quick google search can explain your plant’s preference. Grouping plants with similar watering needs together helps water accordingly. An inexpensive houseplant water meter is a handy tool, too.

Monitor consistently for pest and/or disease (and while shopping for them, too).  Look under leaves for yellowing or leaf loss. Discovering new growth can happen here, too!

Fertilize seasonally, usually during active growing months from April through September.

SELECTING HOUSEPLANTS

If you are new to houseplants, find help selecting the best ones for your lighting and skill level. This webinar is absolutely wonderful for explaining the science behind happy houseplants and selecting the right plant for your place.  

Once you’ve got a handle on the light in your space, it’s on to the fun part: Make a wish list of suitable plants and go strolling through your favorite local garden center. Enjoy the immersion in the elevated oxygen of the greenhouse, ask their staff questions, and peruse the gorgeousness you will find. 

Aesthetically, it’s fun to mix up plant structures – tall and reedy, soft and velvety, draping growth habitat, foliage colors. Are you wanting something that blooms? Violets, bromeliads, or cyclamens might be the ticket. Or is self-sufficiency key? Sansevieria, pothos, schefflera or succulents are rewarding lower maintenance options.

Another tip is to inspect plants before you buy by checking under the leaves and at the soil line. Sometimes creepy crawlies sneak their way in to even the most professional greenhouses!  

WINTER TLC

Regardless of the time of year, all houseplants need a little TLC. During winter months, with non-melting snow, dreary skies and almost freezing temps projected for days – houseplant pampering can perk up plants and us – their peeps! Here’s how I do it:

  • Gather the basics: Gloves, clippers, potting mix, a small fork or chopstick, fertilizer, watering can, and a bowl of water to keep any clippings hydrated for propagation.
  • Collect plants in the shower or tub and gently spray or splash off the mid-winter dust.  It’s a nice humidity boost for them, too.
  • Soak soil thoroughly and let the container drain. Clip, pluck or pinch off dead, diseased, or discolored matter. If the foliage is looking a bit limp or weak you can fertilize lightly with half strength of your favorite brand.
  • Inspect plants for disease and pests. If any are present, you’ll find remedies here.
  • This is a good time to select plant parts for propagating and prune to reshape foliage. Check out good tips here.
  • Gently disturb the top 1” of container’s soil and apply a top dressing of potting mix. Depending on your plant’s preferred growing conditions, this can also be a good time to repot root bound varieties.
  • Return the plant to its home. Every few weeks, rotate the plant so it receives even light on all sides.
  • Dispose of diseased matter rather than composting it to avoid spreading the disease further. Compost temps need to reach at least 150℉ to kill pathogens which is a struggle for home compost bins to reach during winter months.

Houseplants offer a verdant element to our homes and workplaces. They are as varied and interesting as the people who share them!

Outside to Inside – Hardening Off Houseplants

By Lori Williams, CSU Extension-Denver Master Gardener since 2016

Bringing houseplants in from gardens is all about timing. Reverse planning from outside to inside starts with your area’s average first frost date. Denver’s average FFD is roughly September 15th! Colorado summers can have a long wind down or be very abrupt, either way the goal is to avoid shocking houseplants or worse, letting them suffer damage or freeze due to temps they can’t withstand. It’s best if plants have time to “harden off”, meaning they adapt from warm days to the interior temp of your home, with less cold night exposure.

A wonderful friend and esteemed gardener I know diligently lines up houseplants for thorough garden hose spray downs for 2-3 weeks, horticultural oil applied the next week, all with time allowed for sitting and drying or airing out. Then and only then are plants welcomed back inside the house. 

I respect the time management, scheduling expertise, and TLC regimen and strive for such skills and discipline! However, down to my toes I know I am amazingly less organized and reactionary in my garden.  Last night’s a great example: windows wide open I woke to grab a quilt at 3am, the fresh air was so (deliciously) chilly! This morning my first thought: get the houseplants ready to come inside before it’s too cold at night. Waa laa – the planning committee just hit town!

I use the following steps, completed in a production line, that can usually be completed in a couple of hours. This year, with 17 houseplants outside, in a range of sizes, I got them processed in about 2 hours, including time when plants were soaking or draining. Big plants can need 2 people to move, but overall, it’s a manageable job solo.

Here’s how to get your plants looking sharp and bug-free:

  1. Watch weather forecasts for predicted temps and storms then pick a day when you have time and go for it.
  2. Group plants in shaded warm area, shooing away Daddy Longlegs as you go. Pick a spot where you can get them saturated and they can also drain.  If they haven’t seen direct sun all summer, now is not the time to let them boldly sit in it as leaves easily scorch. 
  1. Quick-clean plants of dried leaves and debris.  With a hose spray plants and pots from every angle to knock off dirt, dust, cobwebs, debris, buggy-spidey-like things that hang on foliage. Up-spray undersides of leaves.  Delicate plants? Adjust hose pressure or use a spray bottle.
  2. Run enough water in a kiddy pool, garbage can, or bathtub to submerge containers; a tarp, drop cloth and towels can also be useful.  Add a small amount of soap to water (detergents or degreasers can damage or kill sensitive plants), I like Dr Bronner’s castile soap.  You can use diluted insecticidal soap for this step, too.

5. Fully submerge each container (for tall pots set in water, splash water in pot until water sits on top of soil). Soak 10-15 minutes until no more bubbles come up from soil.  Now the soil’s completely hydrated and in turn should drown little buggy organisms (instant in-pot composting, right?). Gently wash all non-submerged leaves, stems and branches with soapy water while the pot soaks by splashing water over the plant. It’s also an easy time to wipe down container’s sides, rim and bottom so it’s house-clean.

6. After thoroughly soaked, remove container and let it drain. Gently spray plant & container with hose until soap-free.  Pleas no direct sun during this step, either, as water sitting on leaves magnifies the sun’s impact. While plants are still outside, rough up top 1-2” of soil and add fresh potting soil. My favorite tool for this is a cocktail fork.  It’s tiny enough to not damage roots, sturdy enough to get the job done. Plants that are root-bound can be up-potted at this time.

After completing the steps, protect your plants and effort. Mud rooms, covered porches, and garages are made for this. From there plants can be moved out during warm daytime temps and back in overnight for a couple days – truly ‘hardening’ them ‘off’.  

Additional resources:

Sunburned House Plants

Bringing House Plants Inside

Putting the Garden to Bed: End-of-Season Advice

A Year in the Life of an Amaryllis

amaryllis_akaIf your holiday amaryllis is nearing the end of its blooming cycle, here are tips to enjoy the plant throughout the year and give it the best chance to bloom again. Unlike paperwhites, which are one-and-done indoor bulbs, with care, amaryllis can re-bloom for years to come.

While flowering, the plant benefits from bright, indirect light and moisture. When each trumpet-shaped flower is finished, snip it off and when the last flower on the stem has shriveled, cut the entire stem about an inch above the bulb. Leave the strappy leaves intact. Occasionally amaryllis won’t develop leaves until after blooming, so don’t fret if the plant is foliage-free at this stage. However, adding fertilizer to a bulb without leaves will kill the roots.

Treat the bulb as a houseplant throughout the winter by providing direct sunlight, watering when dry below the soil line, and feeding common houseplant food once or twice a month. The bulb should remain snuggled in the original pot, with the top half to one-third above the soil line. In spring, the leaves will yellow and die, signaling that they’ve done their job of providing nutrients to the bulb, a common bulb process. Cut the foliage about an inch from the top of the bulb; new leaves will emerge through the summer. Leaves equal energy, so the more leaves developed at this time, the more vigor the bulb has to flower again. During the summer months, you’ll want to give the pot as bright a spot as possible, either indoors or out. Burying the pot in a partially shaded garden bed is also an option.

In September, reduce water significantly until leaves turn yellow and die. Store the plant in a cool, dark area (45 to 50 degrees) for 8-12 weeks, checking regularly for signs of new life and watering sparingly. This fall “Goldilocks” phase of not-too-hot, not-too-cold is critical to the forcing process so choose the resting spot carefully. When you see fresh growth, move the plant to bright light and resume regular watering. The plant is now ready to produce new foliage and flowers.

Many find this process a snap. If that’s not the case for you, keep in mind that the size and quality of the bulb can effect re-blooming, so from the start choose large, blemish-free bulbs which are heavy relative to their size. Amaryllis forced in water are also unlikely to re-bloom as they lack the energy to survive. But if this experiment doesn’t work for you, you may not want to give up as the bulb can take a year off from flowering and then come back with a vengeance. Growing amaryllis sure can be an exercise in patience!

Posted by Linda McDonnell, a Denver Master Gardener

Living With Plants and Pets

20160126_123421[4]Keeping pets safe around house plants has been on my mind with the adoption of Chance, a charming, spirited feline. His only plant-related indiscretions (so far) have been a few nibbled leaves, a toppled jade and a snatched spider plant baby. Then there’s the twinkle in his eyes when he gazes up at the six-foot tall ficus tree, which makes me think he’s plotting something.

Ivy sitting by plants

Many find discouraging dogs and cats from digging or eating plants can be accomplished by moving plants to less trafficked areas; lightly covering the soil line with rocks, shells, or screening; sprinkling cayenne pepper or bitter apple spray around the leaves or lending the plant to a friend until the pet matures. Some cat owners grow wheat grass as a treat and a distraction from other plants.

If ingested by dog or cats, house plants can be toxic and trigger reactions ranging from mild discomfort (such as vomiting or diarrhea to release the toxin) to more serious illnesses. Some to be aware of are:

Dieffenbachia– Dogs and cats can react to eating leaves with intense burning in the tongue and mouth, difficulty swallowing, drooling and vomiting.

Corn Plant – the leaves contain saponin, which ingested in large amounts causes dogs and cats to vomit, lose appetite, have increased salivation and even show signs of depression. Cat’s pupils may also dilate.

Lillies – Many varieties, including peace lilies, are toxic to dogs and cats, although cats have more severe reactions including kidney failure and death if not treated. Easter  lilies and common florist varieties are very toxic to cats.

20160201_134705

Peace Lilly

Often cat owners prefer not to bring lilies into their  homes.

Cyclamen – The tuber  (the pod-like structure just under the soil) contains the poison, not the leaves or flowers. Reactions can include abnormal heart rhythm and seizures.

20160201_135054

Cyclamen


  • DSCN0546[1]

    Jade


Jade – Dogs and cats react to eating the fleshy leaves by vomiting, or in more extreme cases by losing coordination and a lowered heart beat.

The ASPCA website contains a far more extensive list of toxic and nontoxic plants for both home and garden.

Should your pet become seriously ill from eating a plant, promptly contact your vet or the  ASPCA hotline,888-426-4435.

Pets frequently out grow their plant-loving stage as they mature, although avoiding the most toxic plants will give you peace of mind  and keep your friend from temptation.

Any suggestions for keeping pets safe around house plants? We’d love to hear from you.

Submitted by Linda McDonnell, Denver Master Gardener, with thanks to models Ivy and Chance.

Keeping the Ho Ho Ho in Holiday Plants

holiday plantsHoliday tables just wouldn’t be the same without a few blooming plants to add to the festivities. While poinsettias are the most popular of the flowering houseplants, there are plenty of others plants with colorful foliage that make nice gifts – either for you or someone else.

If you take a few minutes to learn about your plant’s specific needs, you’ll be able to keep those beautiful flowers blooming into the New Year.

One of the top tips for holiday plants is to either remove the container’s foil wrapping or poke holes through the foil on the bottom. This step improves drainage and helps keep plant roots healthy. Be sure to place the container on a plant dish or saucer to catch water runoff. Dispose of any water that remains in the saucer after the plant gets a good drink.

PoinsettiaPoinsettias prefer to be kept in a cool area. Place your poinsettia plant near a bright, sunny window, but keep flowers and leaves from touching the glass. One of the most important care tips for poinsettias is to give the plant some humidity to help hold its leaves. Spritz lightly with water every day or place the plant’s container on a gravel-filled saucer that’s filled with water. When the top few inches of soil dries, water with a diluted liquid houseplant fertilizer. This step helps keep flowers on the plant longer.

CyclamenAnother popular holiday plant is a Cyclamen. These plants can be kept in full bloom for weeks with the right care. Plants need sun, but not intense sunlight, and temperatures from 60-65 degrees during the day; cooler at night. Watch for flower buds that start at the crown, and be sure to keep the crown dry. It’s best to water slowly and deeply near the edge or rim of the container. Water only when the top inch of soil is dry or if the plant starts wilting. Remove flowers as soon as they fade and clip off any leaves that turn yellow. Fertilizing every 3-4 weeks will encourage the plant to keep sending out flower buds.

HydrangeaHydrangeas make for a beautiful holiday display because of their showy and ornamental blooms. To keep hydrangeas blooming indoors, place them in bright, but indirect light. Like most houseplants, hydrangeas need to be kept out of the way of cold drafts and blasts of hot furnace air. Keep soil moist, but not soggy, while plants are in bloom. Apply a diluted liquid houseplant fertilizer every other week.

Christmas cactusMy favorite flowers for the holidays grow on Christmas cactus plants. The trick to keeping these delicate-looking flowers longer is to place plants in cool locations that have indirect sunlight. A consistent temperature that keeps plants away from cold drafts and blasts of hot furnace air will keep flowers and flower buds on the plant longer. Christmas cacti like a drier soil, but avoid wilting by watering when the top 1 inch of soil feels dry. Use a standard houseplant fertilizer to keep plants healthy.

Do you have any tips or tricks to keep your holiday plants looking good? Please add them here!

By Jodi Torpey
A Denver master gardener